How to fix Domain Authentication Issues with CloudFlare DNS Proxy
Table of Contents
If your SiteGround Email Marketing domain fails to authenticate or takes too long, and you are using Cloudflare DNS – this short guide is for you.
Why your domain authentication may be failing?
To authenticate your domain for using the Email Marketing service, you must create a specific CNAME record in your external DNS zone. In rare cases, the authentication may fail, and you can find working solutions in the article below.
What to do if your domain authentication fails?
If you’ve tried the solutions outlined there and your Email Marketing CNAME record is:
- existing in your external DNS zone,
- properly spelled in your external DNS zone,
- resolving correctly with a DNS checker.
However, the authentication may still fail if you are using CloudFlare DNS Proxy. SiteGround Email Marketing uses CNAME records to verify the authenticity of the sender’s domain. When proxied, the CNAME record resolves to a CloudFlare IP instead of the intended destination. That inconsistency can cause a domain authentication failure.
To allow successful authentication, we recommend creating an unproxied CNAME record. That means using the DNS-only option for your CNAME in your CloudFlare DNS zone.
How to Deactivate CloudFlare DNS Proxy for your Email Marketing CNAME Record?
Deactivating the DNS proxying for your Email Marketing CNAME record is a simple task. It takes just a few clicks to get your domain authentication back on track. Read on to learn the steps of this straightforward fix.
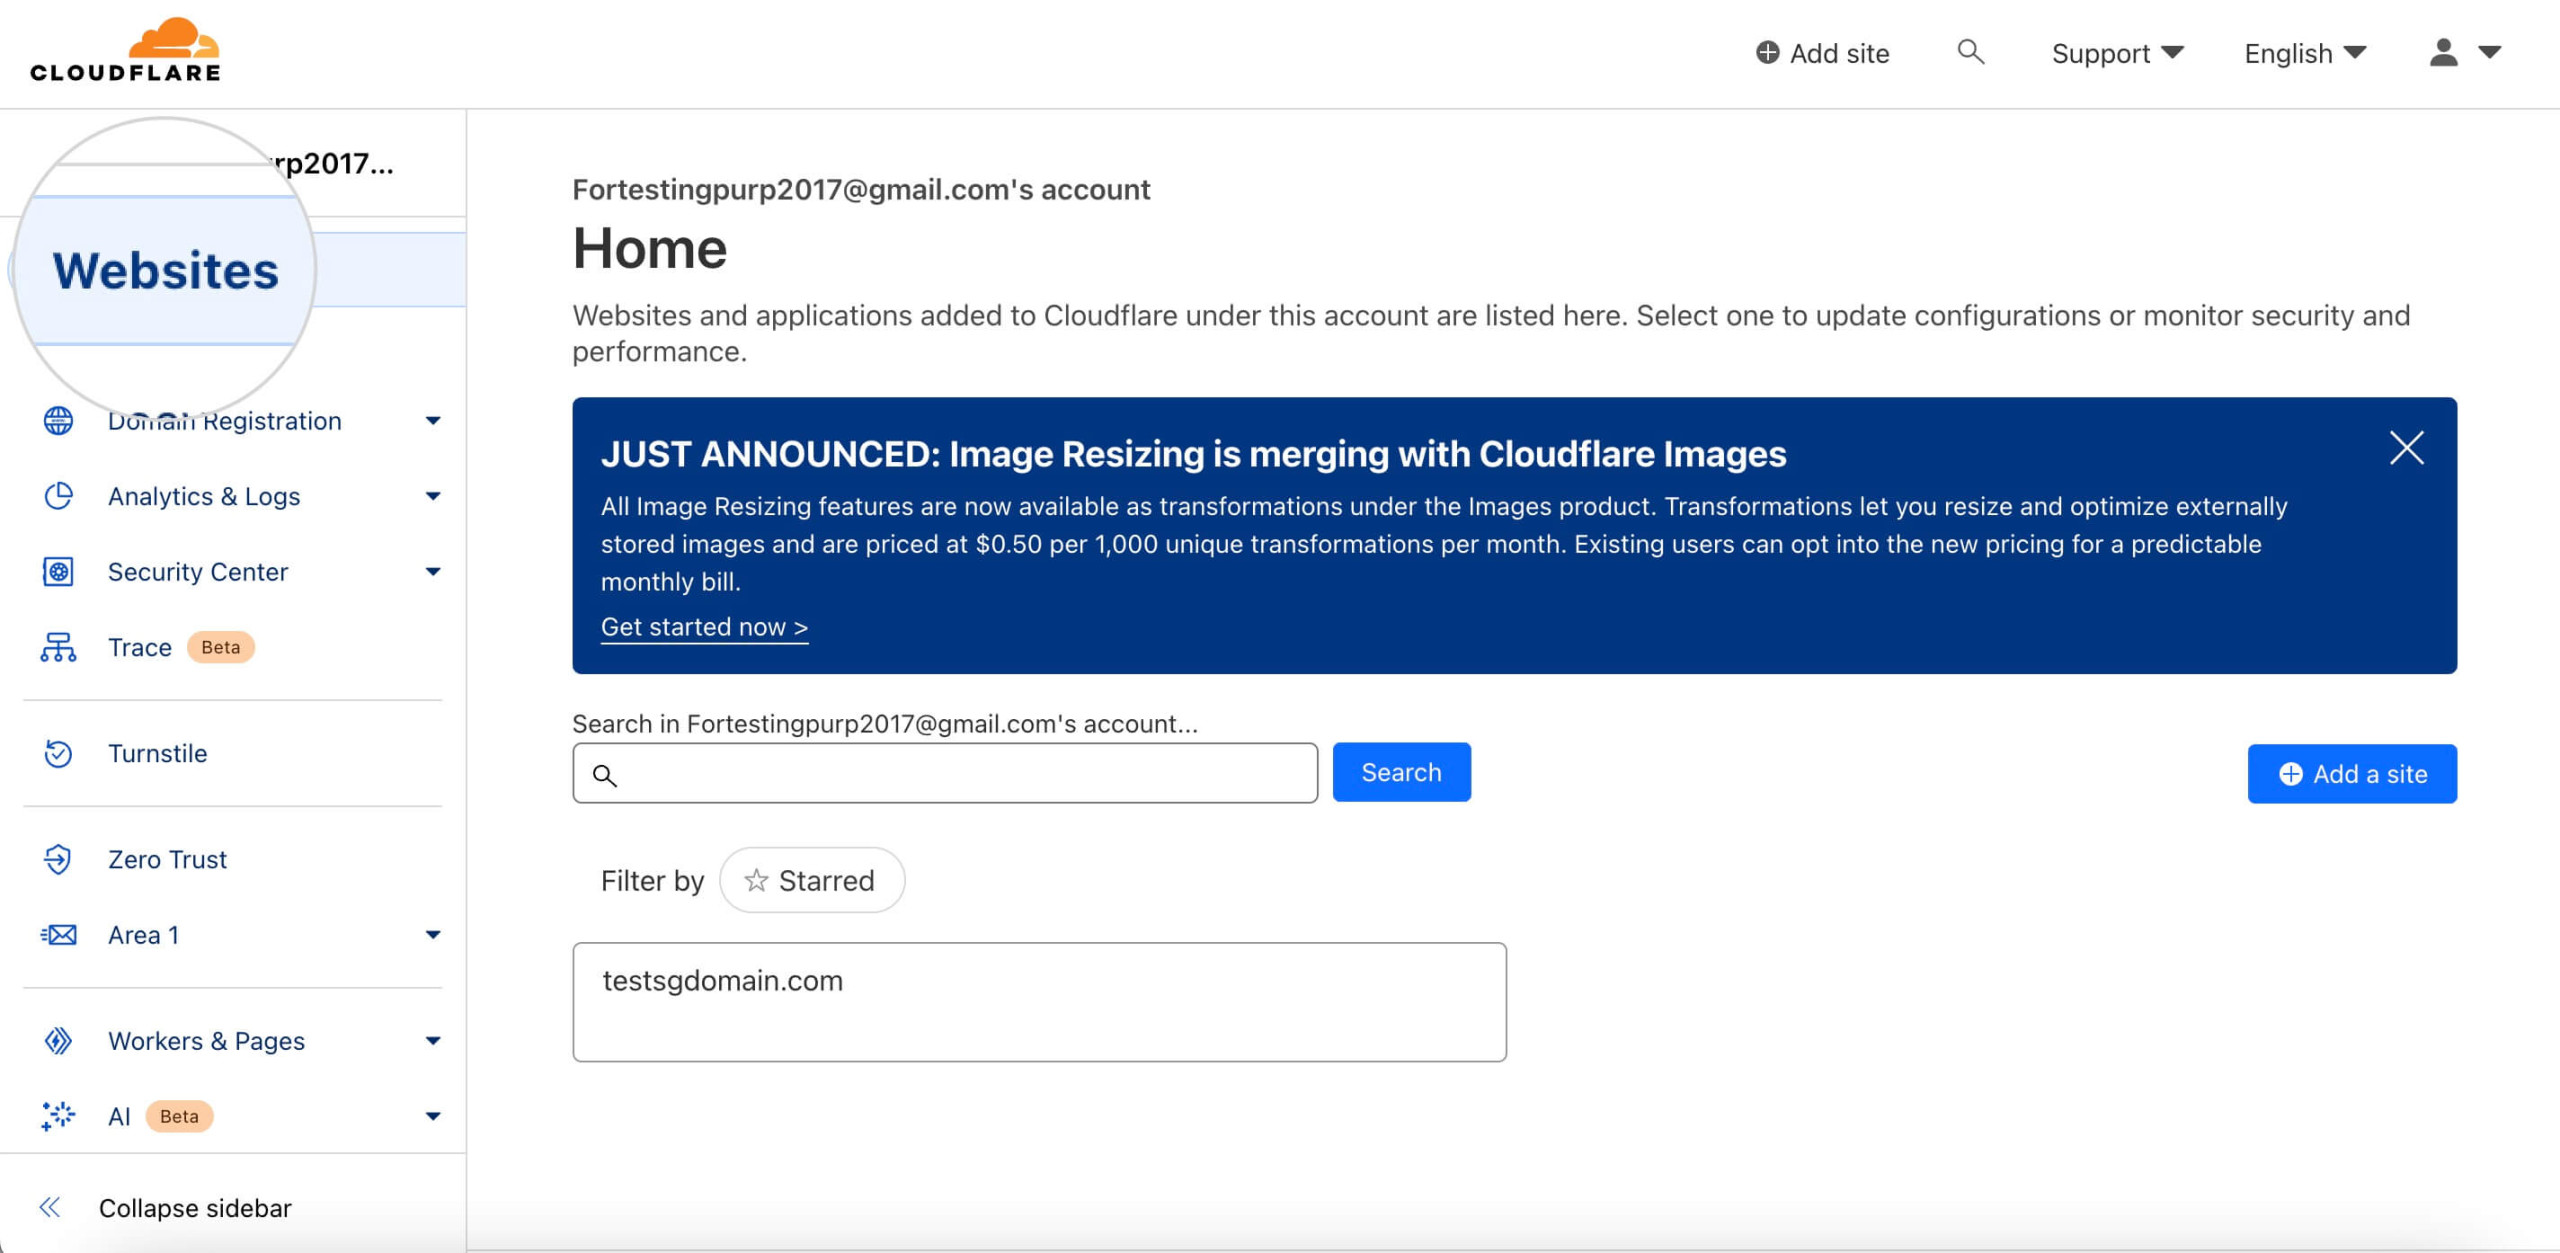
- Log in to your CloudFlare account and navigate to the Websites dashboard.

- Select the domain that you’re using for your Email Marketing service by clicking on it.
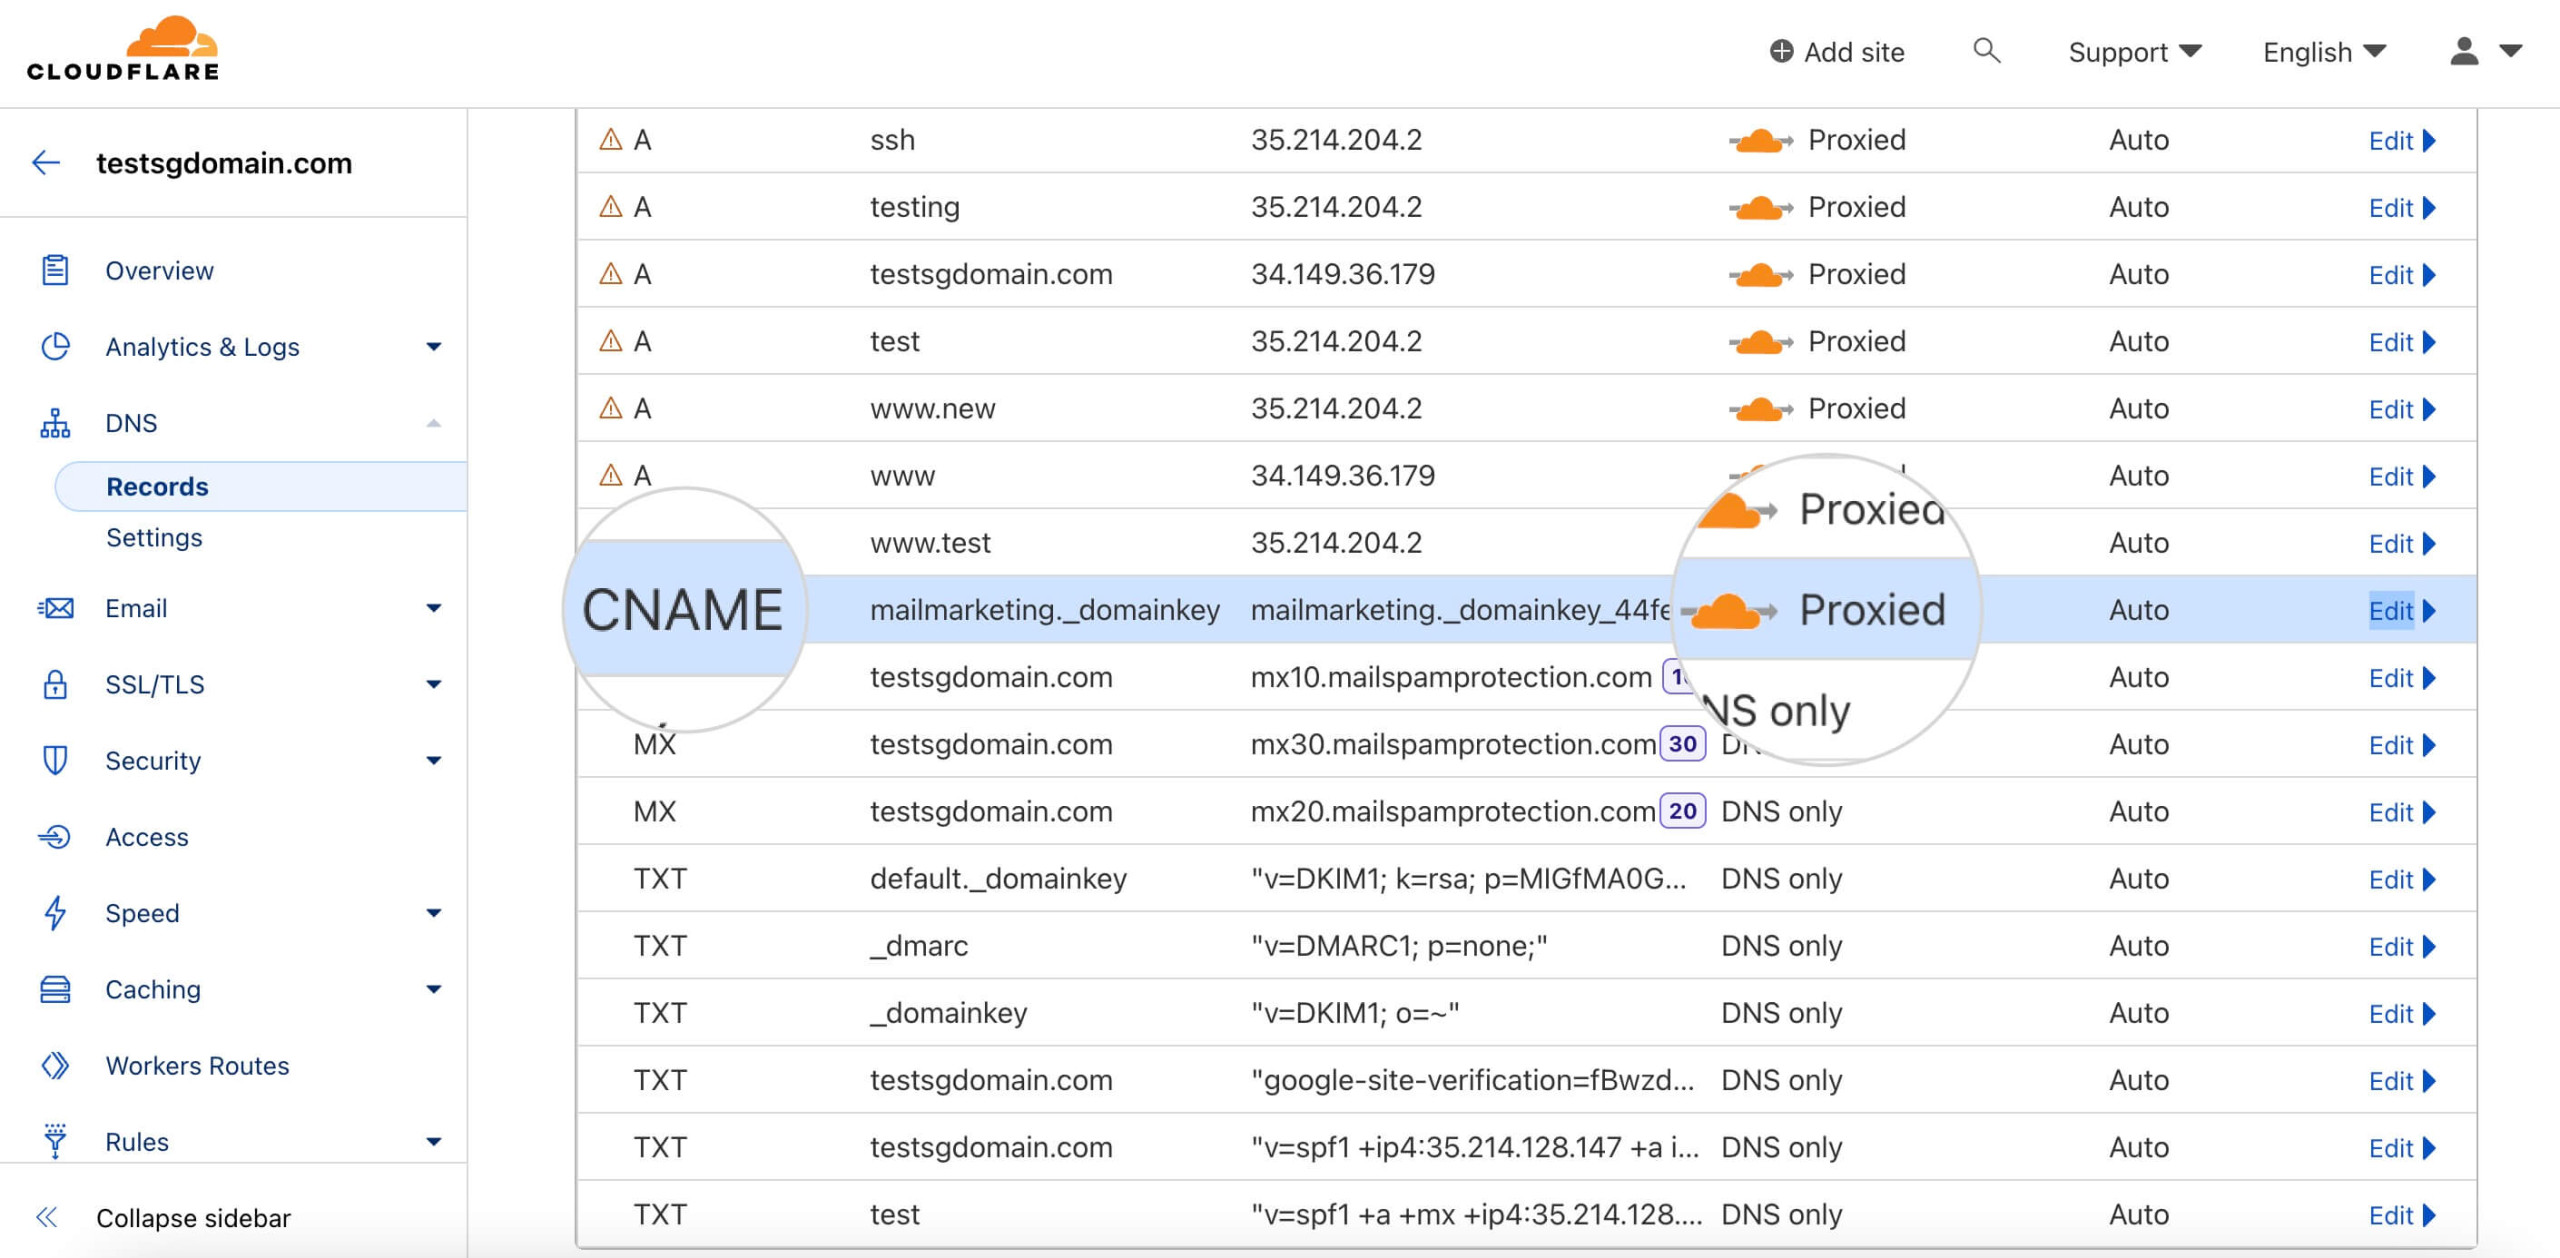
- Navigate to the DNS > Records menu to manage all DNS records associated with your domain.
- Look for the SiteGround Email Marketing CNAME record and check if an orange cloud saying “Proxied” is present.

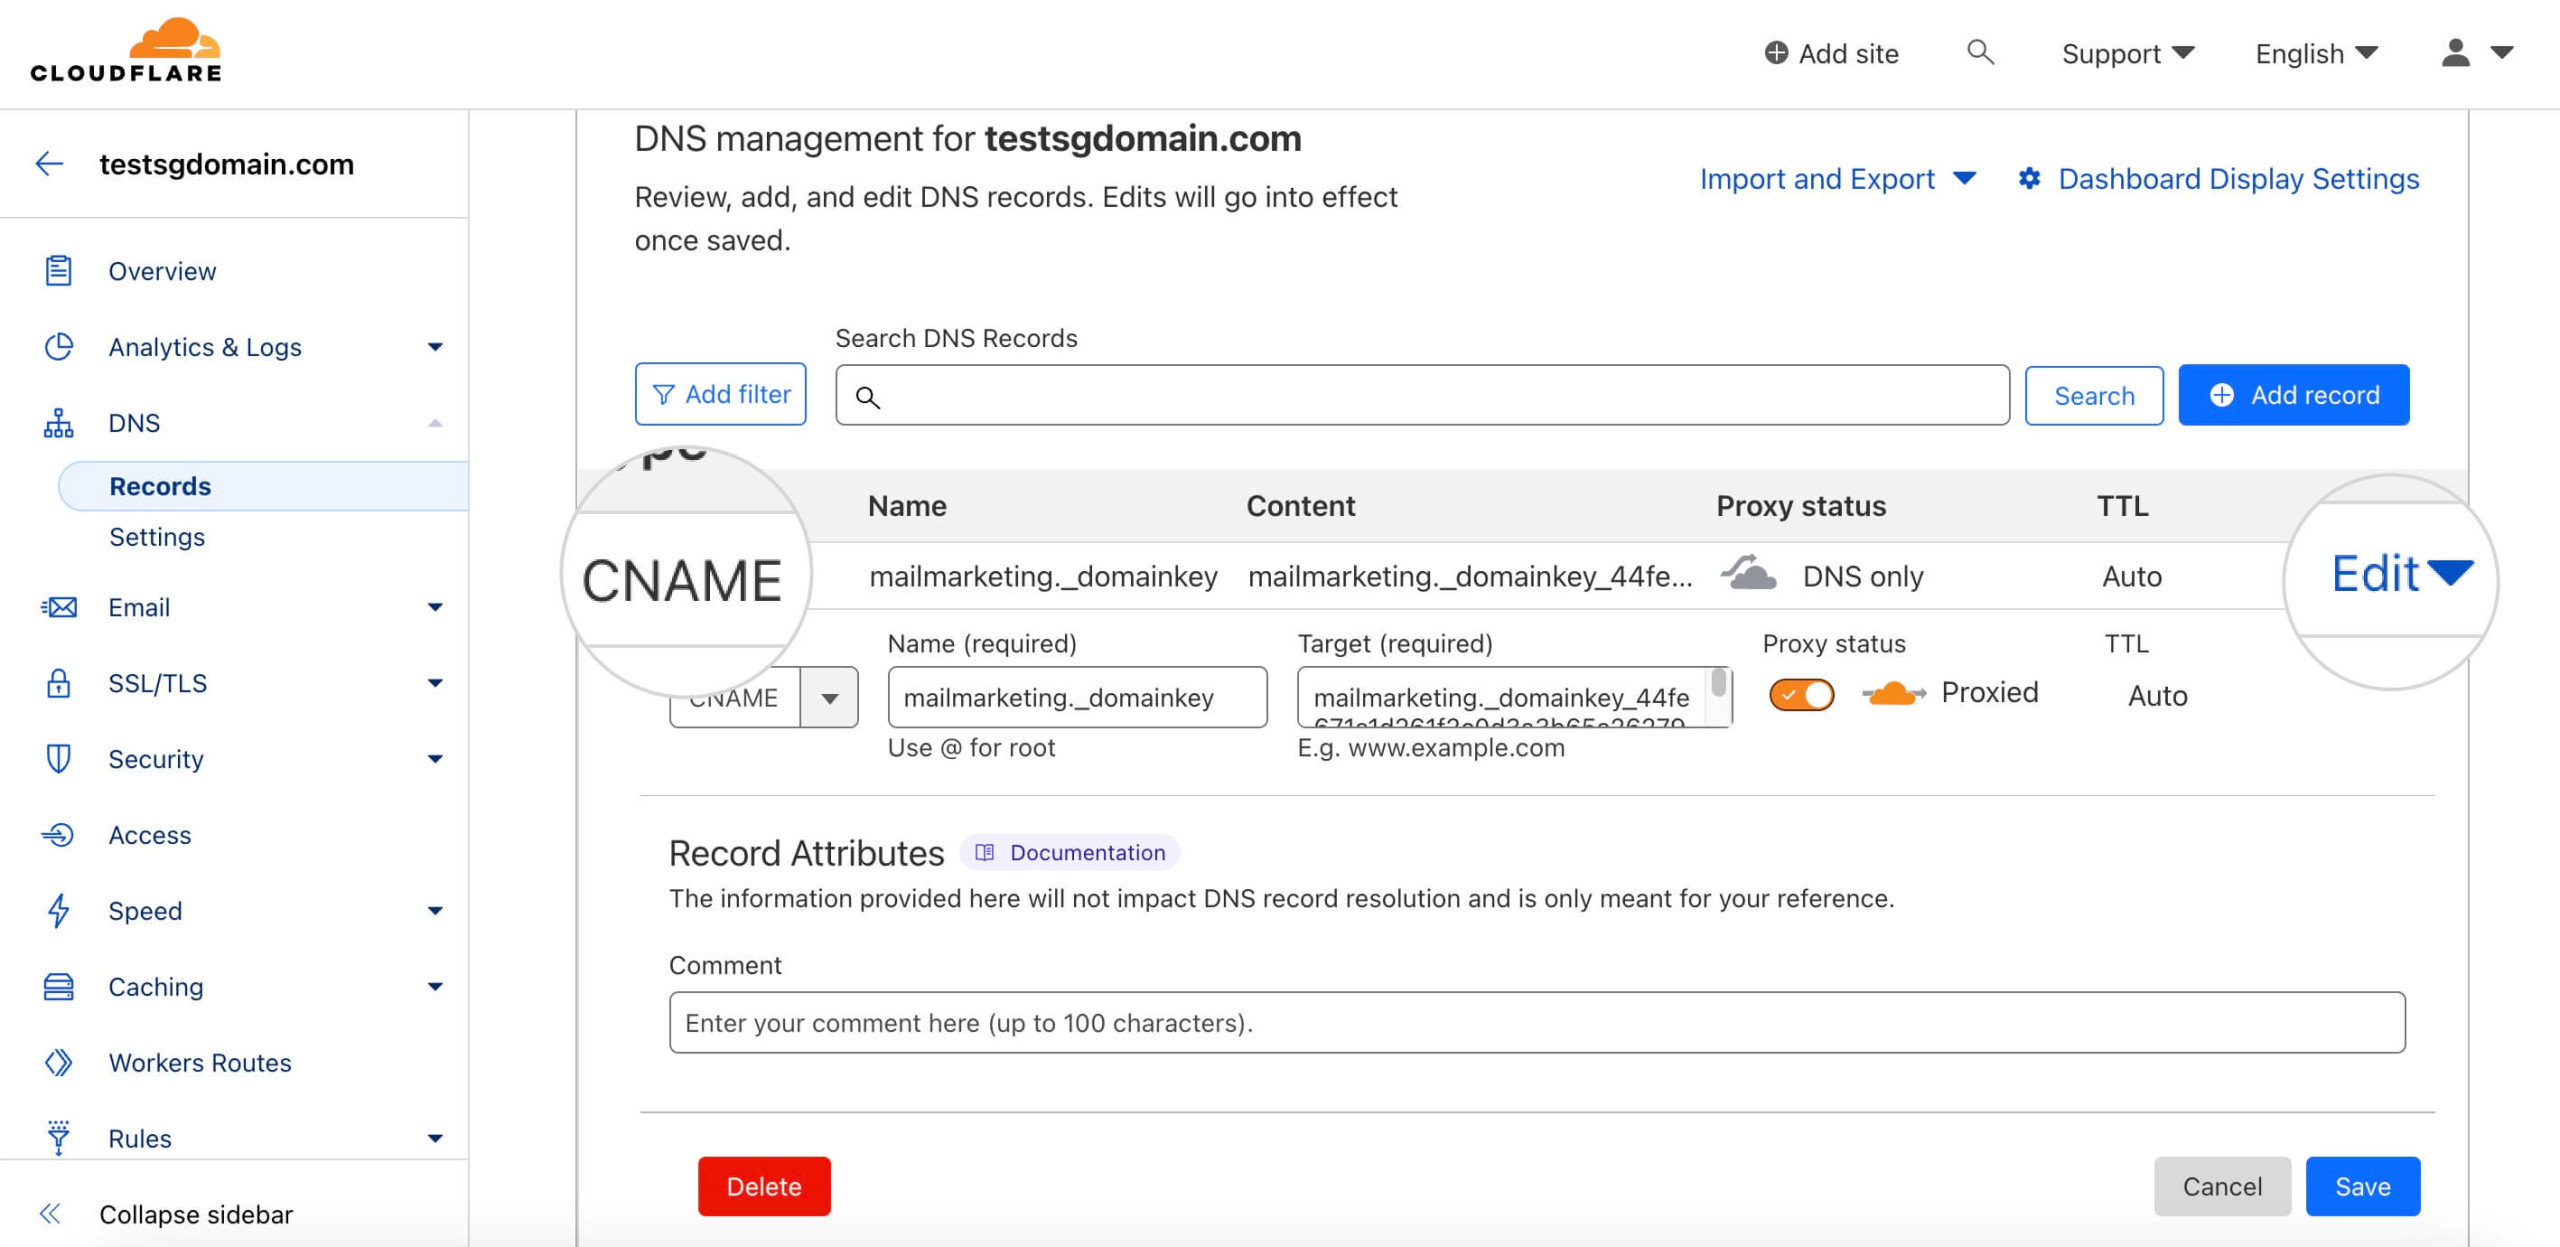
- Click on the Edit button on the far right to open the record’s settings.

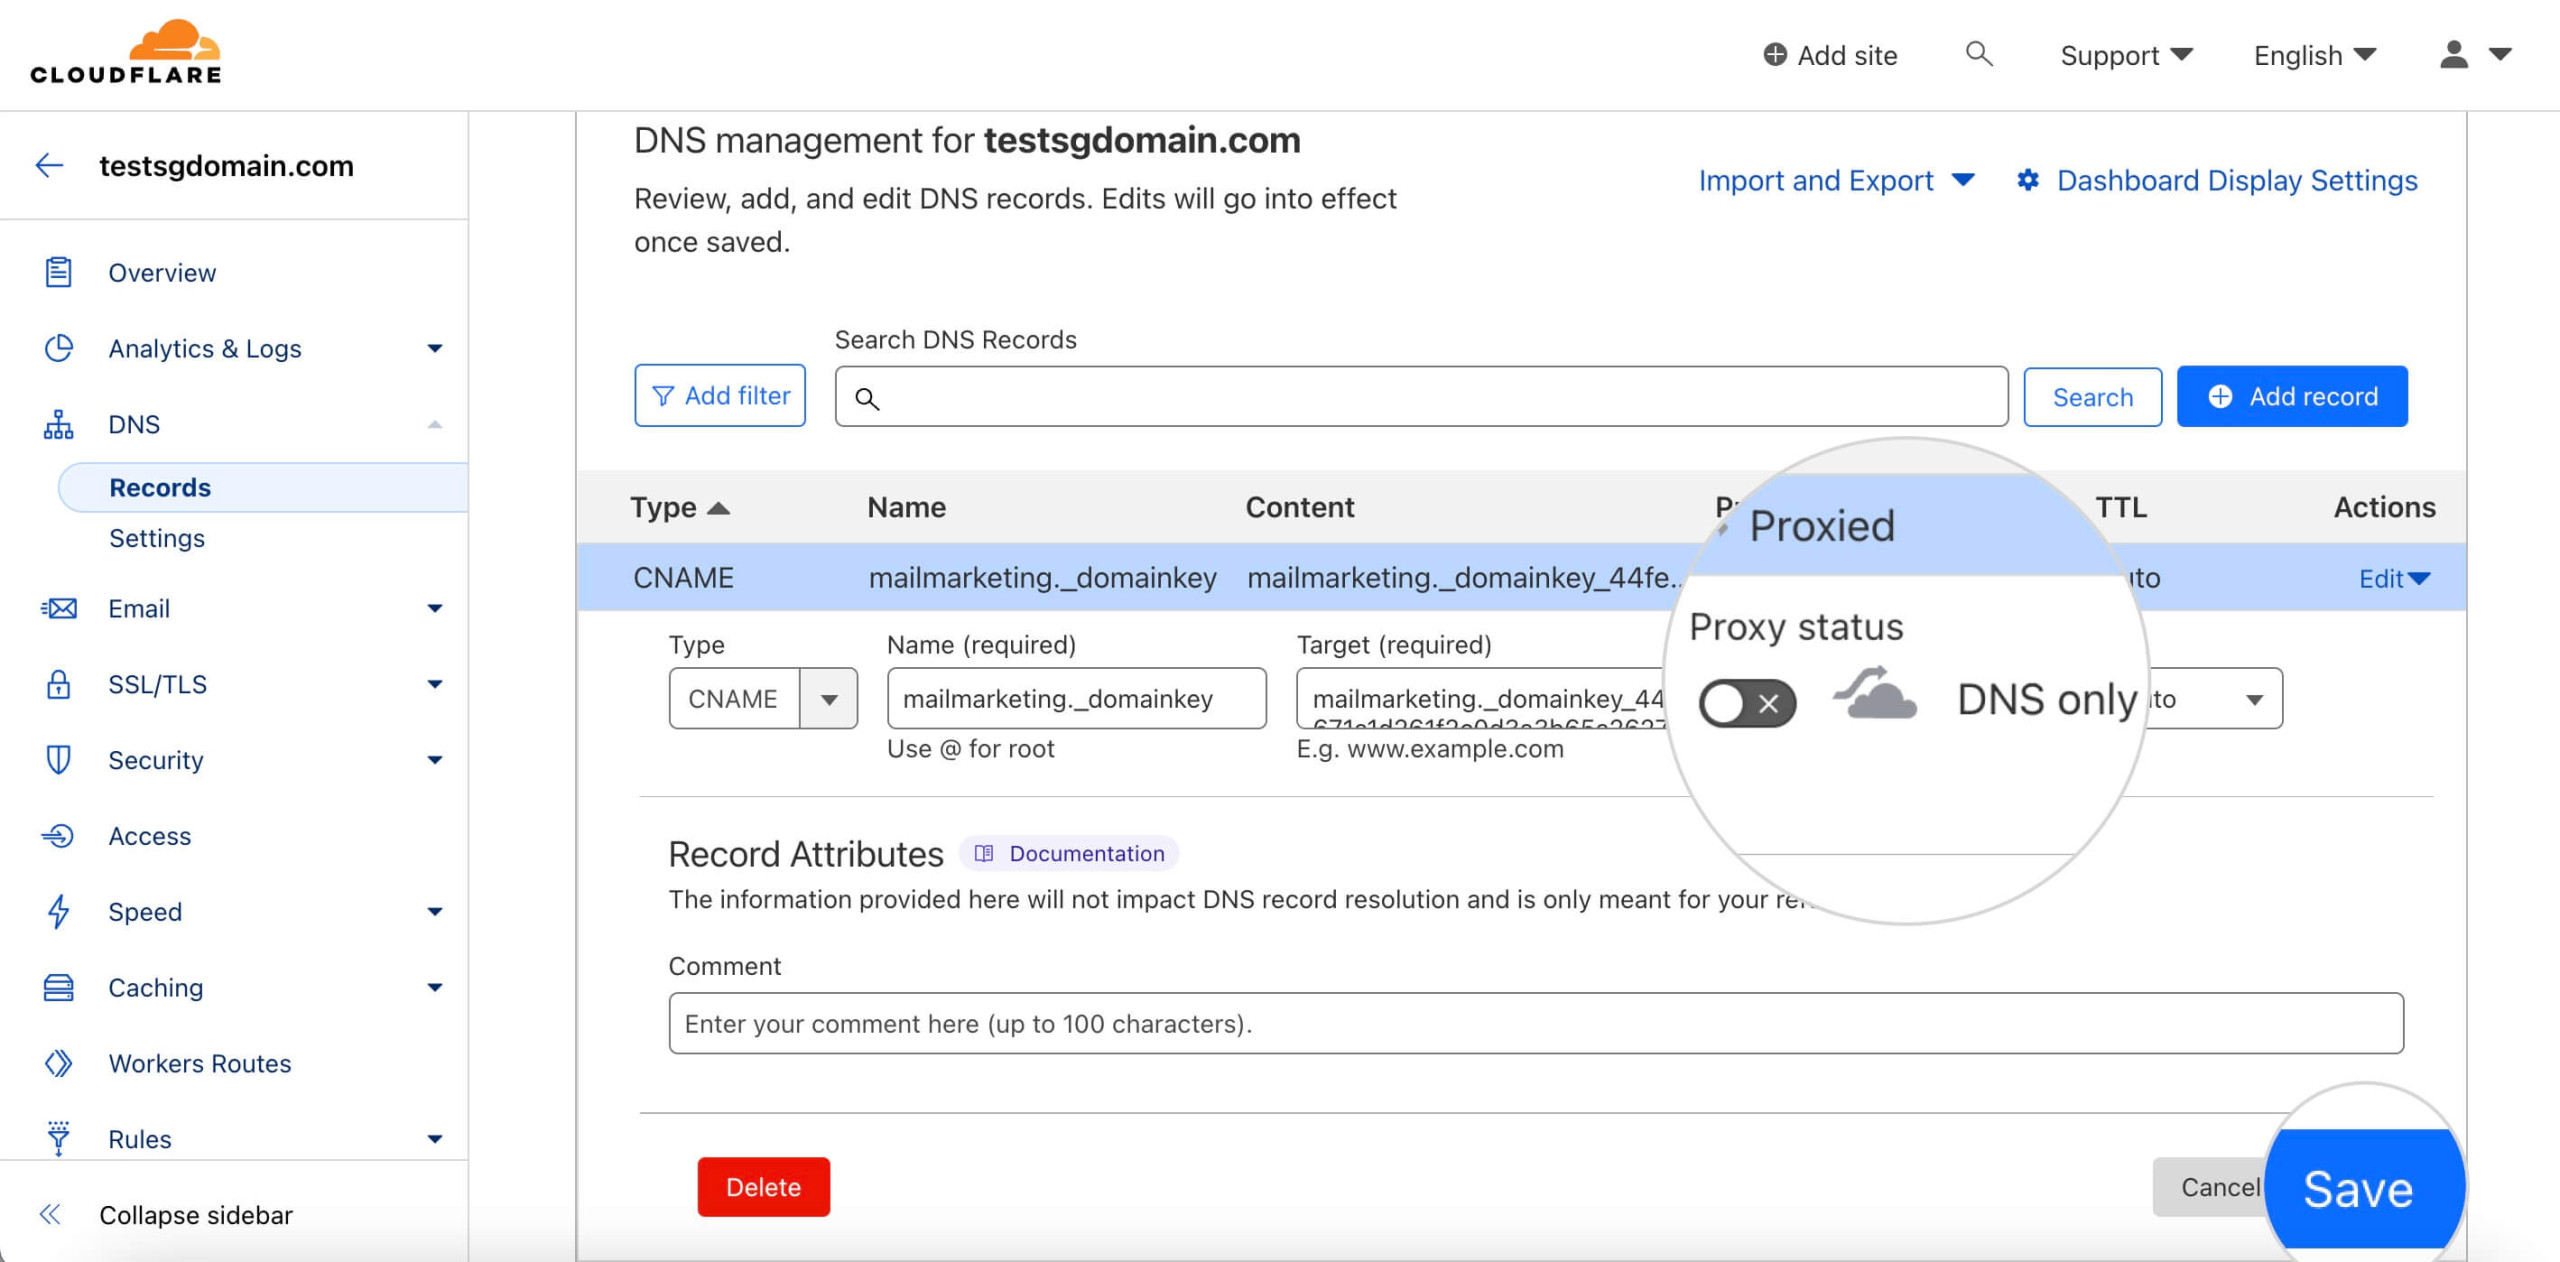
- Toggle off the orange cloud, which will set the Proxy status to “DNS only.”

- Save the changes to ensure that the proxy is disabled for this CNAME record.
It’s that simple. By turning off the proxy, you’re allowing for direct DNS queries to the CNAME record. This facilitates accurate DNS routing and authentication for your Email Marketing service. Disabling the DNS Proxy for your Email Marketing CNAME resumes the authentication automatically.
Why can’t I use CloudFlare DNS Proxy with the Email Marketing CNAME?
CloudFlare’s DNS Proxy is widely recognized for its ability to enhance a domain’s security. When it comes to A / AAAA records, which link domain names to IP addresses, the service works great for extra protection.
However, when it comes to CNAME records, which alias one domain name to another, the CloudFlare proxy can occasionally throw a wrench in the works. That is particularly true for services that require precise DNS routing, like our Email Marketing service.
CNAME records are crucial for our Email Marketing service. They verify the domain ownership and enhance email deliverability by authenticating sender domains. When CloudFlare’s DNS proxy is active for the CNAME, it can obfuscate the true destination of the DNS query. That leads to authentication failures; hence, we advise disabling the DNS proxy service for the Email Marketing CNAME.
Conclusion
In conclusion, this tweak is an easy and effective fix. It ensures your Email Marketing service can authenticate your domain without any interruptions. Deactivating CloudFlare DNS Proxy improves the Email Marketing service consistency and email deliverability.