How to modify your MX records for Google Workspace Mail?
Table of Contents
Once you sign up your domain for Google Workspace, you will have to configure it to start using their email services.
If your domain is pointed to SiteGround name servers (ns1.siteground.net and ns2.siteground.net or any private DNS provided by SiteGround), your domain’s DNS zone is managed by SiteGround, and you will need to follow the steps in this article to configure it to use Google Workspace. For domains not pointed to SiteGround name server, refer to this article.
1. Set your domain’s MX records to Google
Go to Site Tools -> Domain -> DNS Zone Editor -> MX tab and click the Switch to Google MX records button. If you want to set your main domain to work with Google Workspace, do not fill anything in the Name field. If you want a subdomain to work with Google workspace fill it in the Name field.
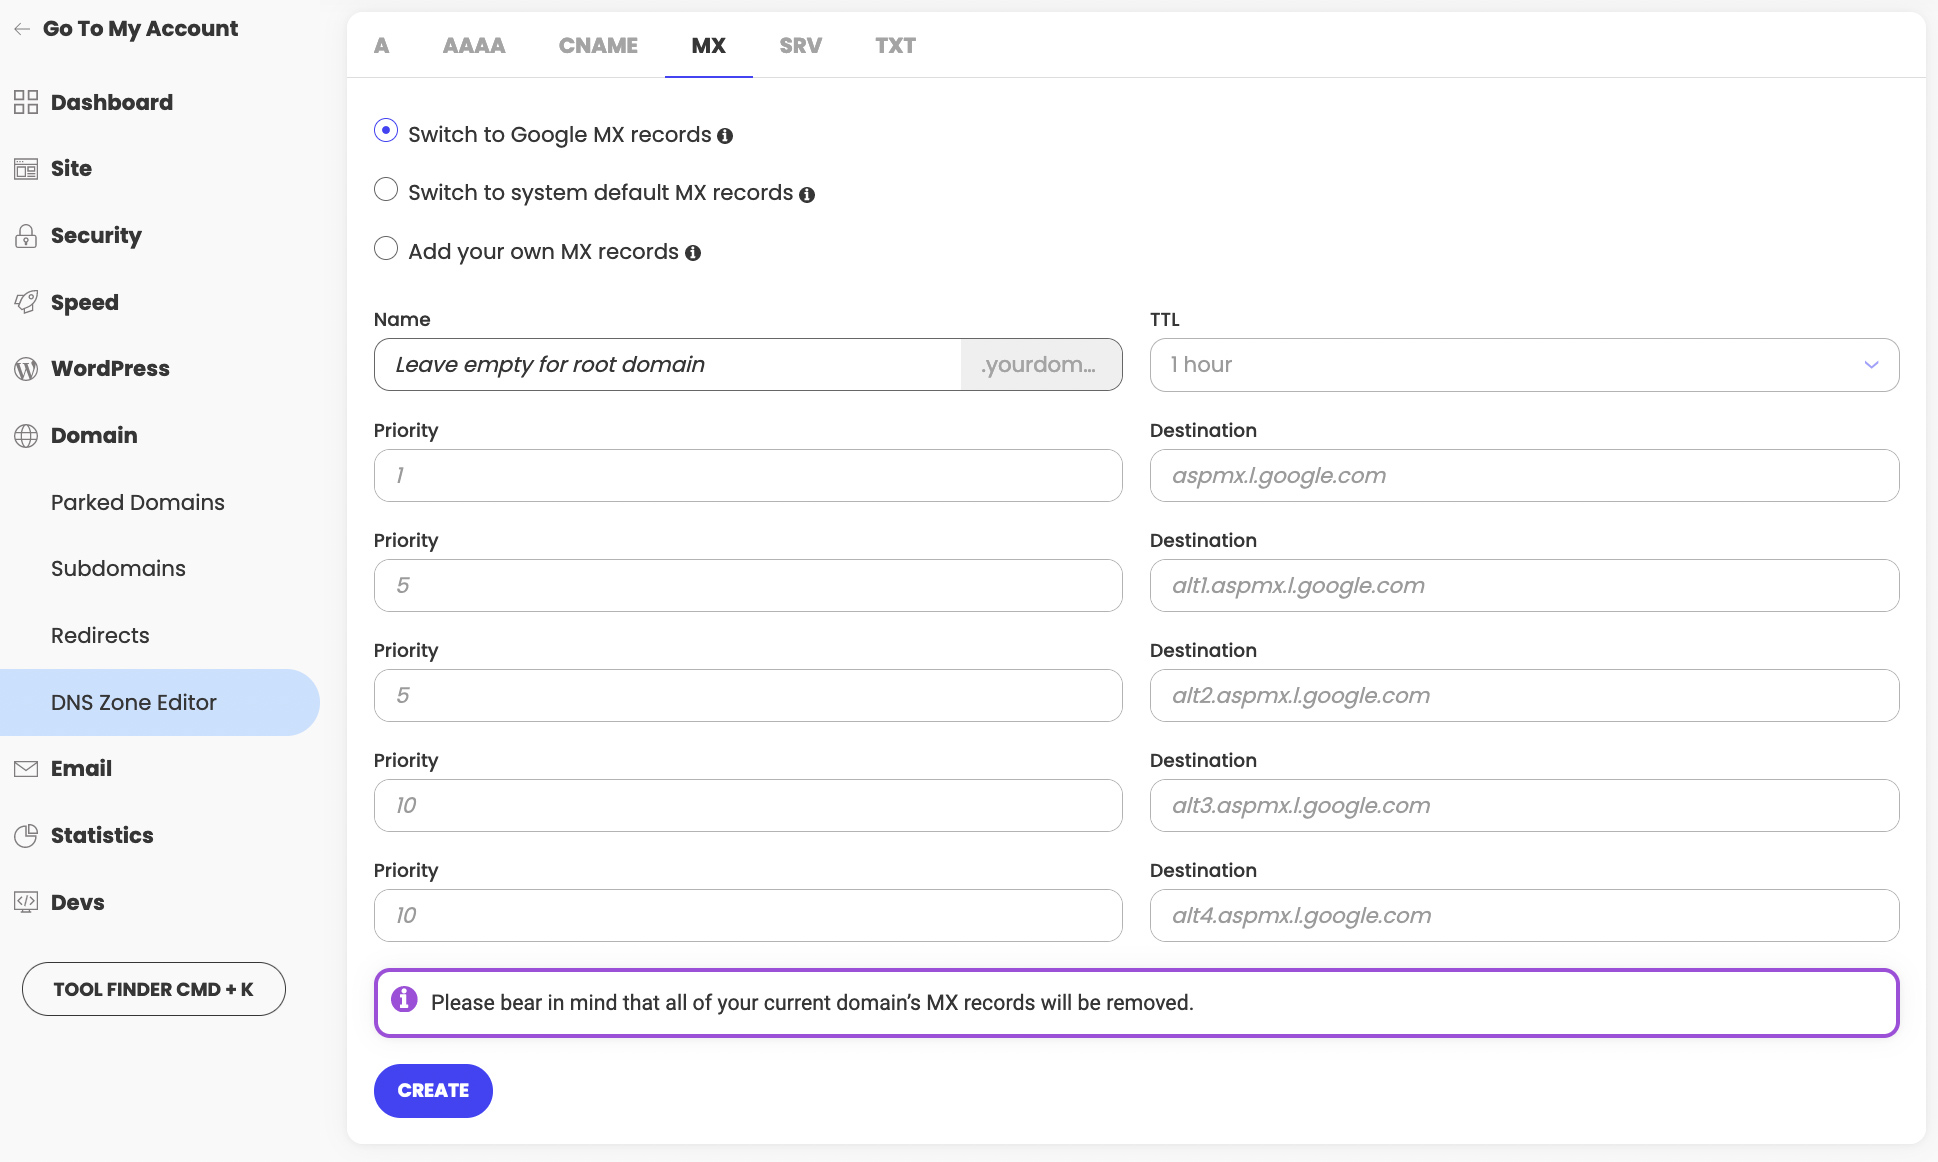
Click Create. This will delete all existing MX records for your domain and create new ones that point to Google’s service.
2. Set your domain’s SPF record to Google
SPF stands for Sender Policy Framework. It is a TXT DNS record, which ensures mail servers will accept emails sent from your domain only if they are sent from a list of trusted servers you set up.
You can edit your domain’s SPF record from Site Tools -> Email -> Authentication -> select your domain/subdomain -> click on the pencil icon on the Include List line -> delete the existing entries by clicking the minus sign and add only:
_spf.google.com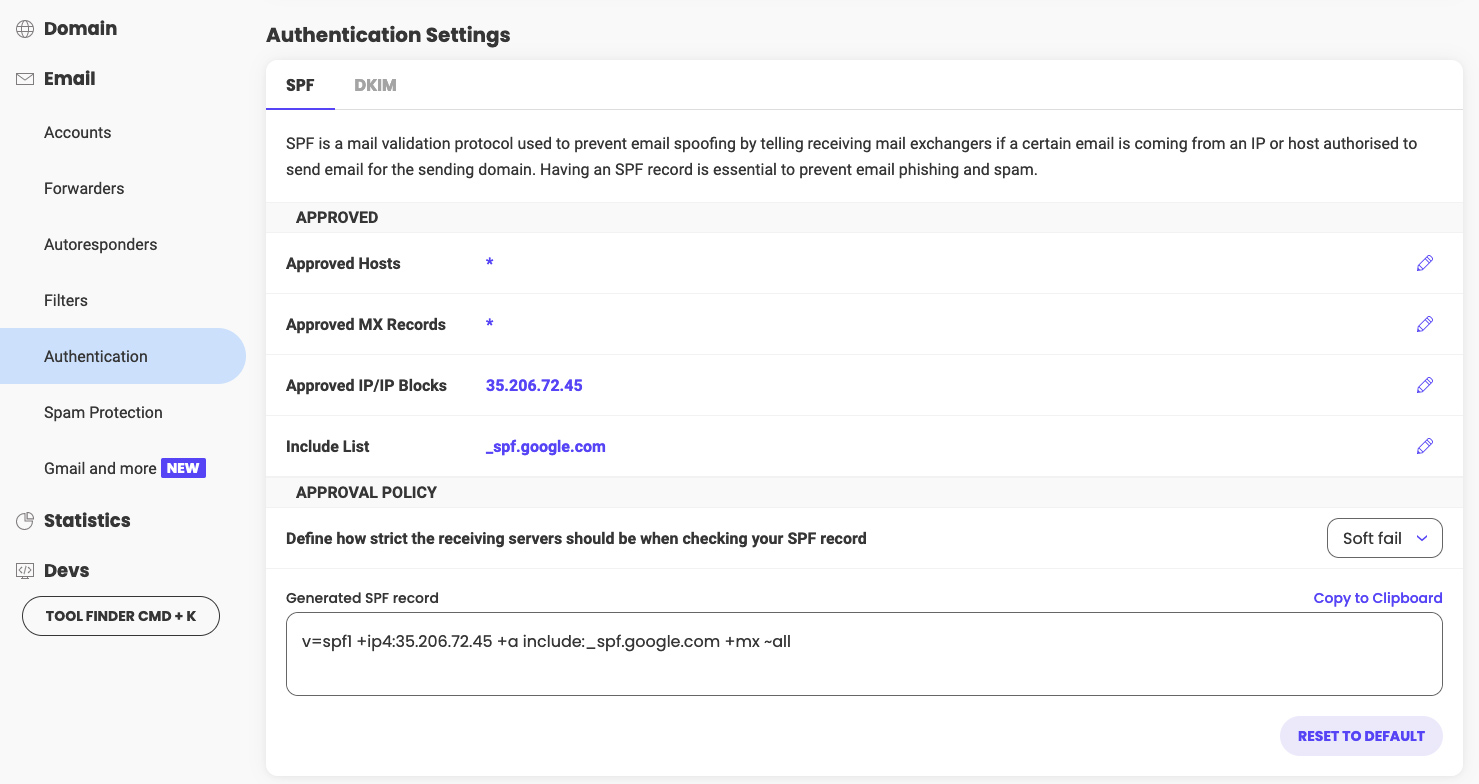
3. Set your domain’s DKIM record to Google
DKIM stands for DomainKeys Identified Email. DKIM is an email authentication method used to prevent email spoofing by allowing the receiver to check if an incoming email claimed to have come from a specific domain, was indeed authorized by the owner of this domain.
Please follow these steps to configure your DKIM record with Google:
Step 1: Get your DKIM key from your Admin console in Google Workshop.
- Sign in to your Google Admin console (at admin.google.com).
- Go to Apps > Google Workspace > Gmail.
- Click Authenticate email.
- Select the domain and click Generate new record. A DNS TXT record will be generated.
Step 2: Add your new DKIM record from Site Tools -> Domain -> DNS Zone Editor -> TXT record.
Step 3: After adding the DKIM TXT DNS record, click on Start Authentication in your Admin console in Google Workspace.
The changes require up to 72 hours to propagate and take effect. After that, your mail will be handled exclusively by Google Workspace.