How to create a custom email sign-up form on your WordPress website
Table of Contents
Email Marketing for WordPress is a great plugin that enables full integration with your SiteGround Email Marketing platform.
It allows you to easily create sign-up forms in your WordPress website and insert them into selected web pages. Since the plugin and your Email Marketing service are connected, anyone who signed up through one of the forms will be automatically added to your Contacts in the Email Marketing service.
In this guide, you will learn how to create and edit marketing sign-up forms on your website.
Read along for step-by-step instructions.
- Log into your WordPress dashboard.
- Navigate to Email Marketing > Forms.
- On the plugin’s control panel page, click the NEW FORM button.
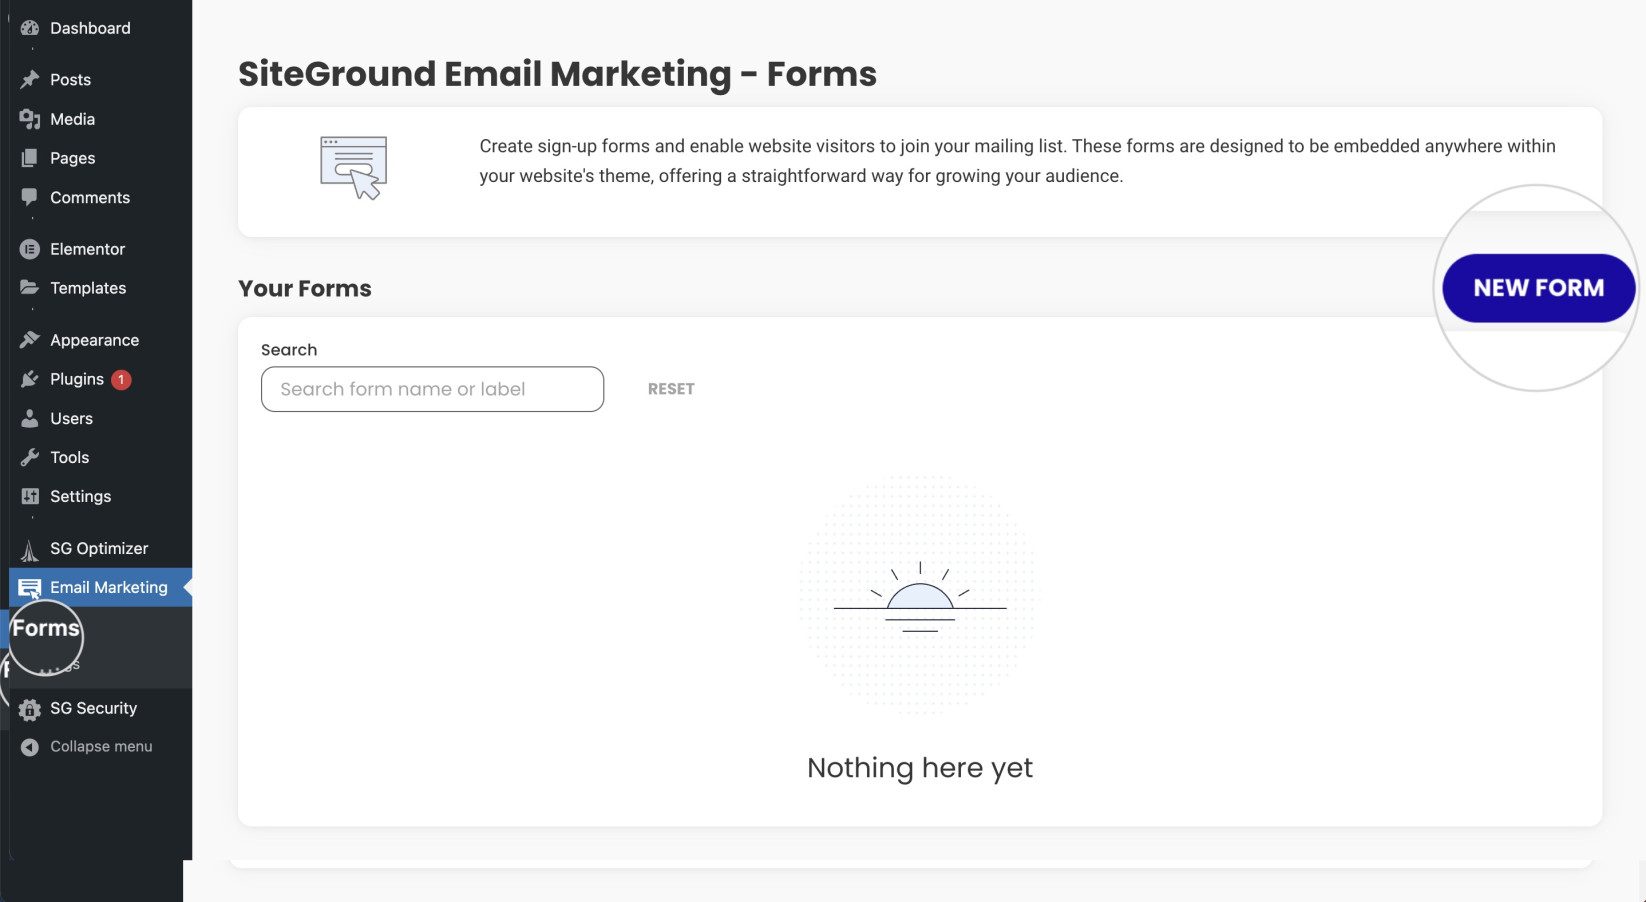
On the next screen, you can customize the new form.
How to customize the sign-up form
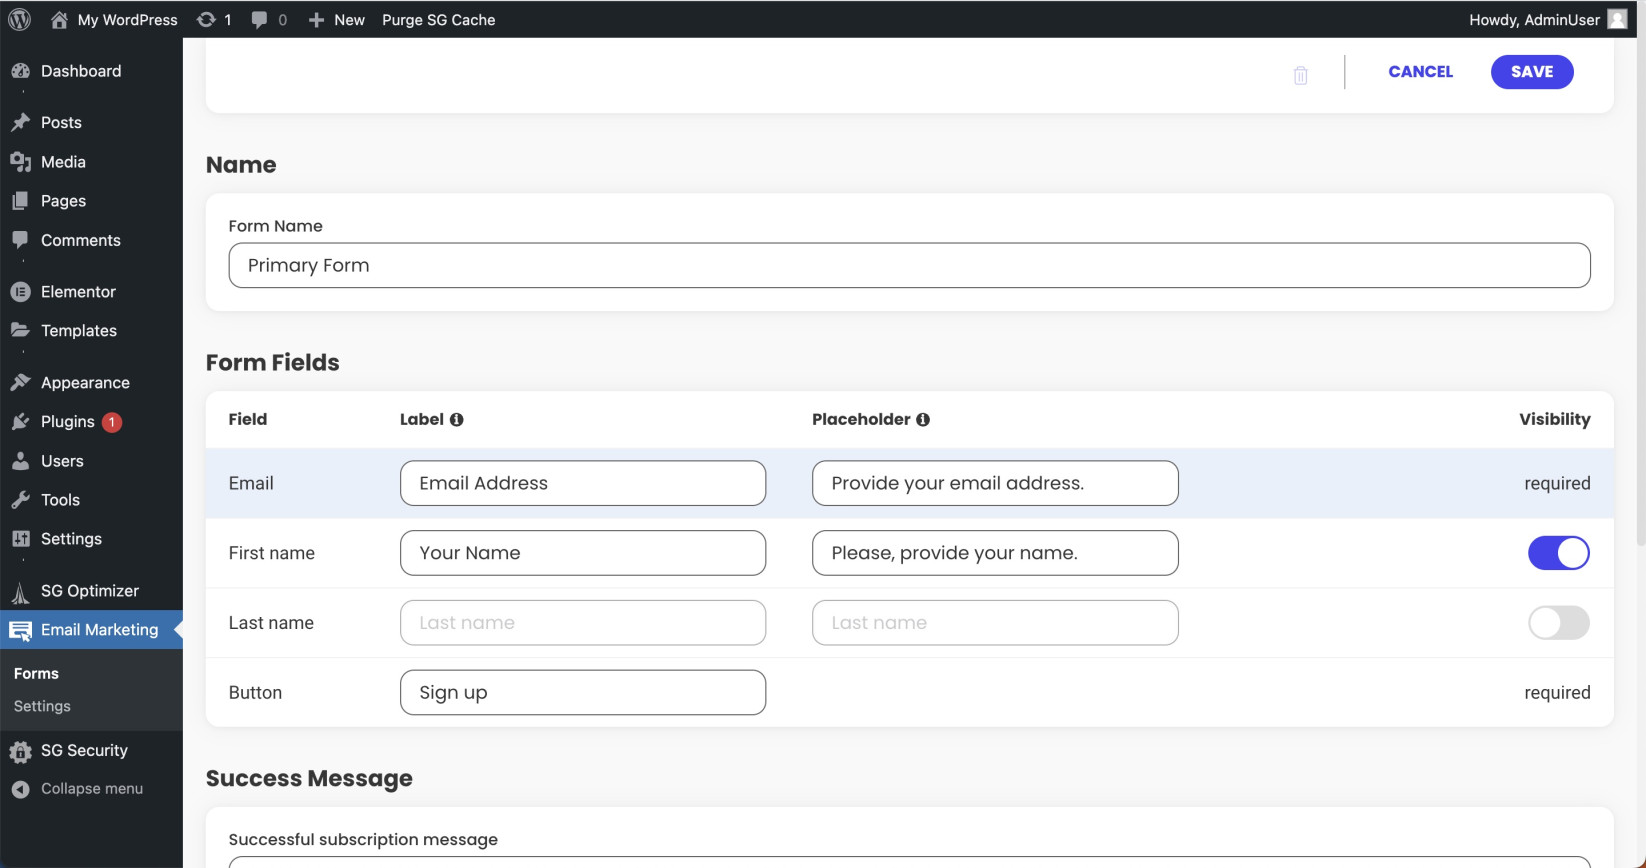
Once you hit the NEW FORM button, the plugin will generate a default form with preset field names (labels) and placeholder text.
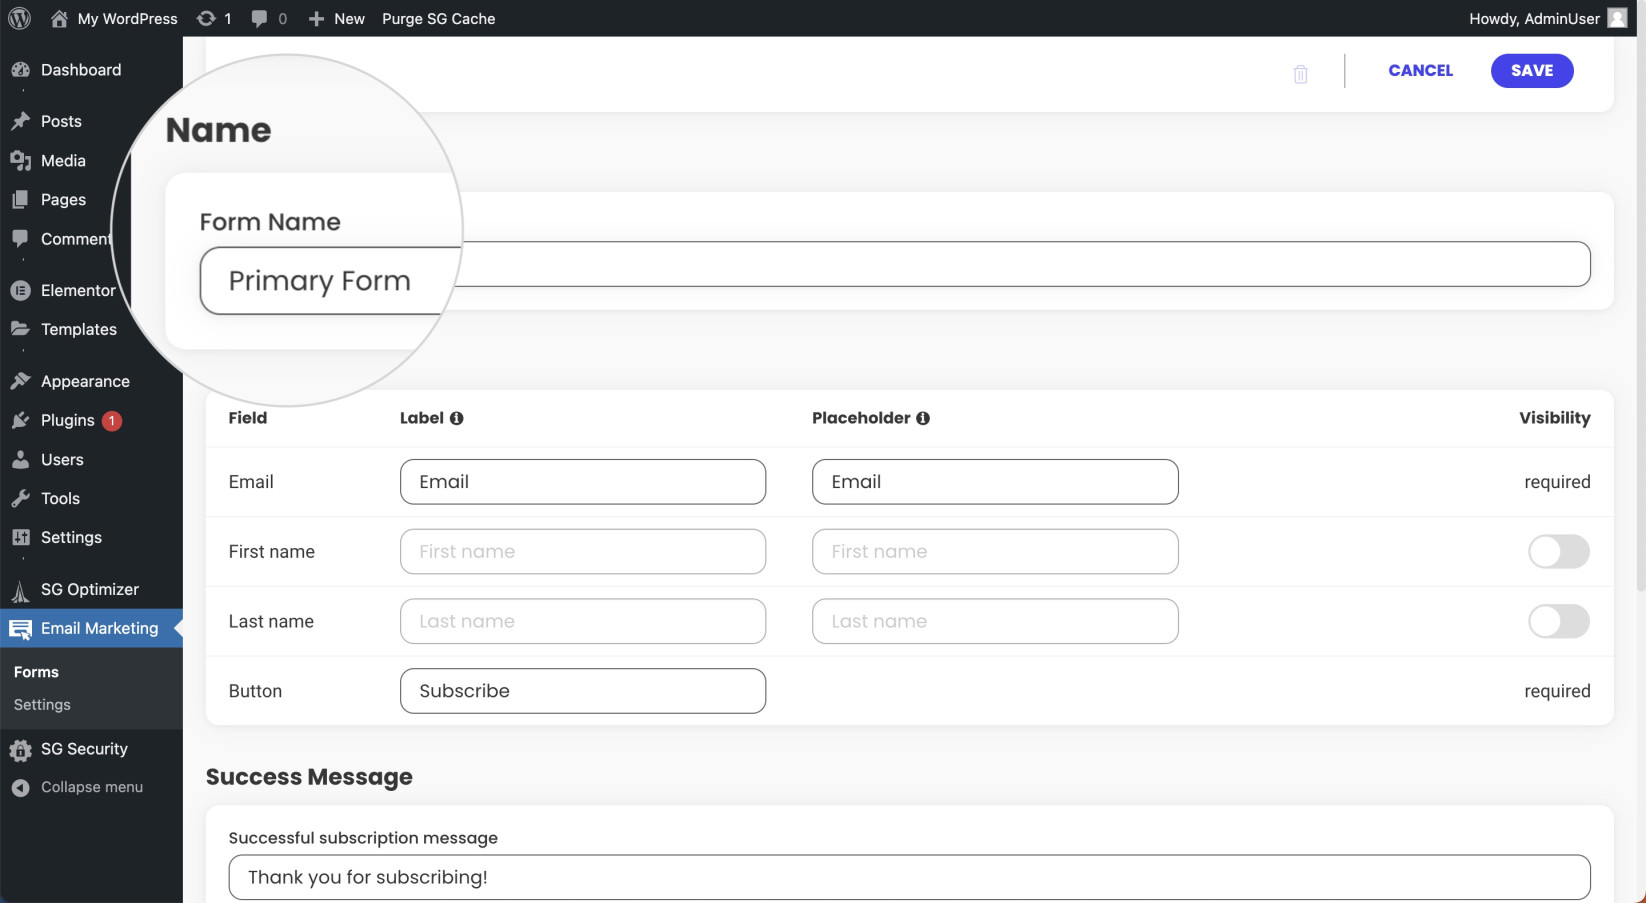
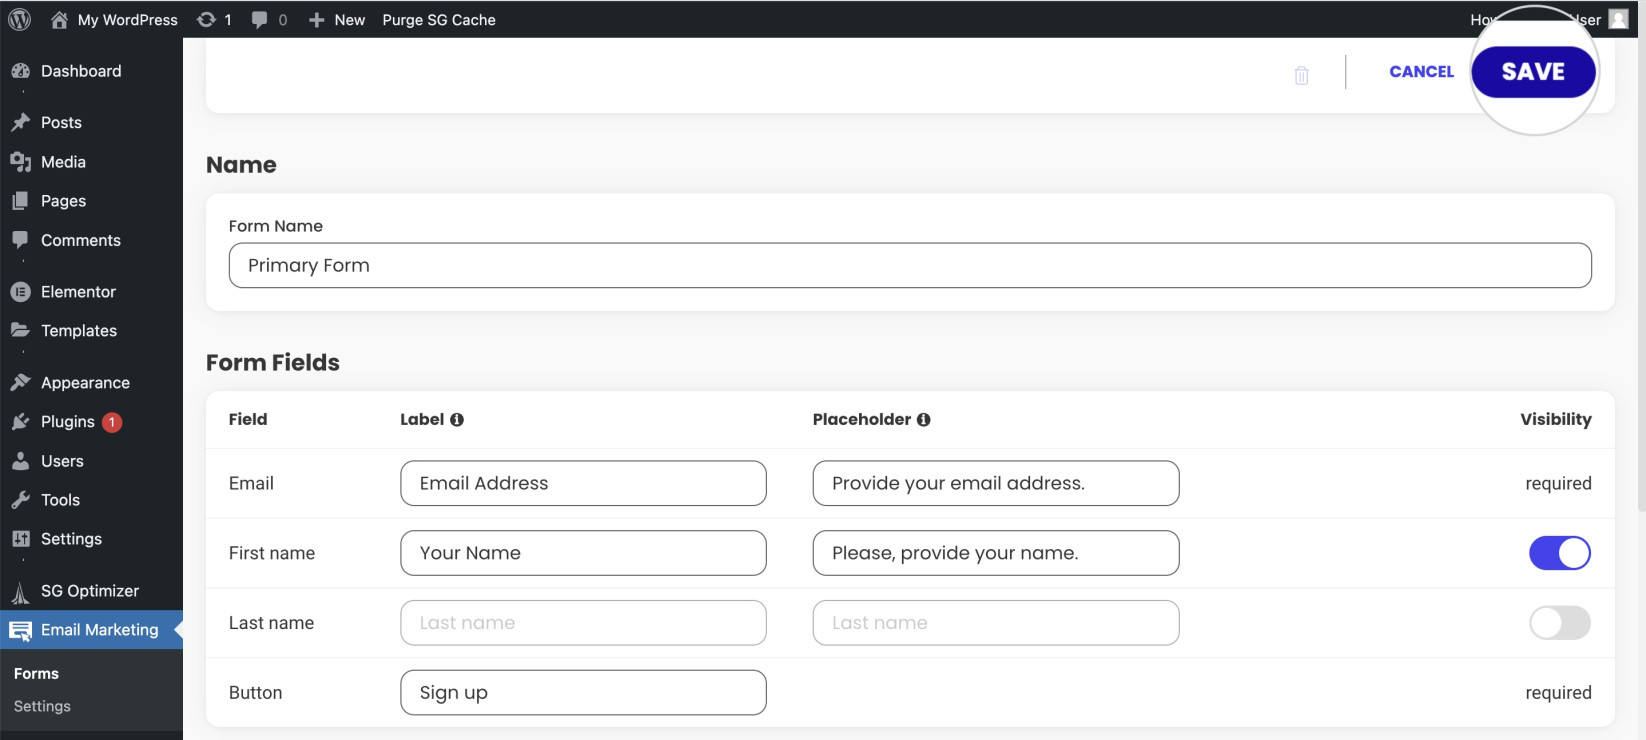
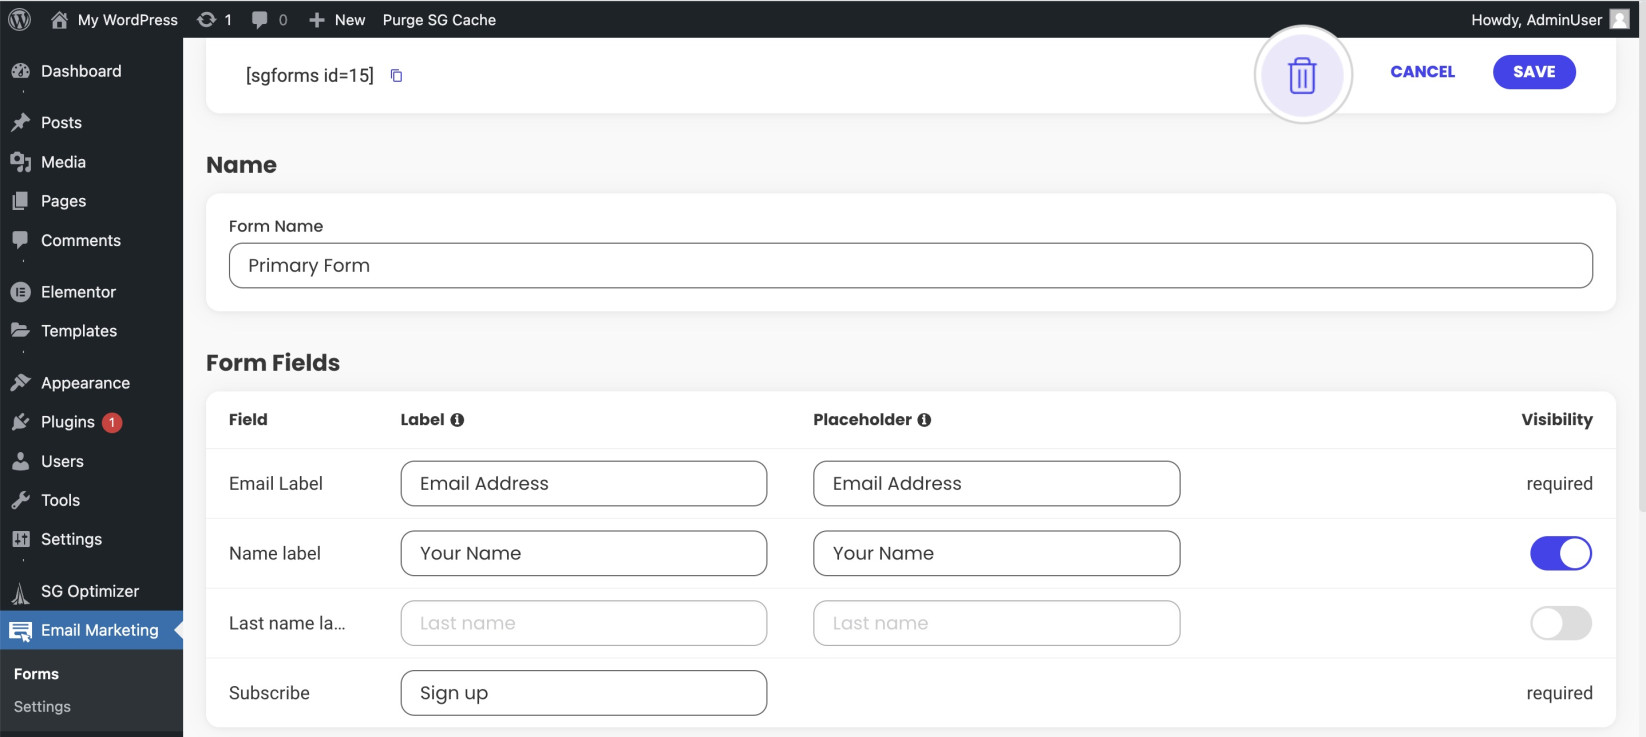
- First, you can set a name for the new form in the field Form Name. This name serves the purpose of a unique identifier. Only you will see it in your WordPress dashboard and page builder to easily distinguish this form from the others.
- Next, define the fields that the form will display. The column Field shows the respective field from Contacts of your SiteGround Email Marketing in which the visitor’s entry will be recorded.
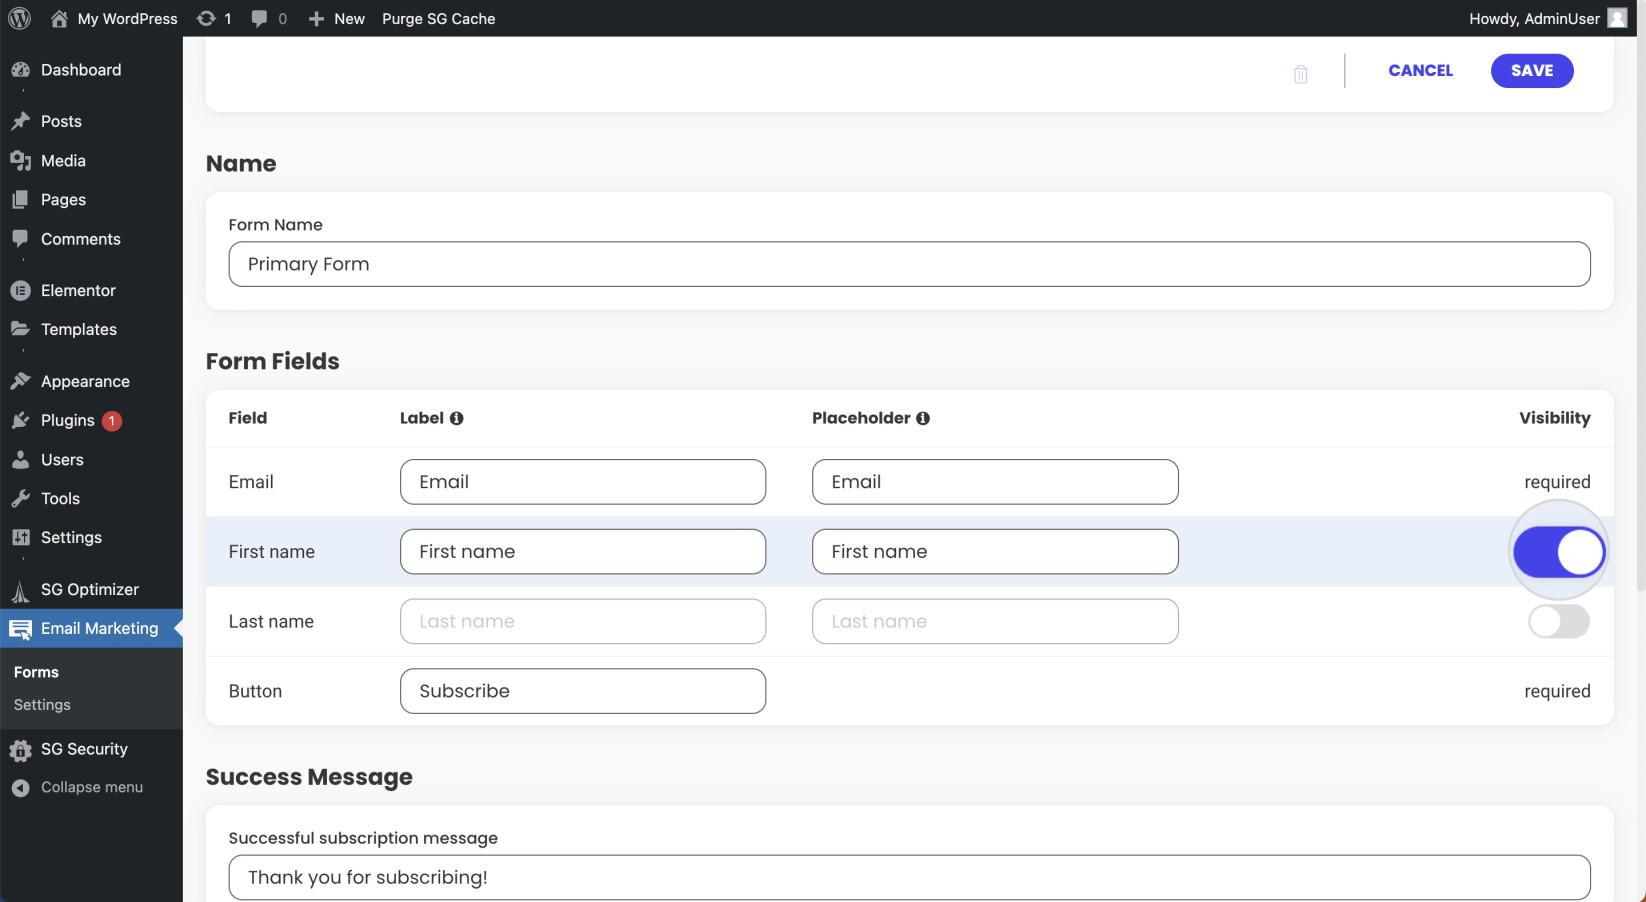
- Choose a unique Label name and placeholder text for each field. By default, the fields have the same label names as the Field names from your Contacts in Email Marketing. However, you can set the form to display a custom name for each field by changing its Label name.
For example, you can change the label for Email to Email Address. Entries submitted by visitors will still be recorded in the Email field in Email Marketing > Contacts. However, visitors will see the field with the name Email Address in the form on your website. - In the Placeholder field, you can set your custom text. It will appear in the field itself and will serve as an action prompt to the visitor. Once the visitor starts typing in the field, the placeholder text will disappear. For example, you can set the placeholder text for Email as “Provide your email address.”
- You can also change the text for the Button field. This text will appear in the button that visitors use to submit their subscription through the form.
How to set a Success message for the sign-up form
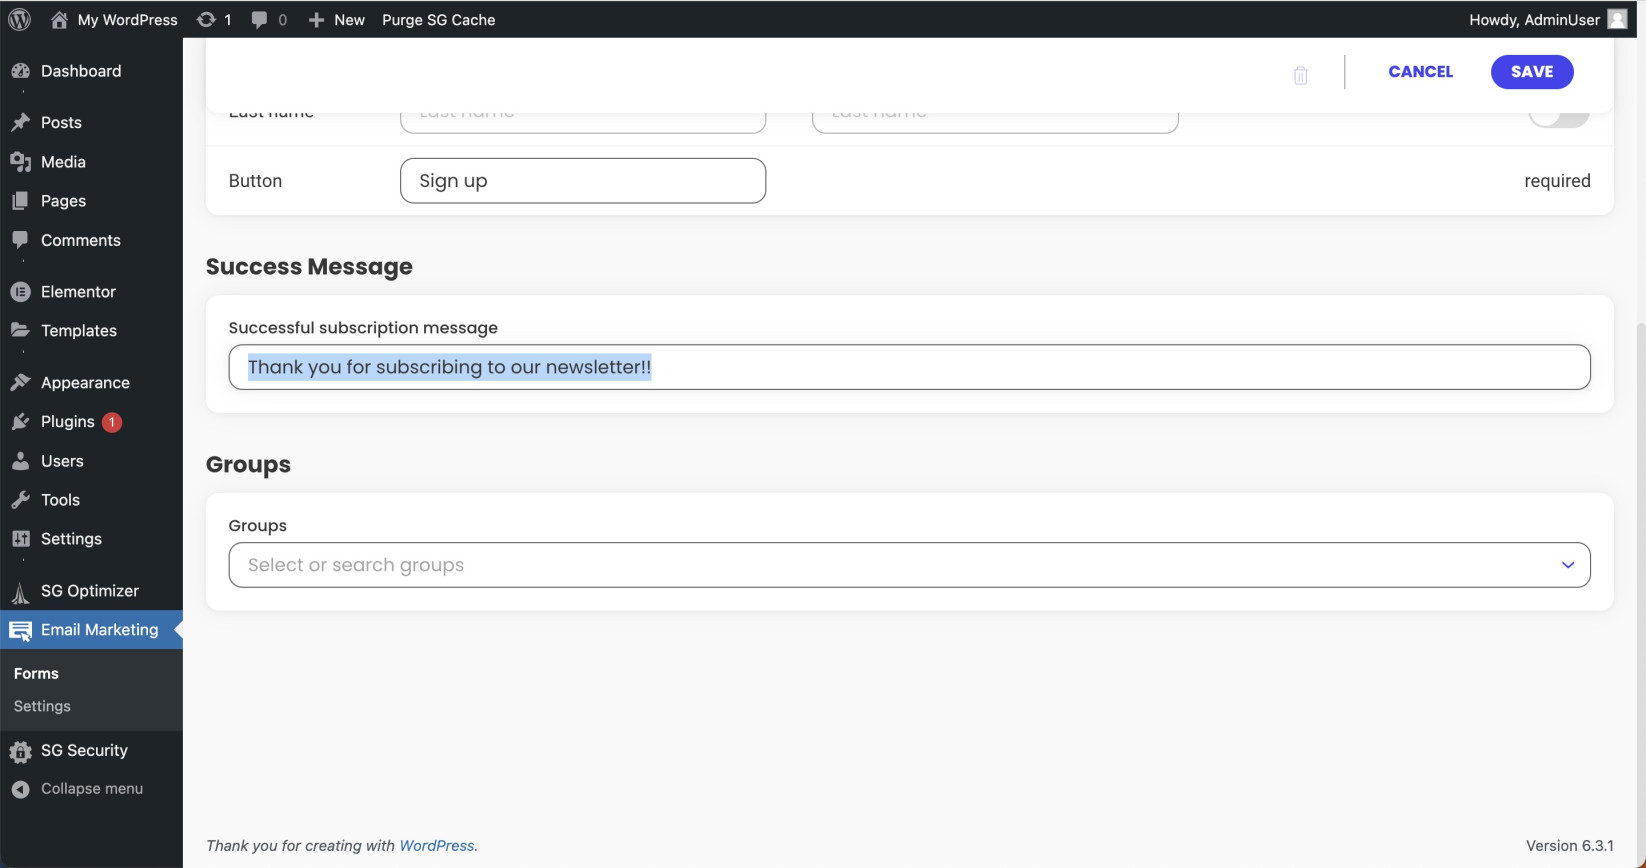
After you’ve defined the form fields, you can set a Success Message. Visitors will see it on their screens after they’ve completed the form and subscribed to your marketing campaign.
How to assign Contact Groups to the Sign-up form
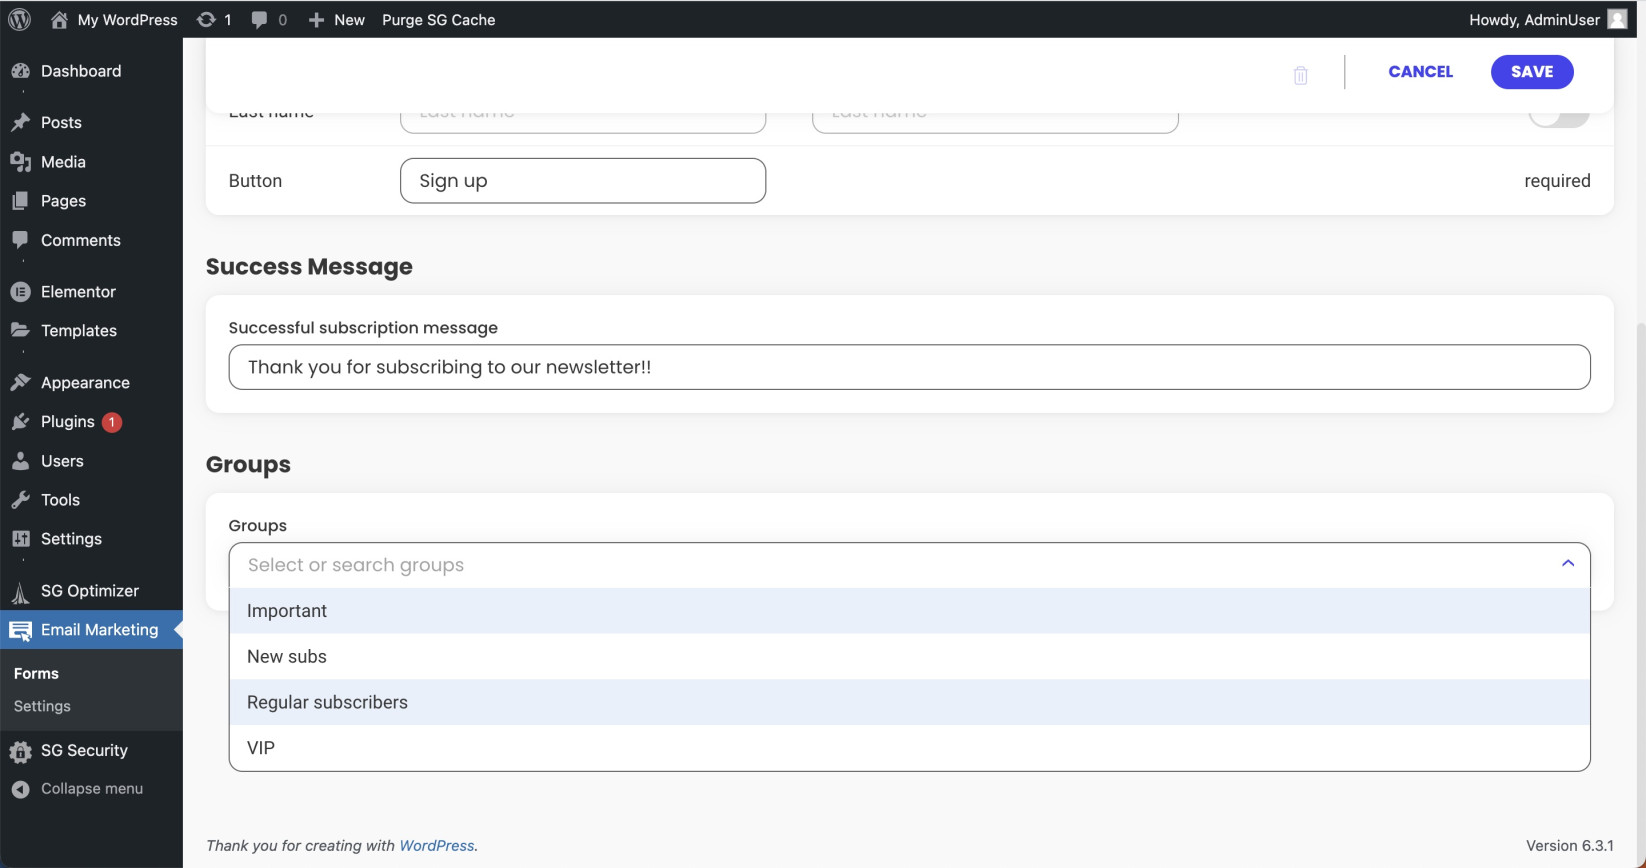
You can categorize contacts in your Email Marketing service into Groups. You can find more information in this guide for groups in Email Marketing. Since the Email Marketing plugin allows you to add subscribers to your contact list, you can select one or more of these existing groups for new contacts who subscribed through the sign-up form.
While creating the form, scroll down to the Groups drop-down menu. Select one or more of the existing groups in your contact list.
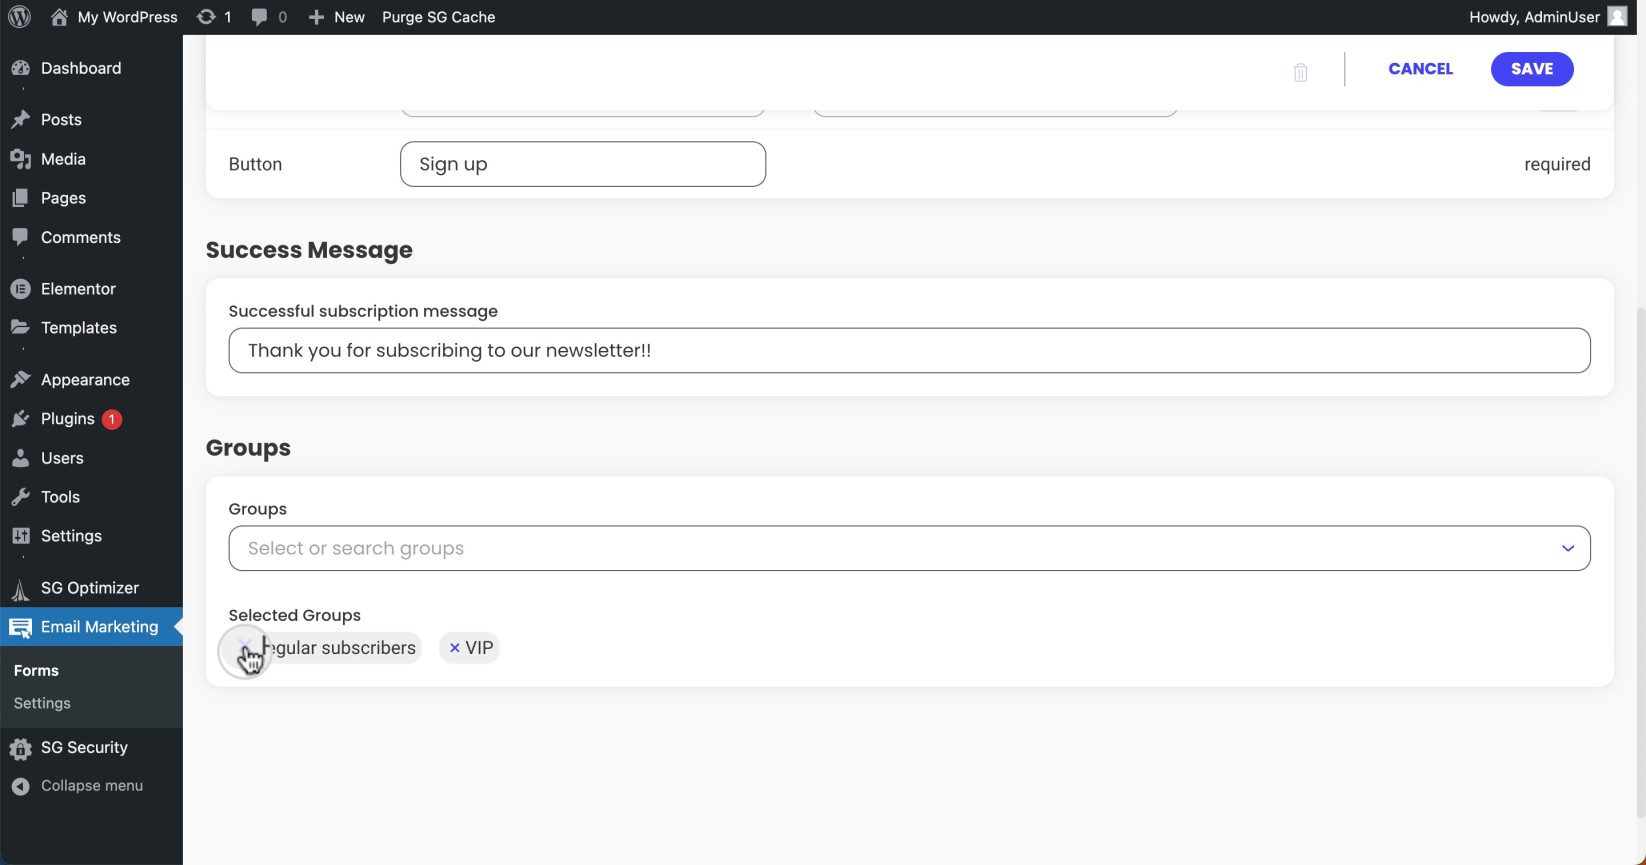
The chosen groups will appear in the Selected Groups section as separate tabs. If you’ve assigned a group that you now wish to remove, just click on its X symbol.
How to save the new form
Once you’ve finished customizing the form, save the form by pressing the SAVE button in the right corner.
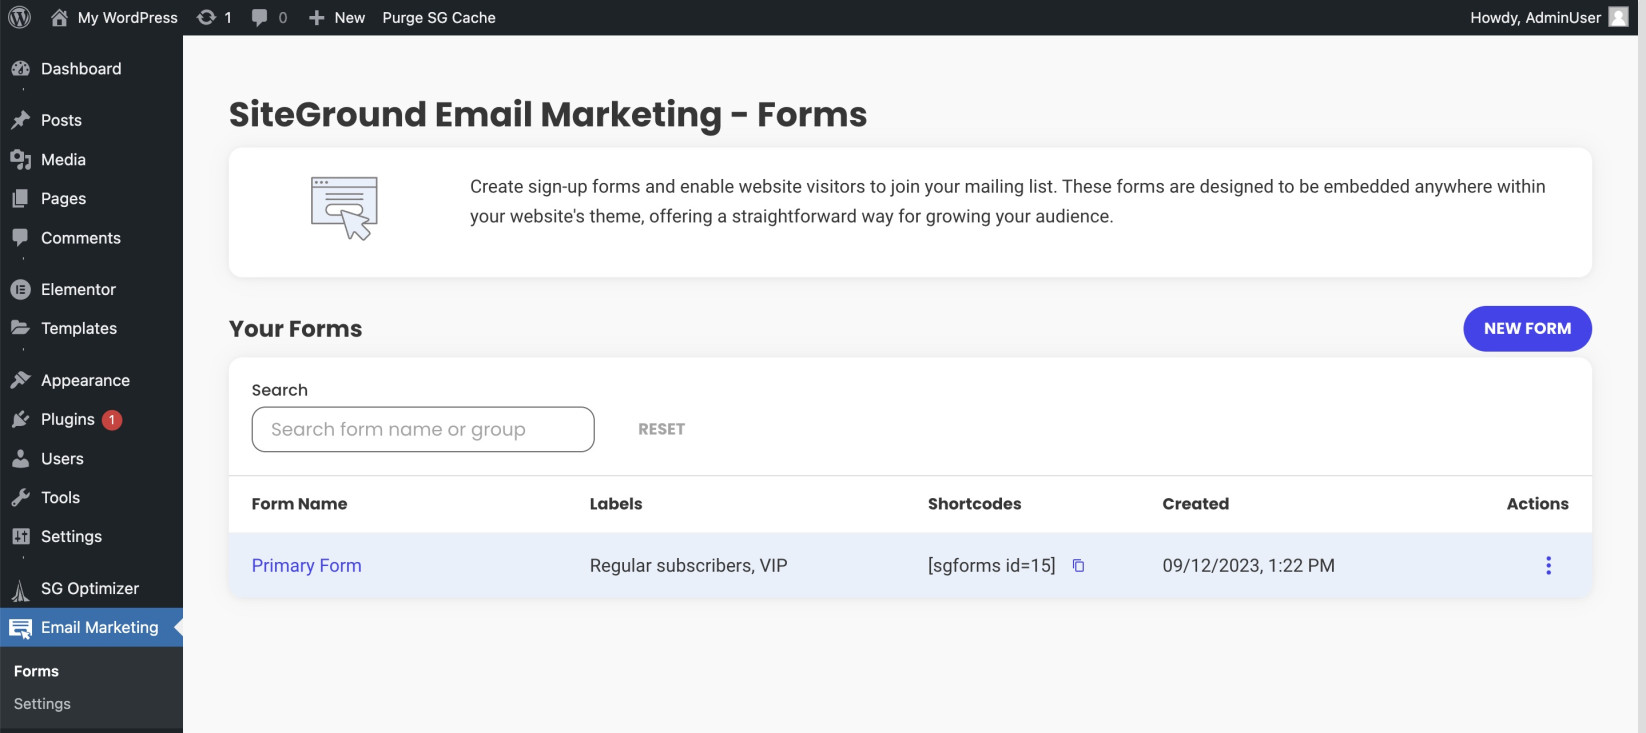
The form will be saved in the Email Marketing plugin, and you can now insert it on your web pages. To view, edit, or delete existing forms, navigate to Email Marketing > Forms in your WordPress dashboard.
How to edit existing forms
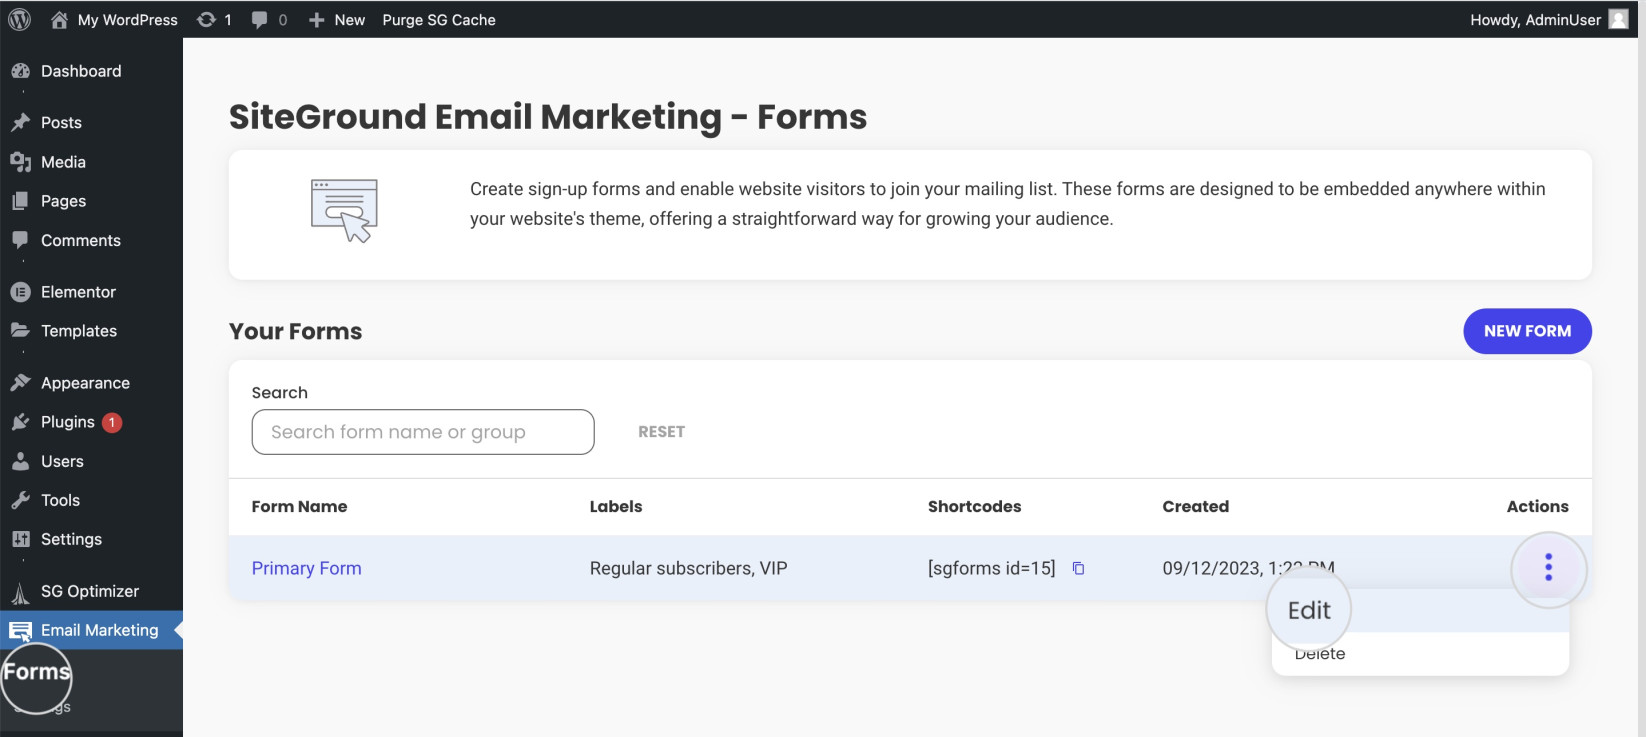
At some point, you may want to modify one of your existing forms. You can do that at any time by opening the Email Marketing > Forms section in your WordPress dashboard. Click on the Actions (kebab) menu and select Edit to open the form editor.
Make the necessary changes and confirm them with the SAVE button.
How to delete a sign-up form
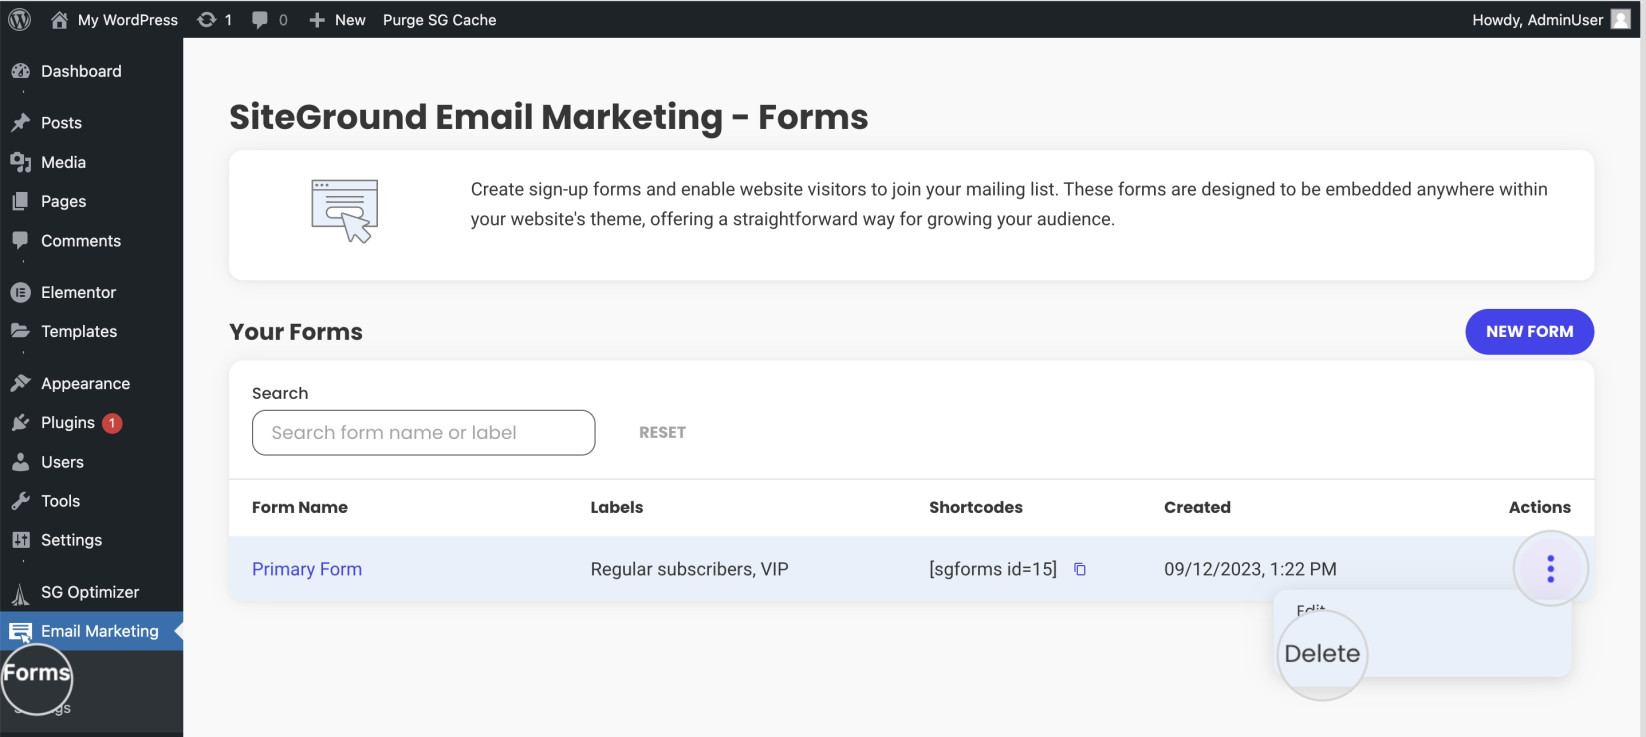
If you have a form that you no longer need, you can delete it from Email Marketing > Forms. Click on its corresponding Actions (kebab) menu and select Delete.
Alternatively, you can delete a form while editing it. Click on the Trash icon in the top right corner of the form editor.
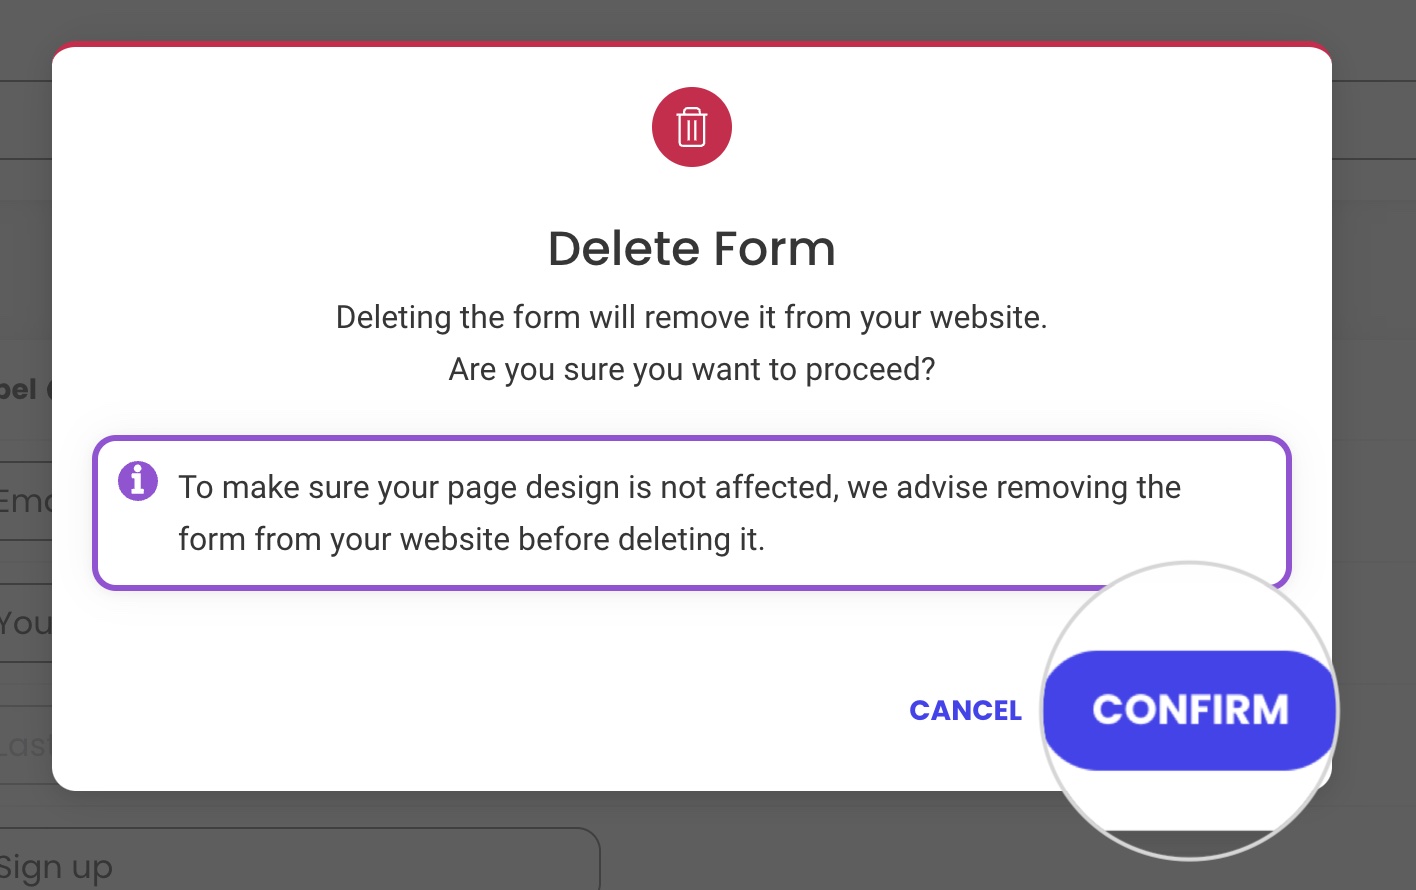
In either case, a new pop-up window will appear. Press Confirm to delete the form.
