How to Add Custom CSS to your WordPress site
Table of Contents
Adding custom CSS to WordPress is the secret ingredient to personalizing and boosting your website’s design. The power of CSS allows you to deviate from the standard themes and add a unique touch to your site, making it stand out in the digital world.
In this guide, we’ll show you how to add custom CSS to WordPress. From using the WordPress Customizer to installing CSS plugins and even tweaking your theme’s stylesheet, we’ll provide clear, concise steps to help you navigate this process with ease. So, buckle up and get ready to transform your WordPress site into a visually appealing masterpiece.
In that sense, CSS is the invisible hand that shapes your website’s aesthetic, managing the display of HTML elements across various media. But CSS isn’t just about aesthetics. WordPress custom CSS and its strategic application can significantly streamline your web development process. It allows you to manage the design of multiple web pages simultaneously.
Introduced by the World Wide Web Consortium (W3C), CSS effectively segregates style from structure. This allows you to define styles, layouts, and display variations for different devices and screen sizes, all managed from a single CSS file – a breakthrough in efficient web design.
With custom CSS in WordPress, you can transform a functional but plain website into a visually compelling platform that resonates with your audience. So why not take the plunge? Explore the potential of CSS and start elevating your web design prowess today.
Why should you add custom CSS to WordPress?
Injecting your own flavor into your website’s appearance can truly make it stand out. That’s where adding WordPress custom CSS comes into play. With custom CSS in WordPress, you can break free from the confines of standard themes and plugins, tailoring your site to reflect your unique brand.
Imagine having the power to modify every nook and cranny of your site, from colors and fonts to the overall layout. That’s the control you wield when adding WordPress custom CSS. You can fine-tune elements to your liking, ensuring a seamless user experience across your entire site.
But the advantages don’t stop at personalization and control. With custom coding, you can also enhance your site’s performance. By overriding unnecessary styles, you can reduce the amount of code browsers need to load, significantly boosting your site’s speed.
And if you’re keen on expanding your coding skills, working with custom CSS in WordPress is a fantastic way to do so. It’s like becoming your own CSS star, learning to navigate the intricacies of web styling and structuring.
So why not dive in? Start adding WordPress custom CSS, and take the reins of your website’s appearance.
6 Methods to add custom CSS to your WordPress website
Ever wondered how you can give your WordPress website a unique aesthetic touch? The answer lies in understanding how CSS works and how to apply custom CSS to WordPress. With custom CSS, you can tweak your site’s appearance to align perfectly with your brand identity.
There are several methods to apply custom CSS, each offering different levels of control and complexity. In this section, we’ll explore 5 methods to help you navigate the process of applying custom CSS to your WordPress site, so read on.
1. Adding custom CSS using the Theme Customizer in WordPress
You can insert additional CSS rules with each WordPress theme. If you want to add custom CSS, you can simply use the built-in Theme Customizer. To use this method, follow the steps below:
- Login to your WordPress dashboard.
- Navigate to Appearance > Customize.
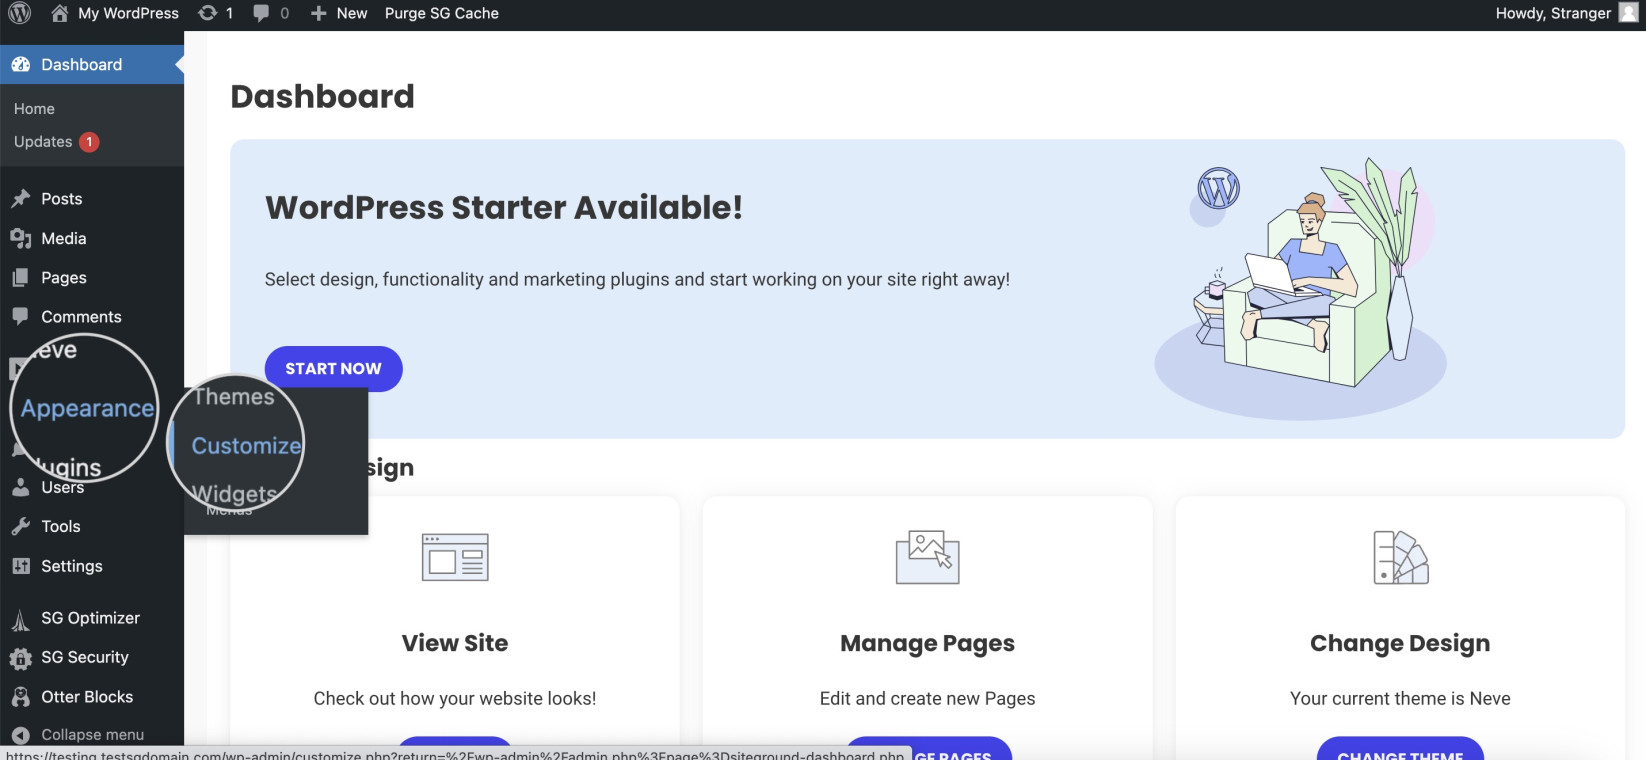
- This launches the Theme Customizer, and you should scroll down to find the Additional CSS option.
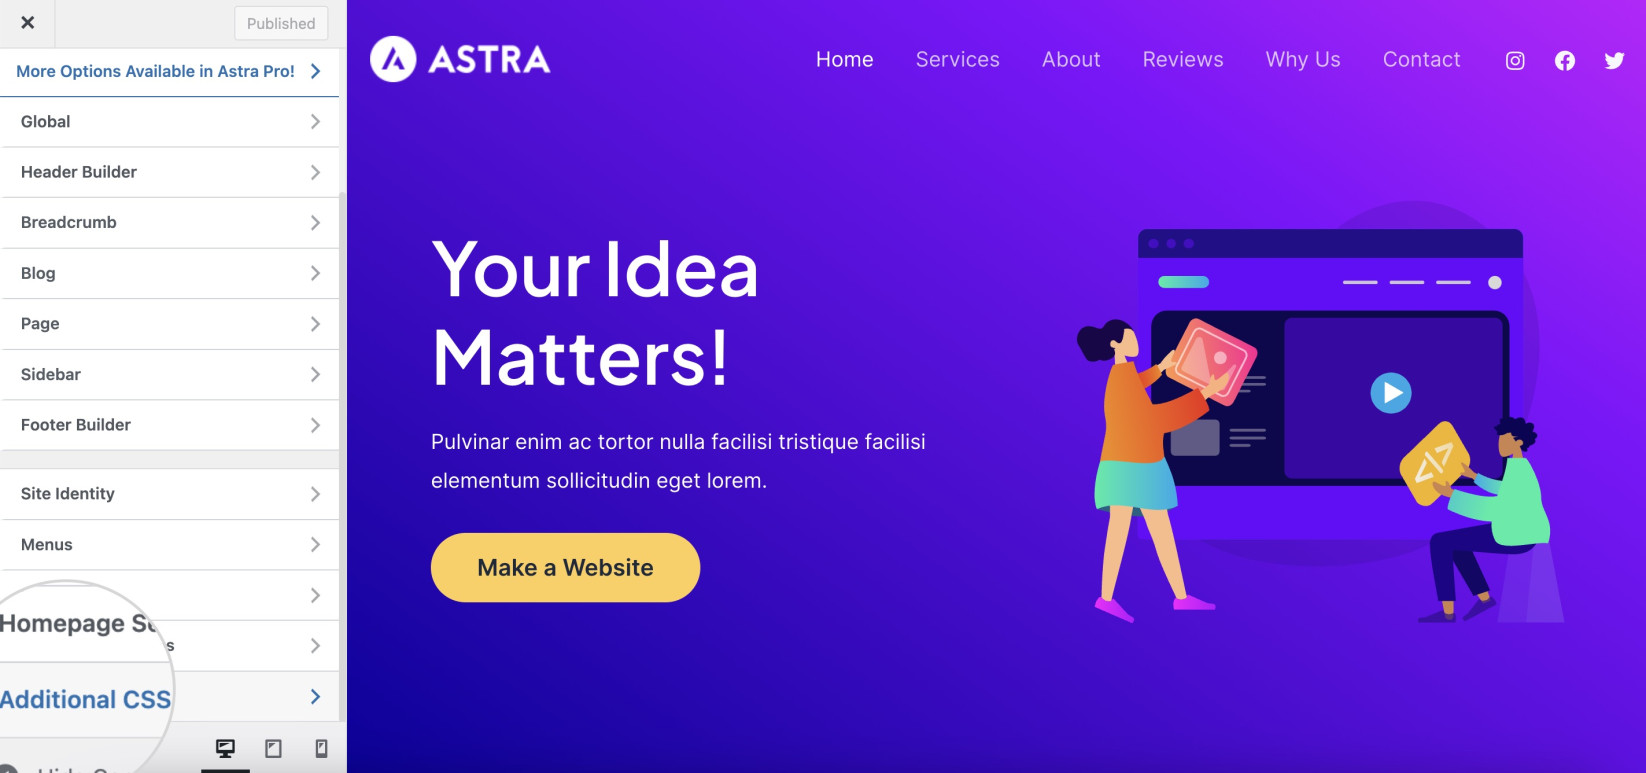
- Click it to open the Additional CSS screen and enter your CSS code in the field.
- Hit Publish or Update to save the changes.
This method is pretty straightforward. Thus, it allows even beginners to apply simple Custom CSS changes to WordPress.
2. Add Custom CSS using a Page Builder
Another method to add Custom CSS in WordPress is using a page builder like Elementor. Elementor Pro is a game-changer for those wanting to add a unique touch to their WordPress website through custom CSS. This powerful page builder allows you to style your pages without any CSS knowledge. It provides a platform for those with coding skills to add their own custom CSS styles, enhancing their pages’ look and feel.
Here’s how you can use the CSS editor feature in Elementor:
Site Level
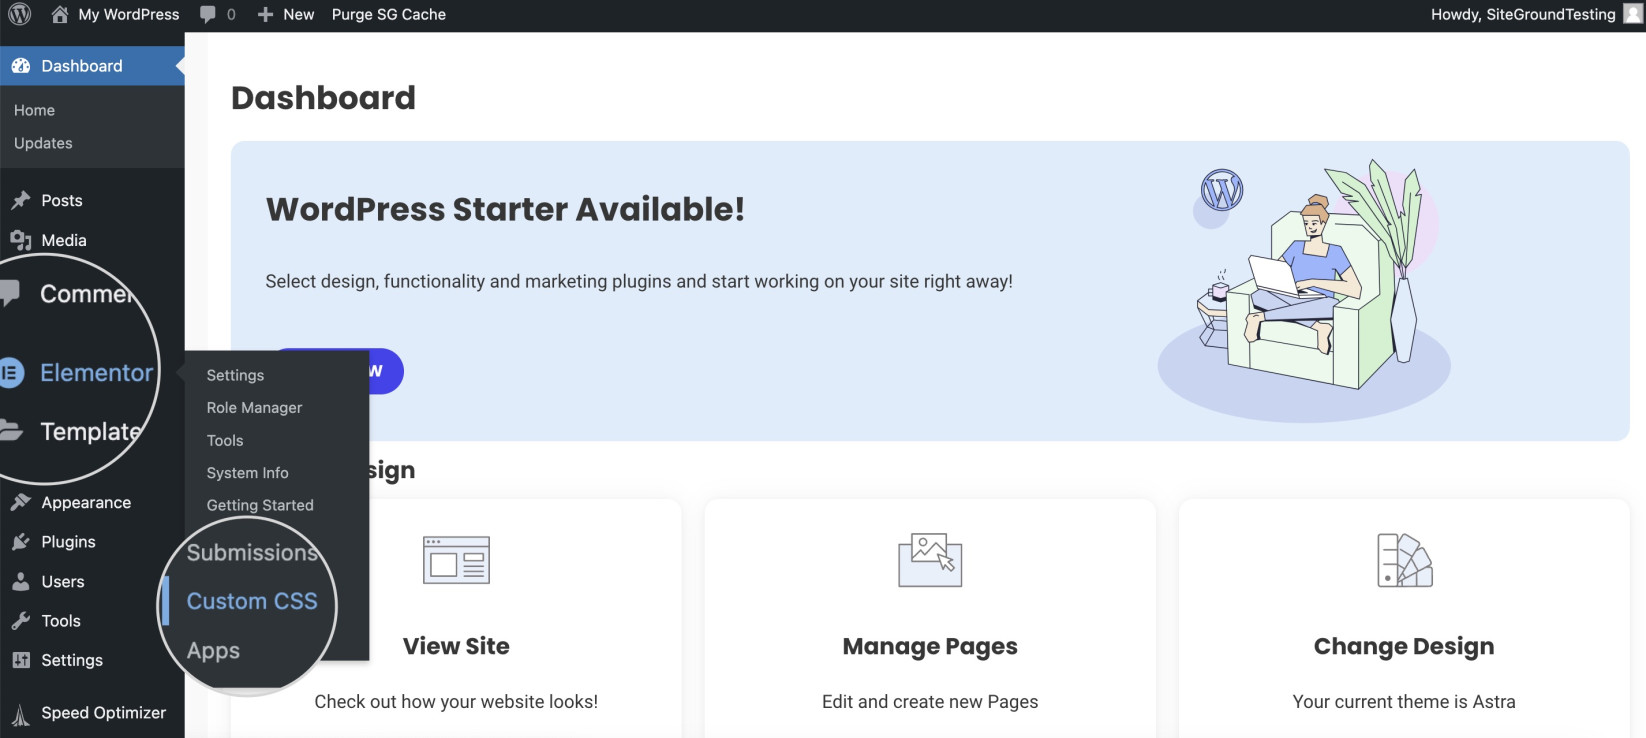
To add custom CSS that will affect your entire website, navigate to your WordPress dashboard. Find the “Elementor” tab and select “Custom CSS“. Here, you can add your custom code. This could include changes to the font size, font family, or any other CSS styles you wish to apply across your site.
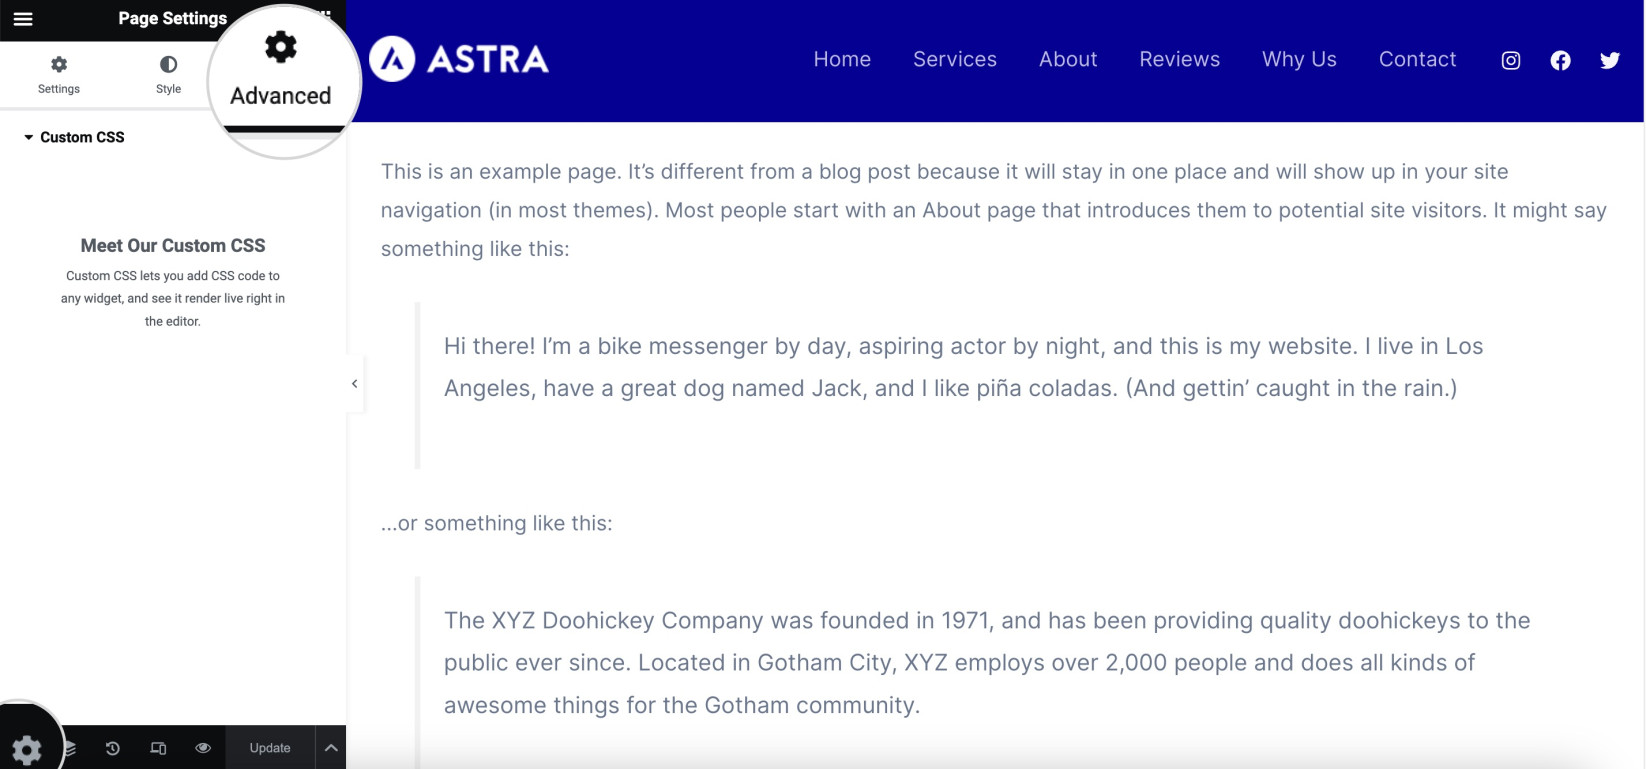
Page Level
If you want to add CSS that will only affect a specific page, first open the page using the Elementor Editor. Then, go to the page settings menu, select the “Advanced” tab, and add your custom CSS in the “Custom CSS” field. This is perfect for applying unique code snippets to individual pages, enhancing their distinct identity.
Element Level
For CSS editing that will only affect a specific element, select the widget you want to customize. Under the “Advanced” tab, you’ll find the “Custom CSS” field where you can add your code. This allows you to make precise changes to specific elements, such as altering a text box’s font size or family.
Note that the ability to add custom CSS at different levels is a feature of the Elementor Pro version. This flexibility is what makes Elementor Pro a powerful tool for adding WordPress custom CSS, giving you control over the exact look and feel of your site.
3. Use a Child Theme to edit Custom CSS
When adding WordPress custom CSS, using a Child theme is a smart and secure approach. As the name suggests, a Child theme is a subset of the active parent theme. It inherits all the features and styles of the active theme, allowing you to add custom CSS in WordPress without risking any changes to the original theme files.
Creating a Child theme in your WordPress dashboard lets you experiment with your site’s aesthetics freely. You can tweak and refine to your heart’s content, safe in the knowledge that your changes won’t break your site or be lost when the parent theme updates.
You maintain a clean and manageable WordPress site by adding all the CSS to the Child theme’s stylesheet. Regardless of your level of expertise in CSS coding using child themes for your WordPress custom CSS is a winning strategy. It’s an elegant way to ensure your customizations coexist harmoniously with the parent theme, giving you the creative freedom to make your site truly your own.
4. Add custom code by editing the Theme CSS Stylesheet
Adding custom CSS to your WordPress site by editing the theme CSS stylesheet is a method that gives you a lot of control, but it also requires a careful approach.
Here’s how to do it:
- Login to your site files via File Manager or via FTP/SFTP/SSH.
- Navigate to the wp-content > themes folder and enter the directory of your active theme.
- Load your WordPress theme files and scroll down to find the file called “style.css.” This is your theme’s style sheet, where all the CSS styles for your theme are stored.
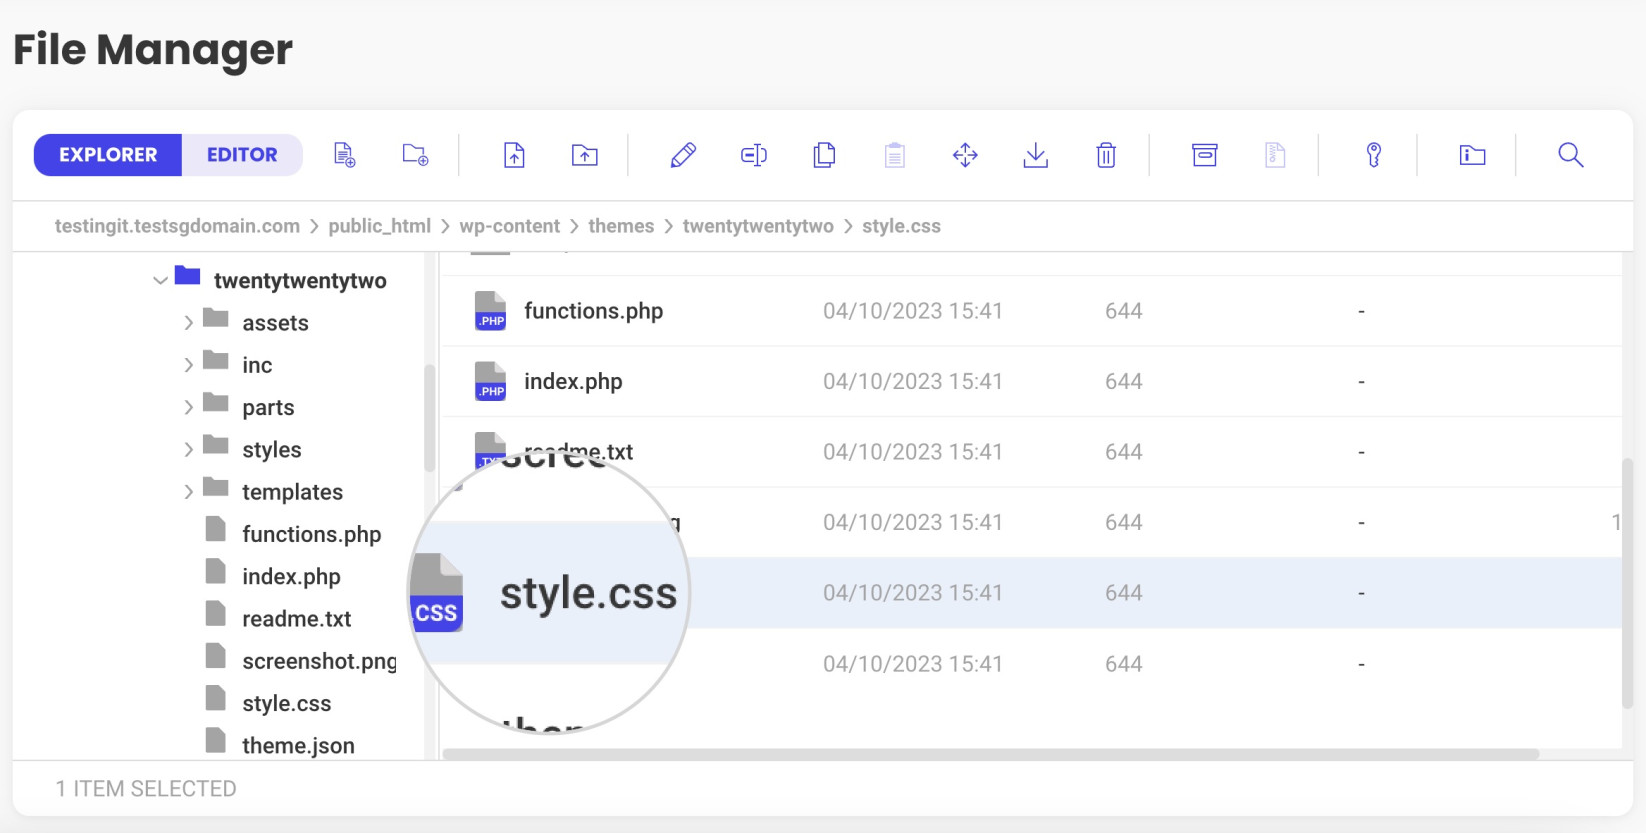
- To add your custom CSS to WordPress, double-click on “style.css,” and it will open in the editor.
- Scroll down to the bottom of the file, and you’ll see a space where you can input your additional CSS rules. This is where you can apply CSS by adding your code snippets.
- After adding your CSS rules, check for errors to ensure everything is in order.
- Once you’re done, hit the Save button, and your new theme changes will be live.
Keep in mind, that every time you switch to a new theme, you’ll need to reapply your custom CSS, as the style sheet is specific to each theme. That’s one of the main reasons why using a Child theme can be beneficial.
5. Add Custom CSS to WordPress using the Site Editor.
On August 8, 2023, WordPress proudly unveiled its 6.3 version, fittingly named “Lionel.” This release, announced on the WordPress 6.3 announcement page, marks a significant leap forward, offering new opportunities for designers, creators, and builders to express their creativity and manage their sites with a refined set of powerful tools.
WordPress 6.3 introduces a game-changing feature – the Site Editor. This all-in-one platform brings together your content, templates, and patterns, allowing you to manage everything from one place. Adding pages, browsing style variations, creating synced patterns, and gaining granular control over navigation menus has never been easier.
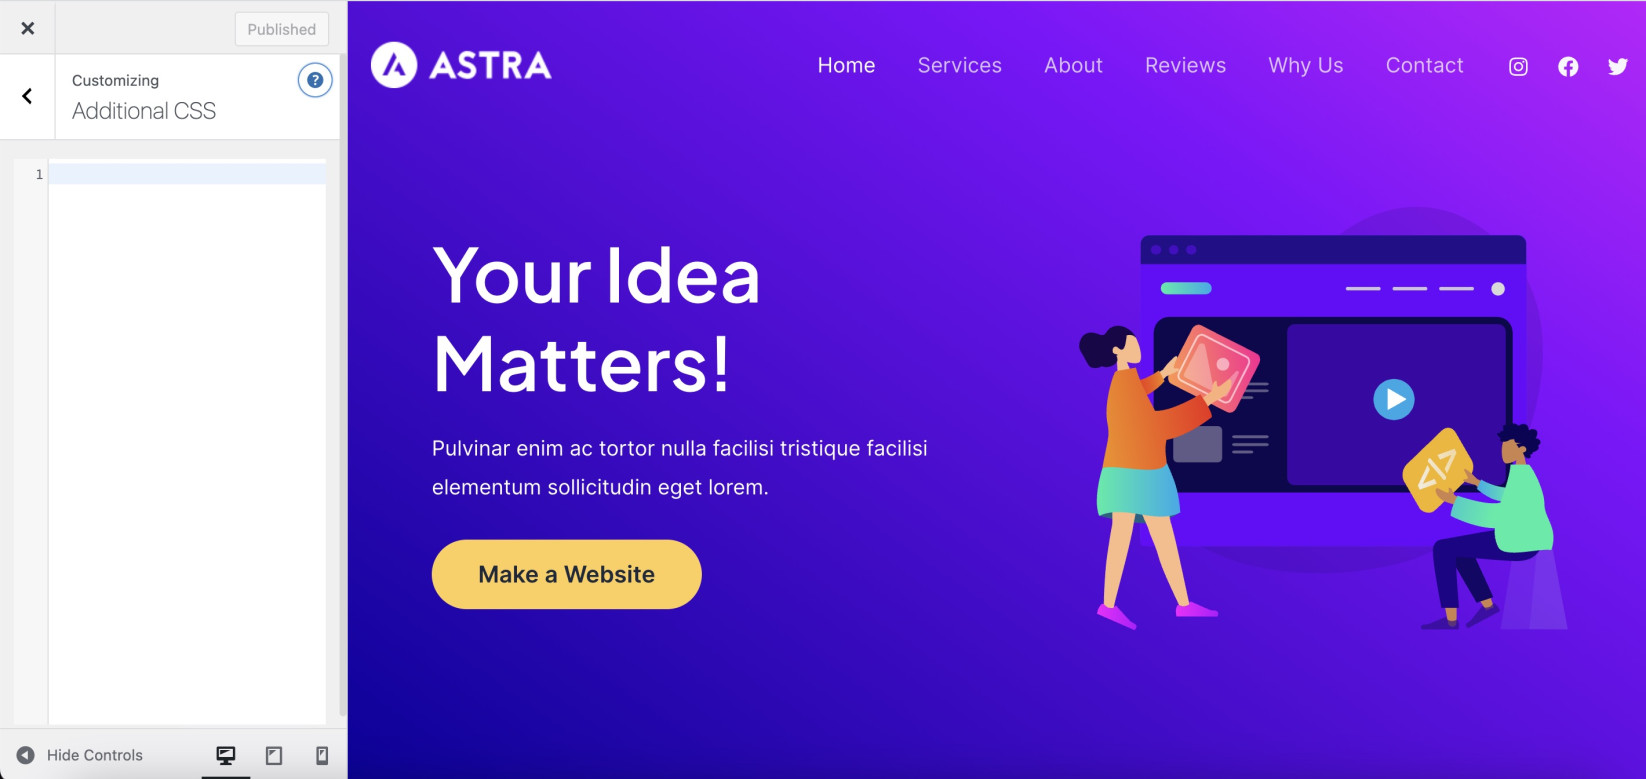
Here is how you can add simple Custom CSS with the WordPress Editor:
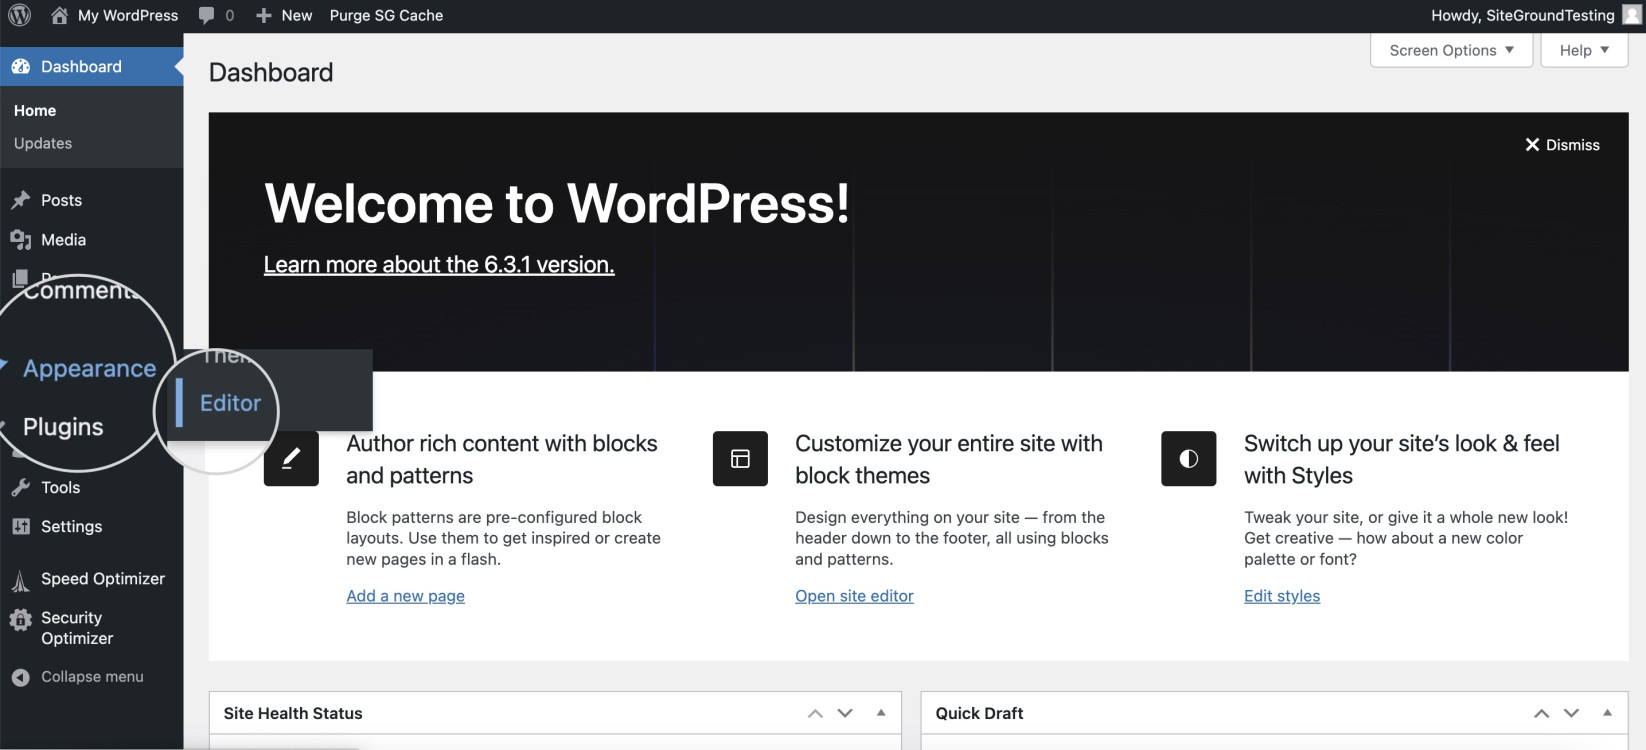
- Login to your Dashboard.
- Navigate to Appearance > Editor.
- Select “Styles”.
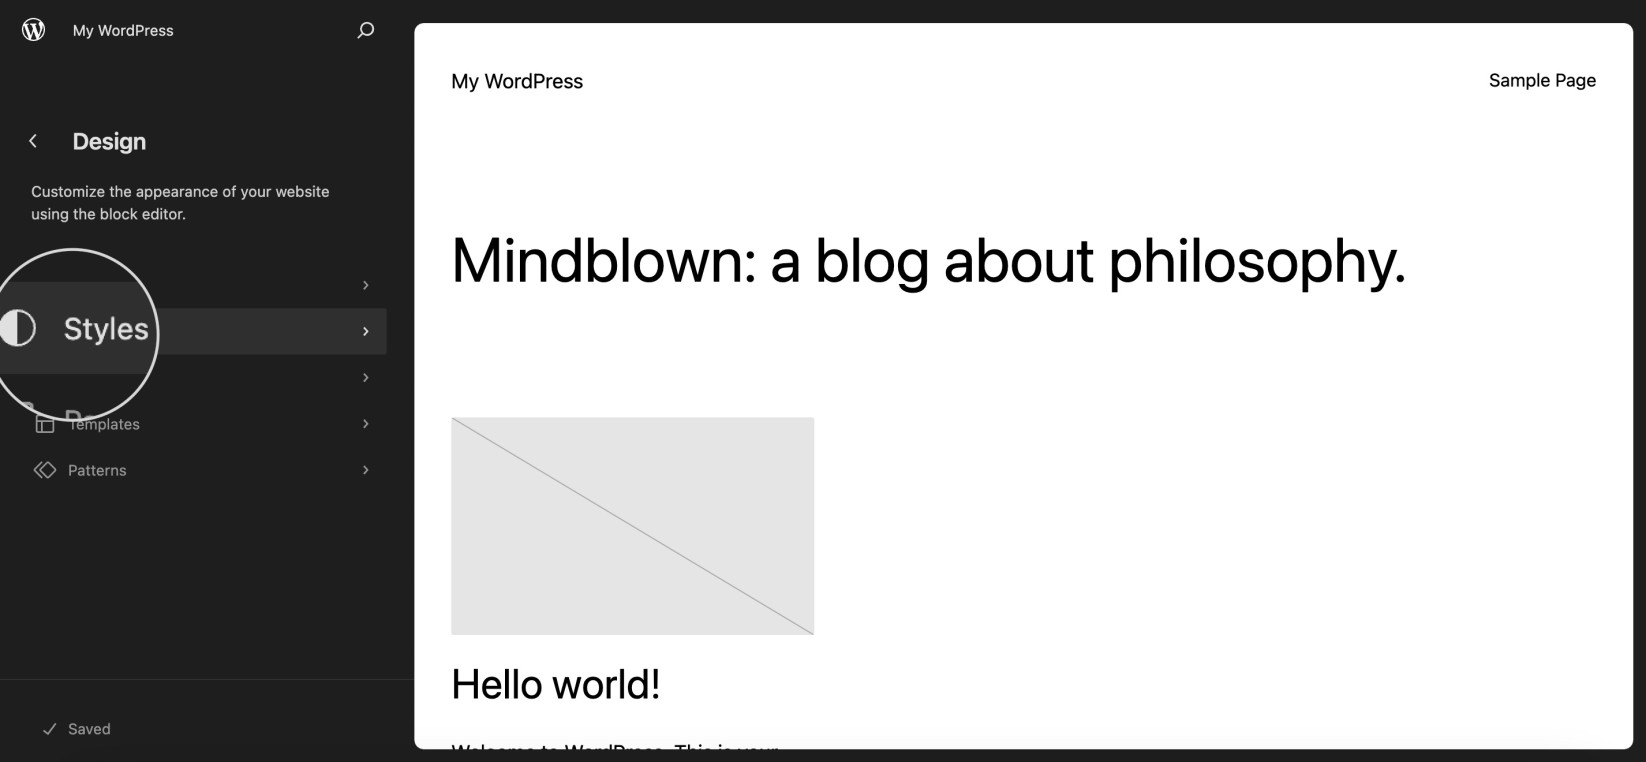
- Click on the pencil button at the top to Edit styles.
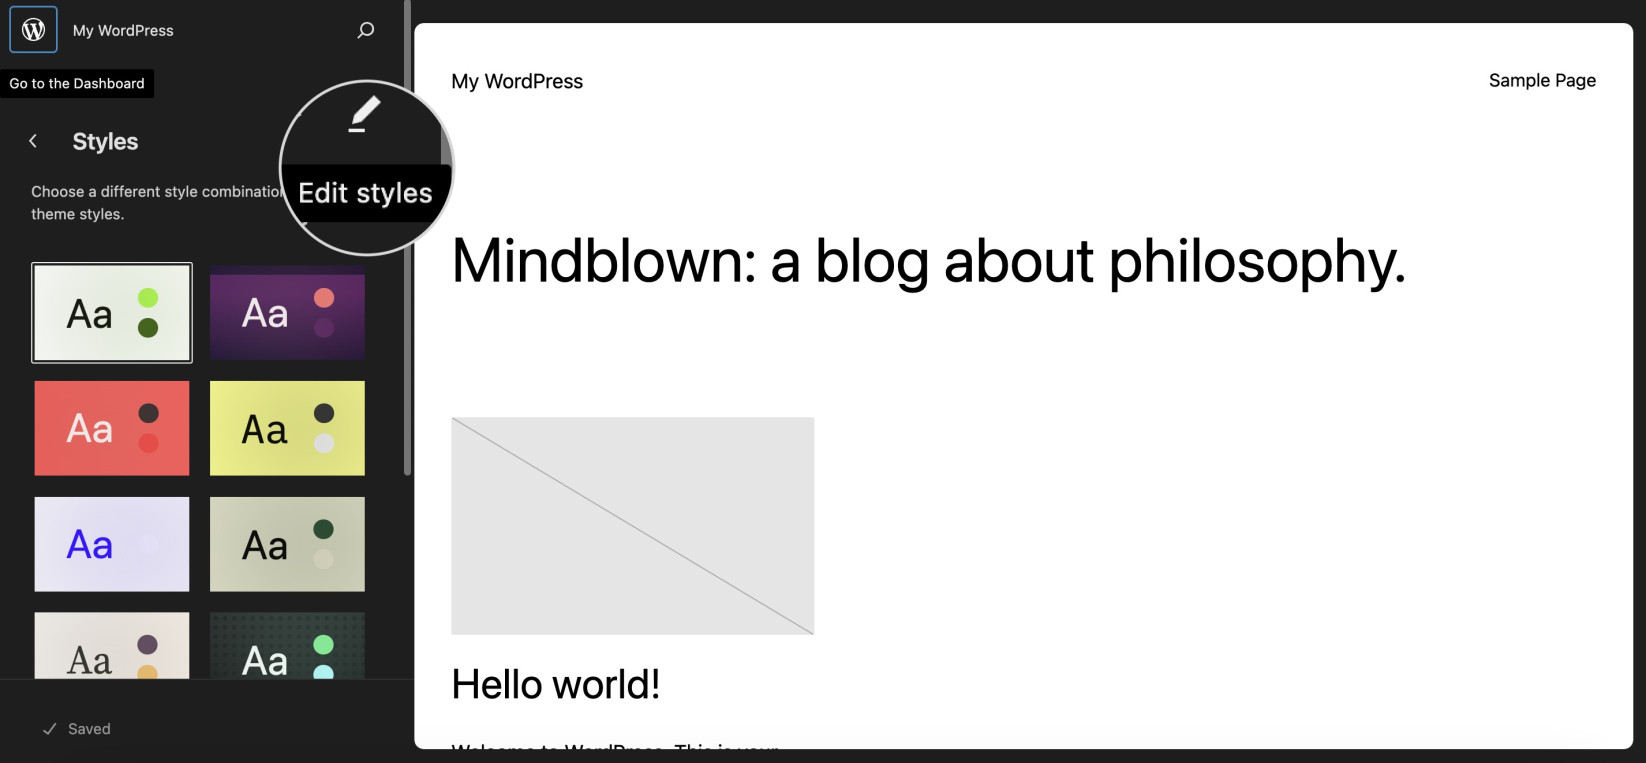
- Hit the kebab menu at the upper left corner and select Additional CSS.
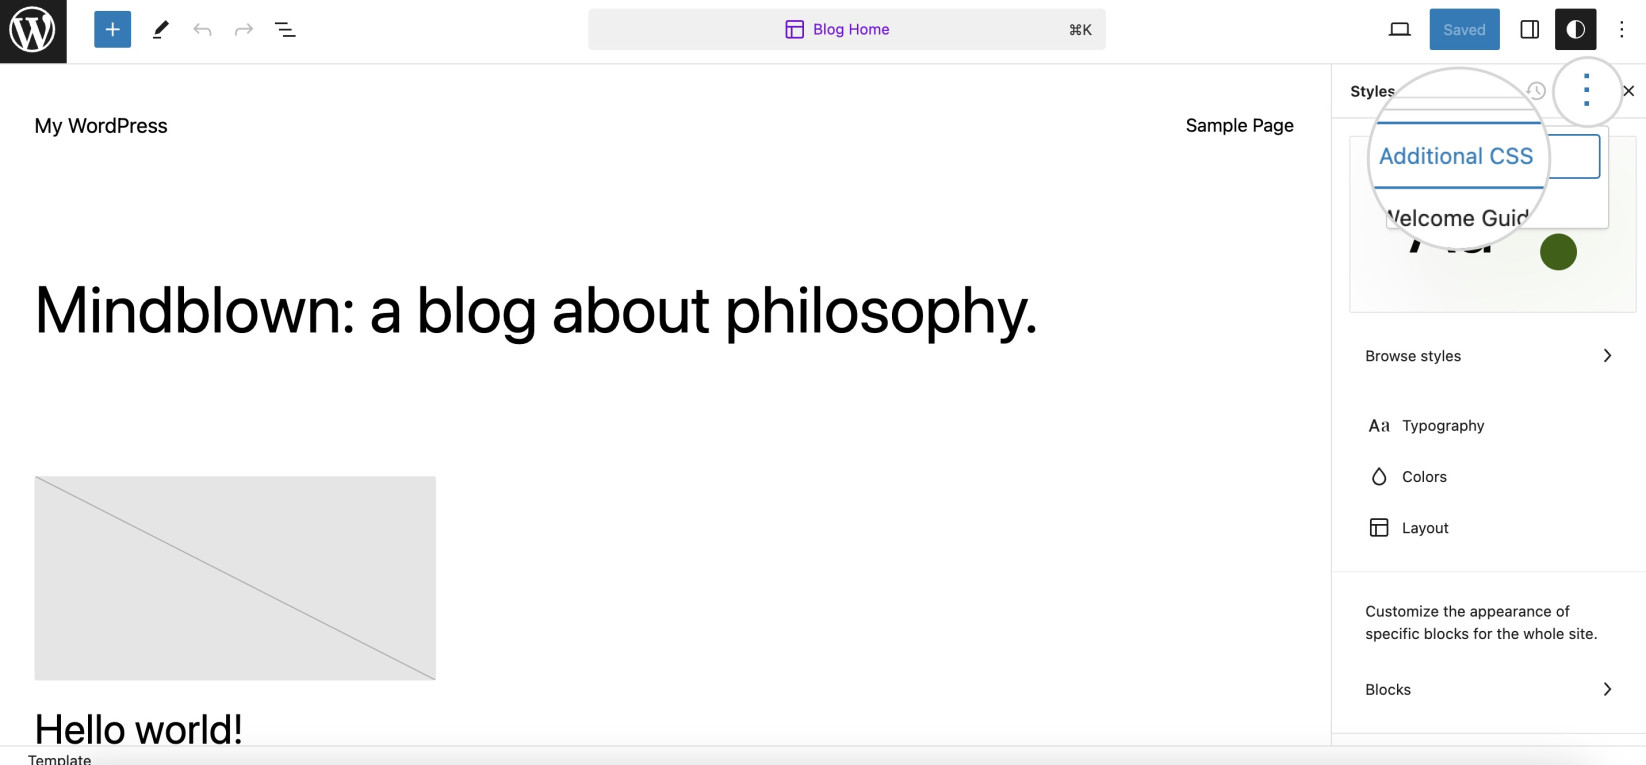
- Input your snippet in the Additional CSS box and hit the Save button to implement your CSS changes.
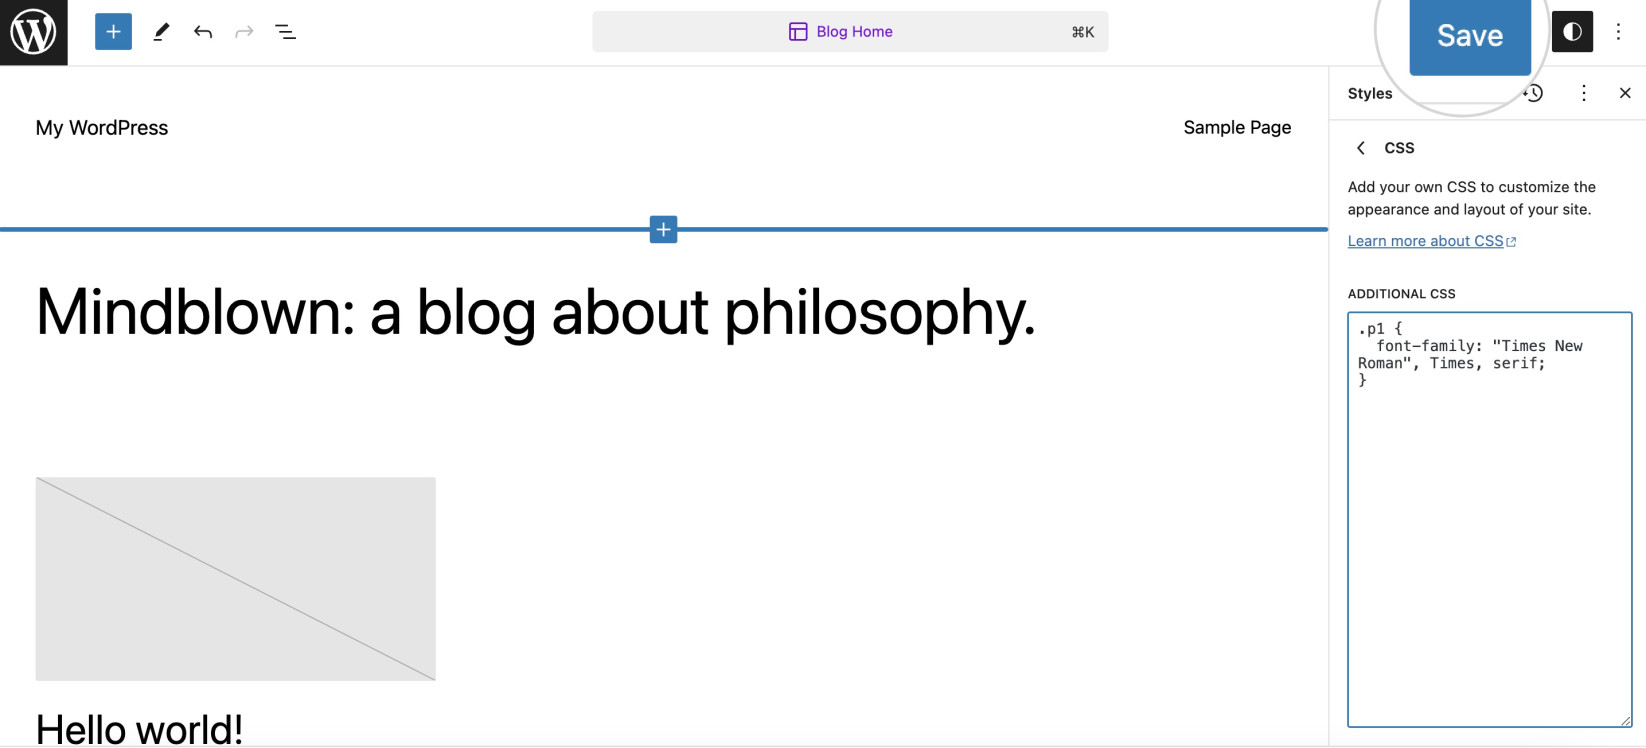
- Clear your browser cache and the cache from any caching plugin you may be using.
6. Edit Custom CSS with a Plugin
Editing custom CSS using a plugin is an incredibly user-friendly and efficient method, especially for those less comfortable with coding. WordPress has a variety of plugins that serve as CSS editors, providing a straightforward, intuitive interface for adding and tweaking your CSS.
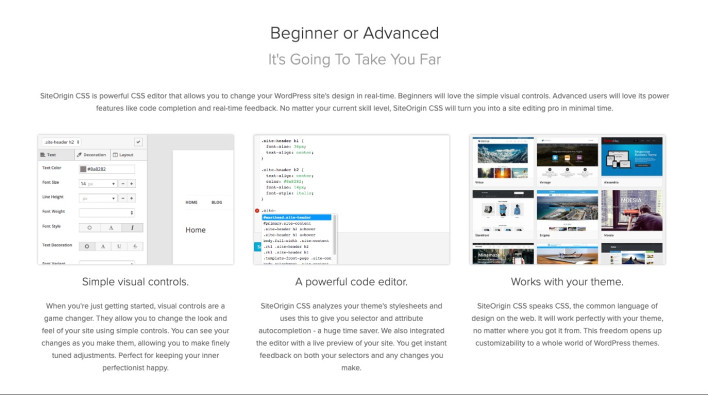
One of the key benefits of using a plugin is that it often provides error checking, making it easier to spot and fix mistakes in your CSS. For example, SiteOrigin CSS offers error checking, and it includes features like code autocompletion and syntax highlighting. These features can be a real time-saver, especially when working with more complex CSS selectors or CSS classes.
Most CSS plugins integrate smoothly into your WP admin dashboard, allowing you to make changes directly within your WordPress interface. This means you don’t need to navigate away from your site or juggle additional plugins to add or modify your CSS.
Some advanced CSS plugins like CSS Hero even support CSS preprocessors, providing more power and flexibility to those with a deeper understanding of CSS. This allows you to harness CSS’s full potential and customize your site to match your vision.
While plugins simplify the process, it’s still crucial to understand the basics of how CSS works. With a solid foundation and the right plugin, you can take control of your site’s appearance and create a truly unique WordPress website.
Basic Customizations in WordPress using custom CSS
Stepping into the world of custom CSS in WordPress brings a wealth of opportunities for basic customizations. Even a few lines of code can dramatically transform the aesthetics of your WordPress site.
In this section, we’ll show you a few CSS customizations you can implement by using any of the methods we outlined above.
Customize font and size with CSS
Customizing fonts and their sizes is a simple yet effective way to personalize your WordPress site. To do this, you’ll need to use one of the CSS methods mentioned above to target the HTML elements you want to change.
Here’s a basic example of how you could change the font and size of all paragraph (`<p>`) elements on your site:
p {

font-family: Arial, sans-serif;

font-size: 16px;

}
In this example, “p” is the CSS selector that targets all paragraph elements on your site. The “font-family” property changes the font to Arial (if Arial isn’t available, it will fall back to any sans-serif font), and “font-size” adjusts the font size to 16 pixels.
You can replace `p` with any other HTML tag (like “h1”, “h2”, “h3”, etc.), a class name (preceded by a “.”), or an ID (preceded by a “#”) to target different elements on your site.
Add customizations to text colors with CSS
Changing the color of text in your WordPress site is another simple customization you can make using CSS. By targeting specific HTML elements, classes, or IDs, you can set the color of your text to any color you want.
Here’s a basic example of how you could change the color of all paragraph (<p>) text on your site:
p {

color: #FF0000; /* This is red */

}
In this example, p is the CSS selector that targets all paragraph elements on your site. The color property changes the text color to red (specified here as a hexadecimal color code).
Style comments in WordPress by adding custom CSS
Styling comments can add a unique touch to your WordPress site and improve readability. By using CSS, you can add custom styles to your comments section.
Here’s a basic example of how you could change the font, size, and color of text in your comments:
.comment-content {

font-family: Arial, sans-serif;

font-size: 14px;

color: #333333; /* This is dark grey */

}
In this example, .comment-content is the CSS class that WordPress uses for the content of comments. The font-family property changes the font to Arial, font-size adjusts the font size to 14 pixels, and color changes the text color to dark grey.
Common reasons for Custom CSS not working in WordPress
Sometimes, despite our best efforts, custom CSS doesn’t seem to reflect on a WordPress site as expected. This can be frustrating, especially when you’ve spent time carefully crafting your styles.
However, there are several common reasons why your custom CSS might not be working. In this section, we’ll explore these potential pitfalls, from syntax errors and caching issues to conflicts with themes and plugins. So, let’s dive in.
CSS Syntax Errors
When dealing with WordPress custom CSS, syntax errors are a common stumbling block. Like any programming language, CSS has its own syntax rules. Even the smallest mistake, like a missing semicolon or curly bracket, can render your code invalid.
Therefore, ensuring your CSS code is free from syntax errors is crucial. Tools with syntax highlighting can be particularly helpful in spotting these errors. Remember, the browser won’t be able to interpret incorrectly written CSS, causing it to ignore the code. So, always double-check your syntax when adding custom CSS to your WordPress posts.
Caching issues
Caching can be another hurdle when working with custom CSS on your WordPress website. Browsers often cache older versions of CSS files for faster loading times. However, this can prevent your new CSS revisions from reflecting on the site.
If your custom CSS code isn’t working as expected, try clearing your browser cache. Similarly, if you’re using a caching plugin on your WordPress site, clear its cache too. This ensures you’re always working with the most recent version of your CSS code.
Compatibility issues
Compatibility issues often arise when a theme or plugin conflicts with your custom CSS code. If you’re adding custom CSS to an element that’s already styled by a plugin or theme, it may cause conflicts. This can prevent your custom CSS from working, leading to inconsistencies in your WordPress posts.
Moreover, some WordPress themes may restrict certain CSS properties, while security settings in your hosting environment could prevent custom CSS from executing. Always check for any such limitations or restrictions, and consider using more specific CSS selectors or adding an !important declaration to your code to avoid conflicts and override existing styles.
FAQs
Which is easier for adding CSS to WordPress – with or without plugin?
When it comes to adding CSS to WordPress, the choice between using a plugin or going without one largely depends on your comfort level with coding. For those new to the world of CSS or those who prefer a more guided approach, using a plugin is typically the easier route.
Plugins like Simple Custom CSS or CSS Hero provide a user-friendly interface and handy tools that make the process more intuitive, even for beginners. On the other hand, if you’re comfortable with coding and eager to flex your CSS skills, adding CSS without a plugin gives you more control. Moreover, you gain a deeper understanding of how your styles are affecting your site.
Ultimately, both methods have their merits, and the choice depends on your preference and skill level.
Why is my CSS not showing on my WordPress site?
There could be several reasons why custom CSS code is not working on a WordPress website. Here are some common issues and solutions:
- CSS syntax errors: Make sure your CSS script does not contain syntax errors, such as missing semicolons or curly brackets. Even a small syntax error can prevent the code from working.
- Specificity: CSS follows a specificity hierarchy, where more specific selectors override less specific selectors. If your custom CSS is not working, it may be because it is being overridden by other CSS with more specific selectors. To fix this, you can add more specific selectors to your custom code.
- Caching: Your browser or website may be caching old CSS code, preventing the new changes from being visible. Try clearing your browser cache and refreshing the page. You can also clear your WordPress site’s cache if you are using a caching plugin.
- Theme limitations: Some WordPress themes may not allow you to add custom CSS or may restrict certain CSS properties. Check your theme documentation to see if there are any limitations or restrictions.
- Plugin conflicts: Some plugins may conflict with the custom CSS code, preventing it from working. Try disabling other plugins one by one to identify the problematic plugins.
- Incorrect class or ID names: Make sure the class or ID names in your CSS code match the ones in your HTML code. An incorrect class or ID name when you apply CSS can distort the outcome.
How to add CSS code to a specific page?
If you want to apply CSS to a specific page on your WordPress site, you’ll need to target the unique body class that WordPress assigns to each page. WordPress automatically generates these classes, which include the page ID, allowing you to apply styles to individual pages.
Here’s an example of how you might change the background color of a specific page:
body.page-id-123 {

background-color: #FF0000; /* This is red */

}
In this example, body.page-id-123 is the CSS selector that targets a specific page – the page with the ID of 123. The background-color property changes the background color of this page to red.
You can find the ID of a page by editing the page in your WordPress dashboard and looking at the URL. The number after post= in the URL is the page ID.