Website Backup Tool
Table of Contents
How to manage my backups in SiteGround Site Tools – Video Tutorial
Our custom Backup tool lets you create backups and restore old versions of your site in a click. You can restore your whole website or just parts you need specifically, like files, databases, emails, staging copies. You get access to 30 backup copies of your site for each day of the past month if you’re on a shared hosting plan. Cloud users can restore from up to 7 days back.
Account backups are stored in a data center that is different from the one hosting the account, which reduces the risk of data loss. You can read our blog post for more information and exact locations where the backups are stored for the different accounts.
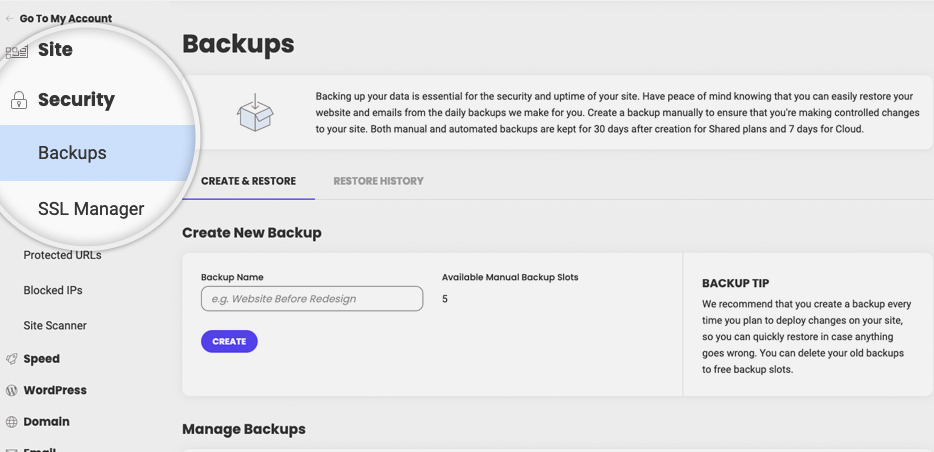
The Backup Restore solution is included and offered for free in all of SiteGround hosting plans. To access it, go to your Site Tools > Security > Backups.
Note that apart from these automated system backups made by SiteGround, you can create up to 5 on-demand backups with our GrowBig and GoGeek plans for free or create single backups with StartUp for an additional fee.
How to create backups and restore your site
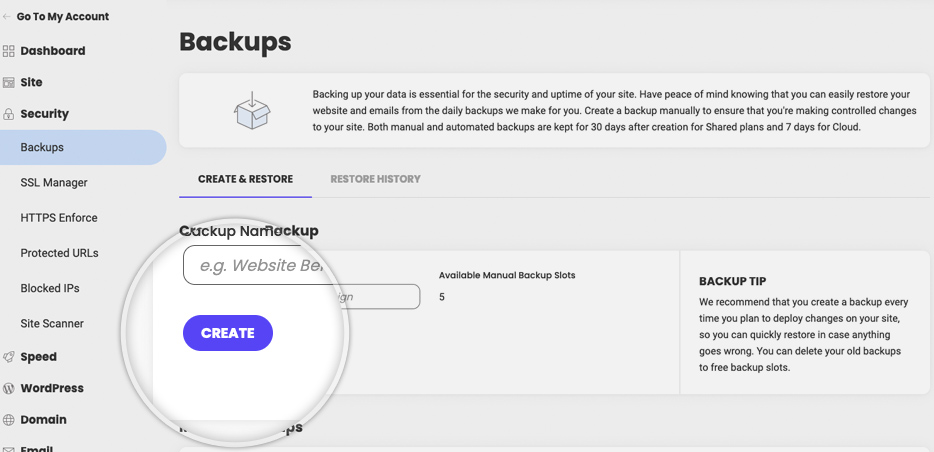
To create a new backup, once you access Site Tools -> Security -> Backups, simply fill in a name for your backup in the Backup Name field under the Create & Restore section. Click Create and in a few minutes, your website backup will be ready. The backup will include all your website’s files, databases, emails and even your Staging copies.
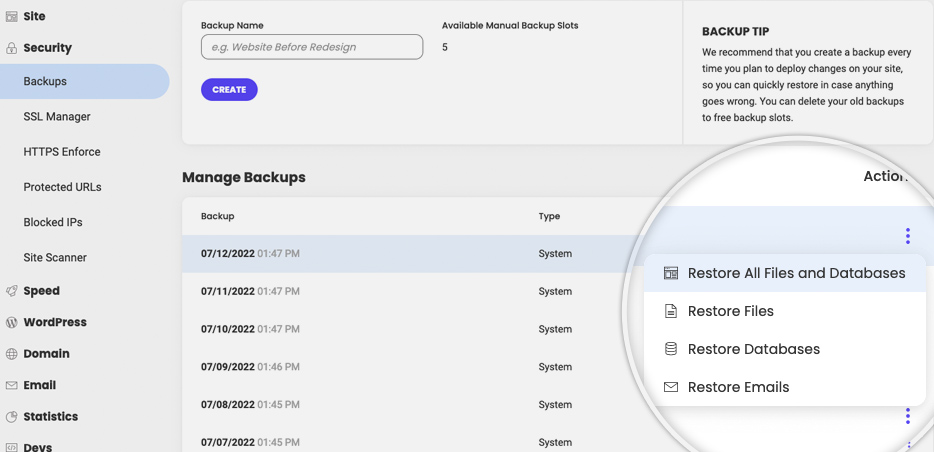
To restore website data from a backup, you need to scroll down to Manage Backups and find the desired backup. If you have several backups, use the backup date to find easily the backup you want to restore from. Then click on the Actions menu and select a restore option.
How to restore specific data
If you need to restore only your files, databases, or emails, go to Manage Backups > Actions Menu (next to the desired backup). Then, select the type of data you want to recover and follow the next respective steps.
Read in details:
- how to restore your files and/or folders;
- how to restore your email accounts;
- how to restore your database;
N.B. The restore will not delete any new files created after the backup for your account was created.
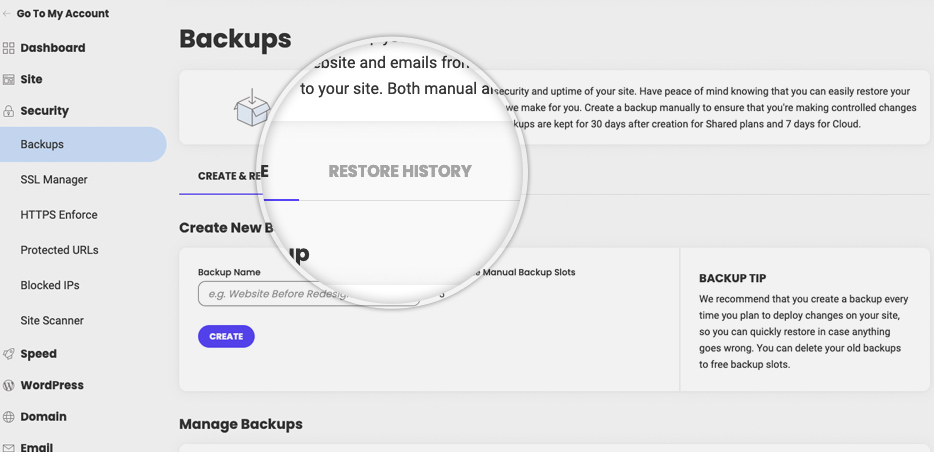
How to view your restore history
You can see the history of your restores for the last 14 days in Site Tools > Security > Backups > Restore History. In the table, you can find more information about the type of your restores, the date of restoration, and more.
Visit our next tutorials to learn how to use other tools like: