SiteGround Email Marketing Integration with Elementor Pro-Forms
Table of Contents
SiteGround Email Marketing is a powerful tool for effectively managing marketing campaigns that create conversions. At the same time, Elementor Pro Forms is a flexible tool for crafting beautiful contact forms. Integrating both, you unlock a streamlined process that captivates your audience with engaging forms and seamlessly grows your email marketing efforts.
In this guide, we’ll show you how to setup both tools to build a robust system that ensures every new contact is a step toward a successful conversion.
How to Activate the Integration?
Meet these simple requirements to activate the integration automatically:
- Your site must be running on WordPress
- You must have an active Email Marketing service
- You must have the SiteGround Email Marketing plugin’s latest version installed
- Elementor & Elementor Pro must also be active on your site.
When all the above are met, you can verify the integration is active by going to Email Marketing > Settings > Integrations.
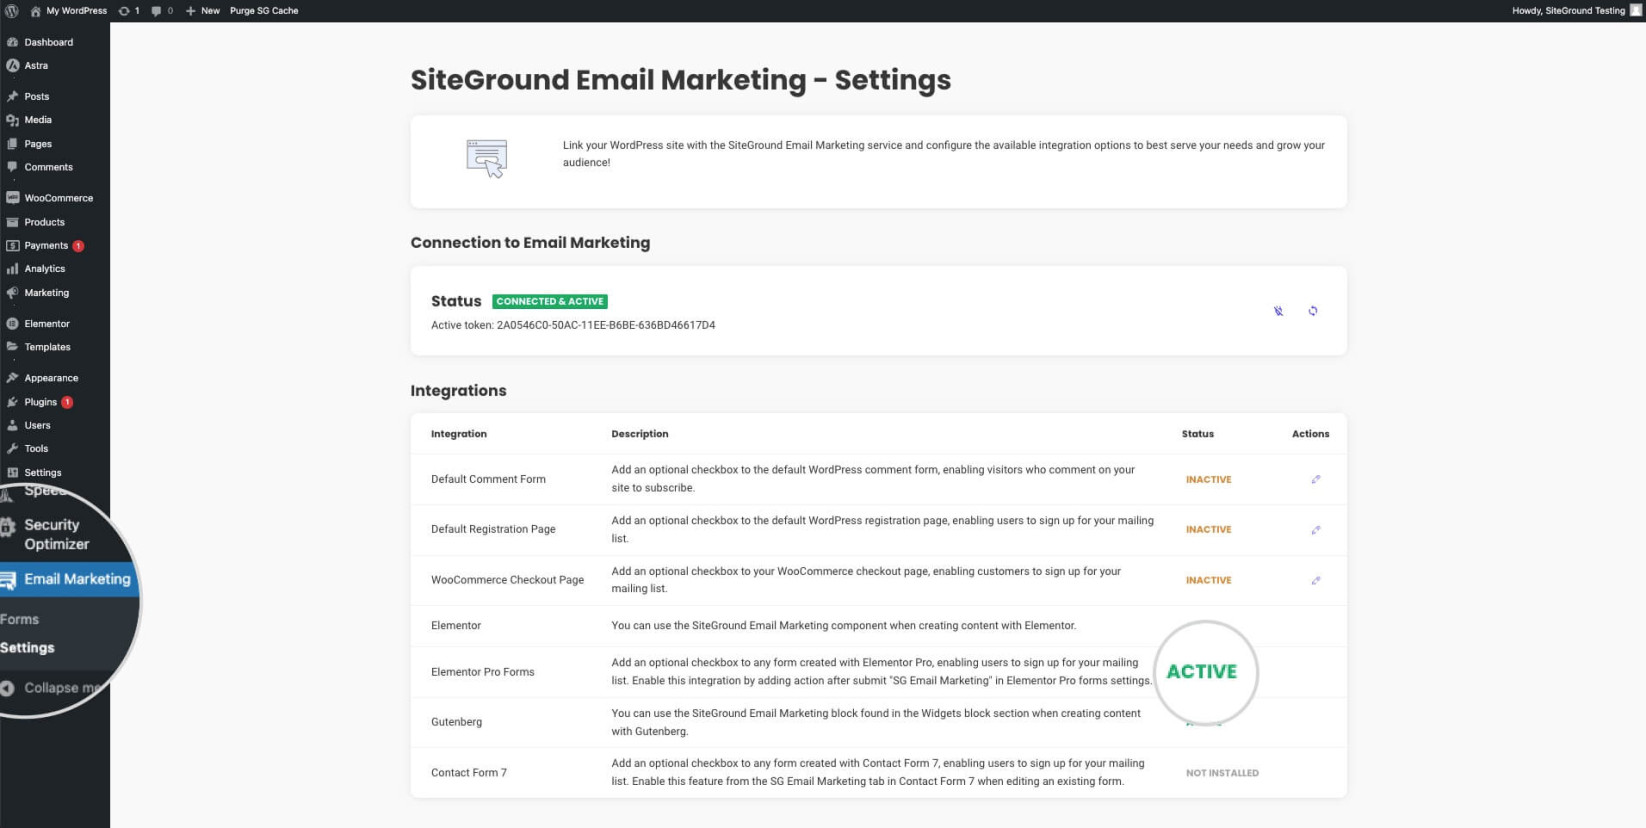
How to set Elementor Pro Forms to Add Subscribers to SiteGround Email Marketing
Once you’ve confirmed the integration is active, you may setup any form created with it to start sending contacts to your SiteGround Email Marketing following the steps below:
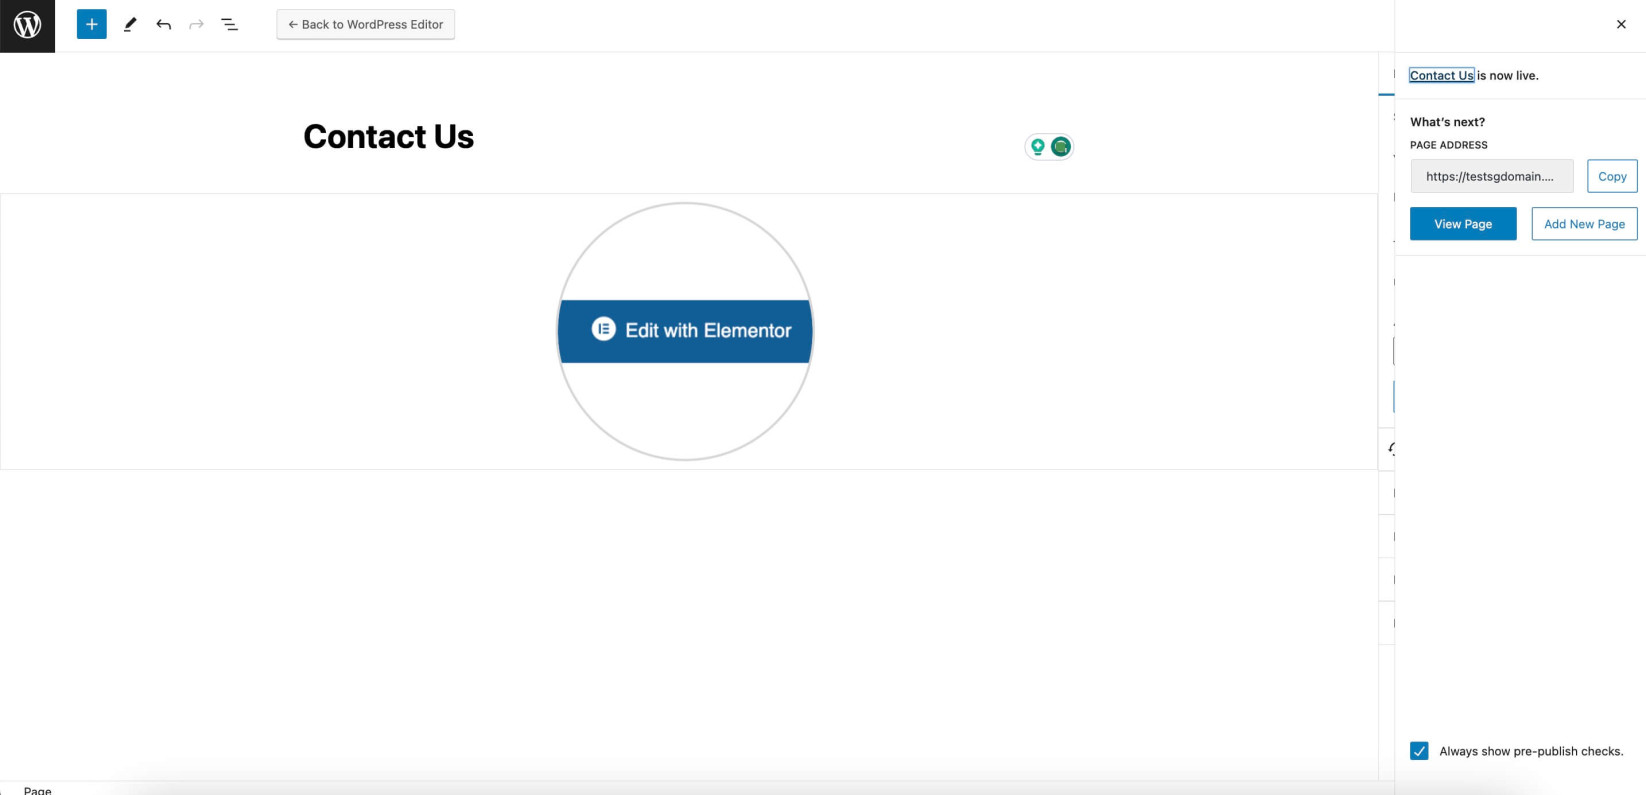
- Login to your WordPress dashboard, navigate to the Page or Post, where your Elementor Pro form is, and click on Edit with Elementor.
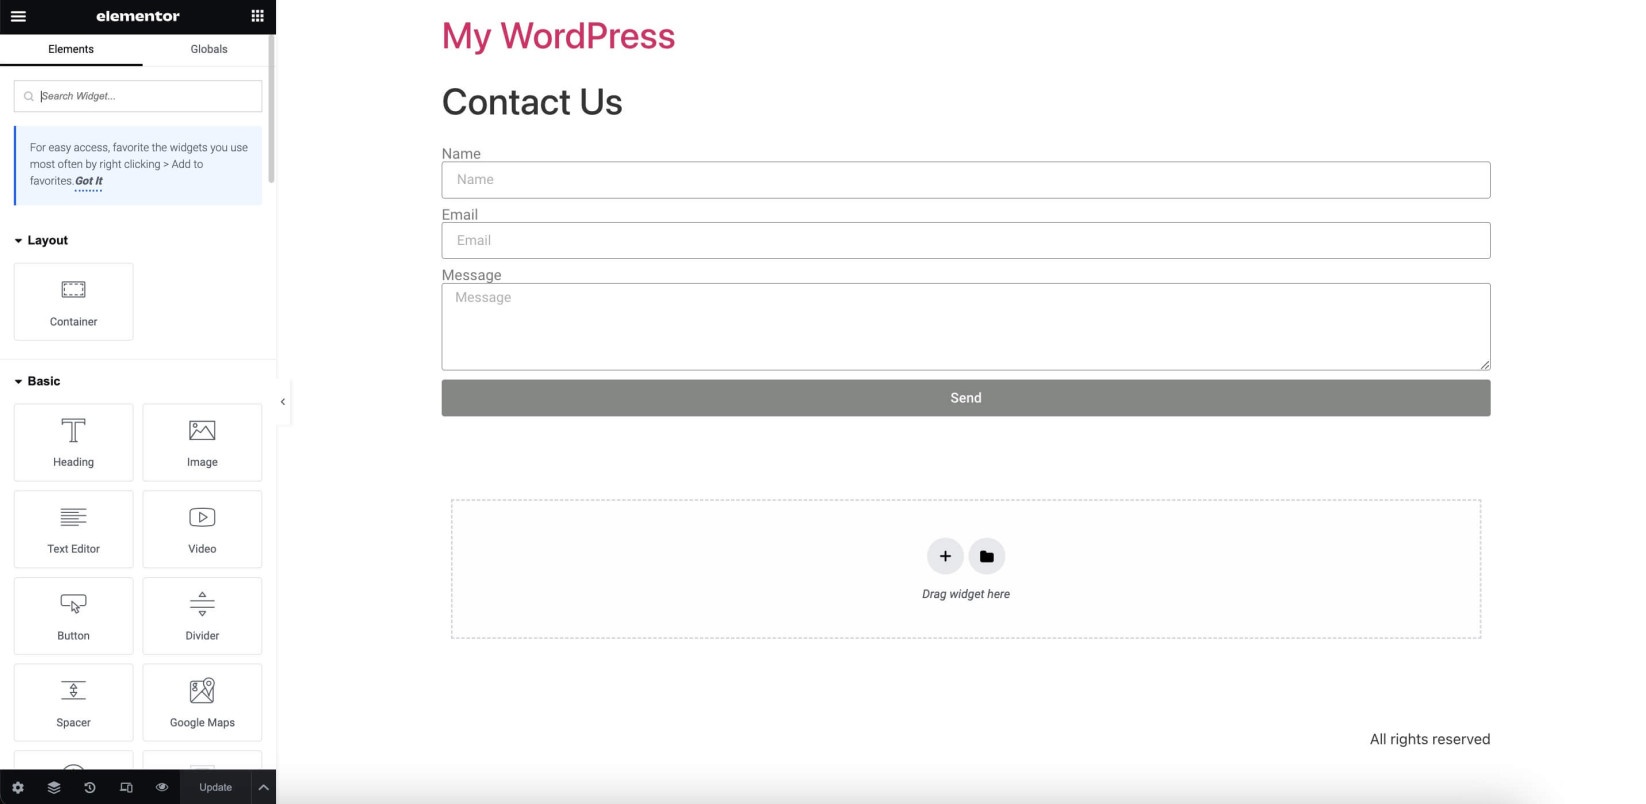
- Click on the form you want to edit in order to see its edit options on the left.
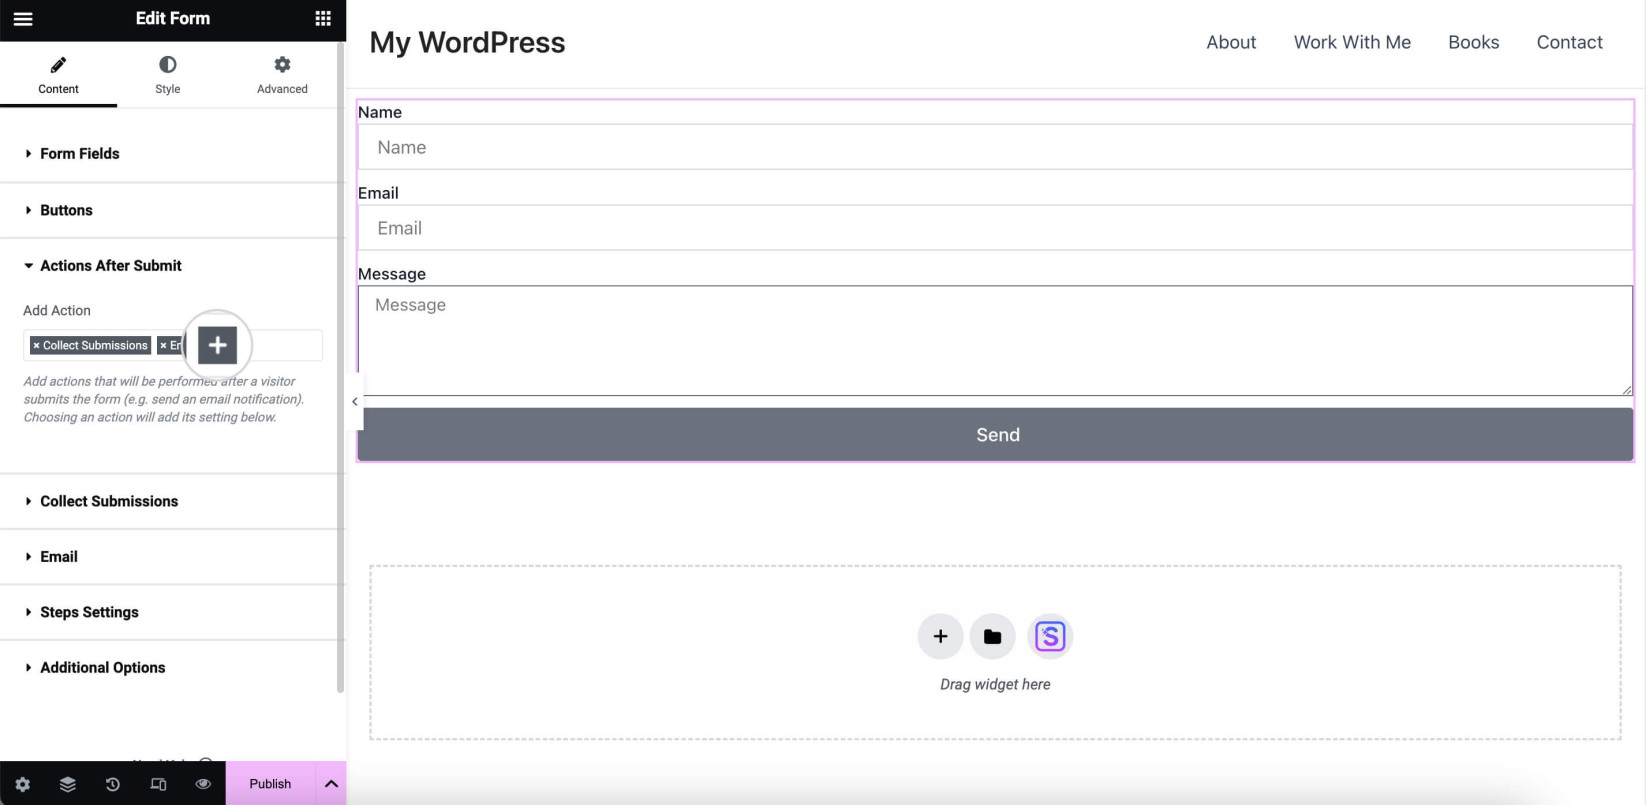
- Click the Actions After Submit tab on the Elementor Sidebar. Once the tab is expanded, hit the “+” sign under Add Actions and select the SiteGround Email Marketing service from the dropdown menu.
- Once you are done with the steps above, a new tab called SiteGround Email Marketing will appear in the sidebar, where you can manage how the form will send contacts to your email marketing tool.
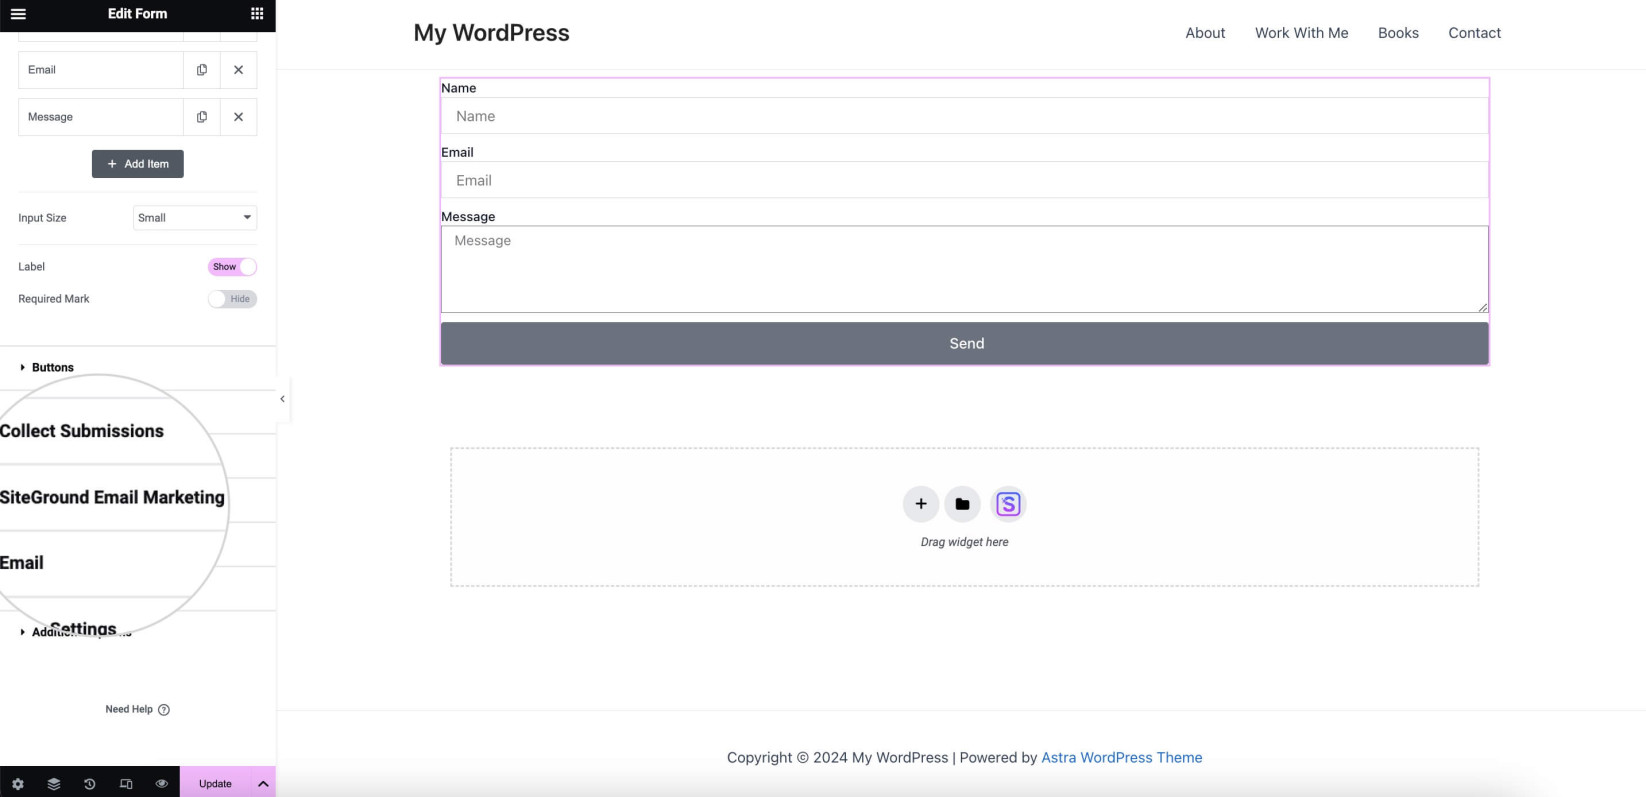
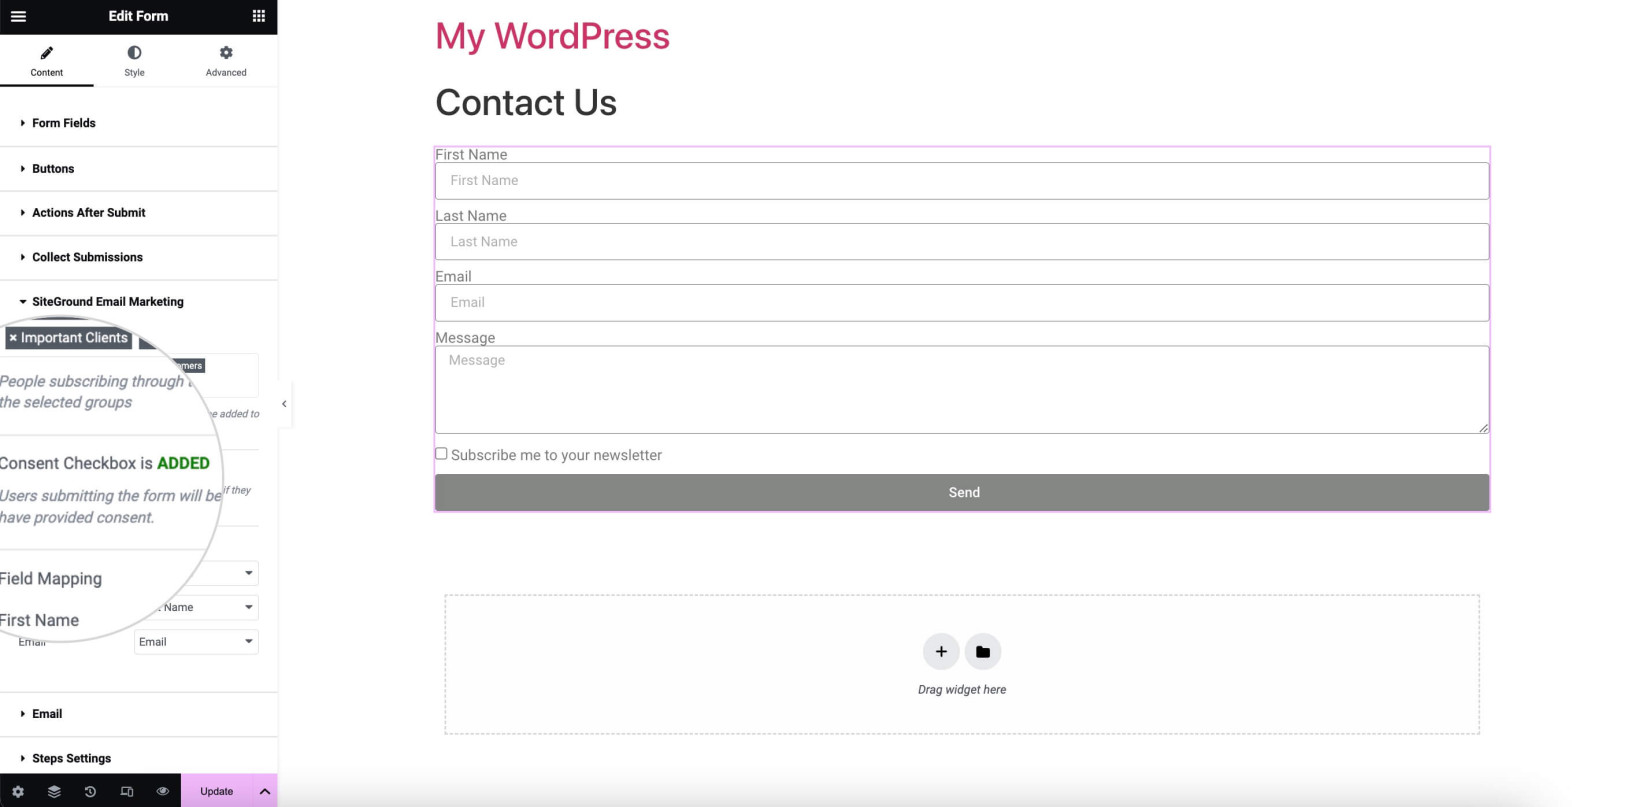
Under this tab, you can control which Groups the subscribers will be added to and how your form Fields are mapped to the SiteGround Email Marketing fields. Additionally, under this tab, you can see whether the Consent Checkbox is added to the contact form.
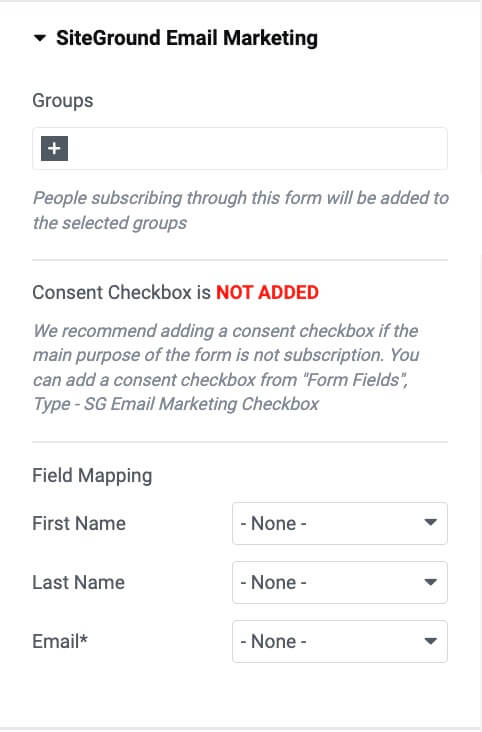
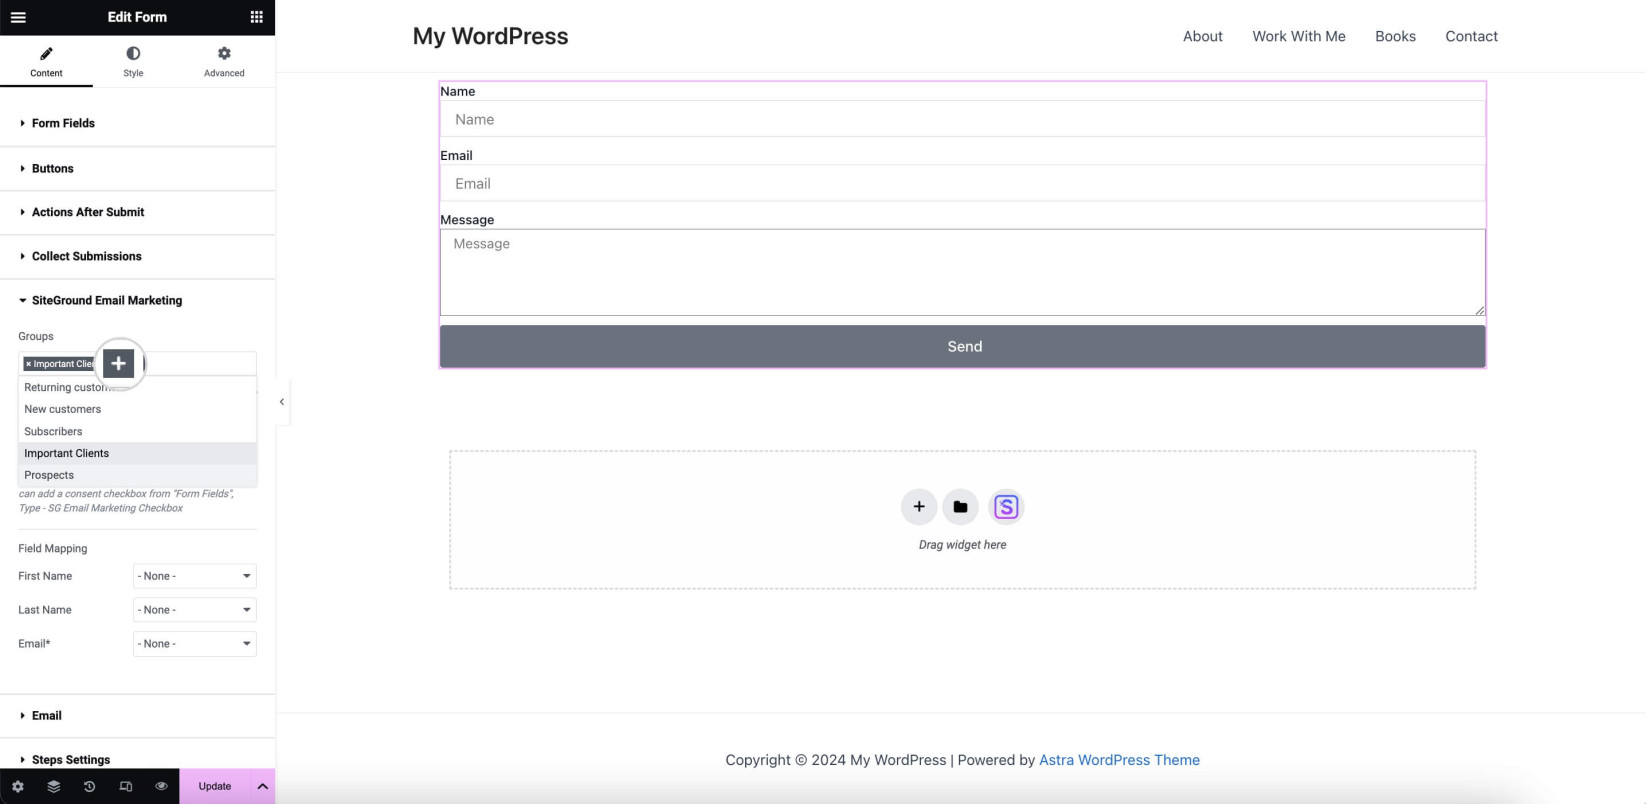
- To add Groups from the dropdown menu, click on the “+” sign and select the groups to which you want to add the people who fill out your contact form.
- Proceed to the Field Mapping section to Match your Form Field values with SiteGround Email Marketing.
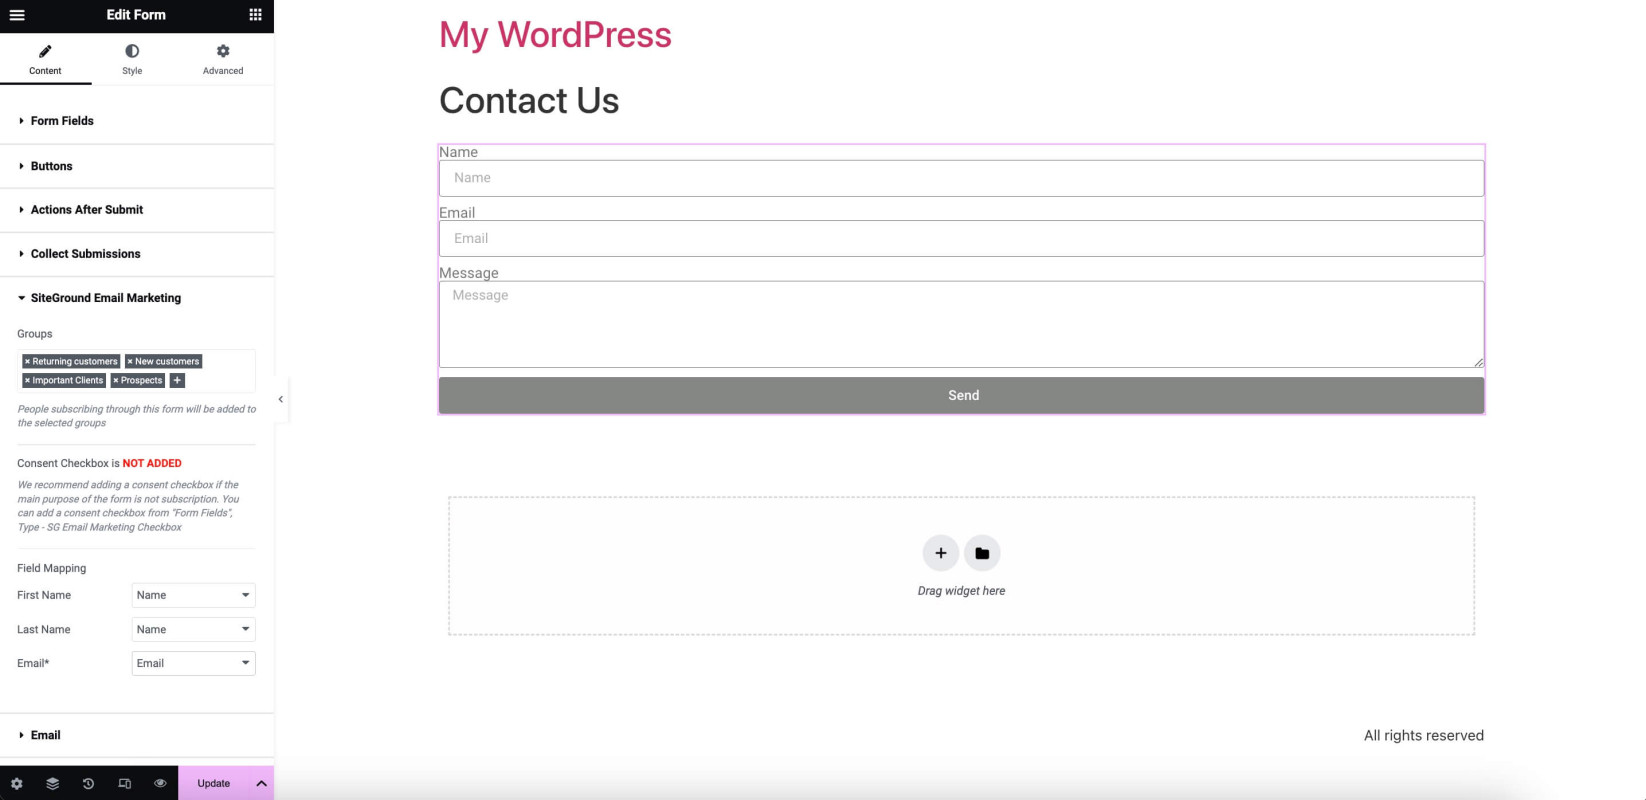
SiteGround Email Marketing stores your subscriber’s data by First Name, Last Name and Email. However, the default Elementor Pro Form contains just one field for name.If someone puts more than one name in this box, SiteGround Email Marketing will do its best to split them up and save them as First and Last names. Still, you must map your Name field to First Name and Last Name options under the Field Mapping section in the SiteGround Email Marketing tab.
How to add a subscription consent checkbox to your Elementor Pro Form?
You should always add a subscription consent checkbox if the form’s main purpose is not subscription. All contact forms used for email marketing must include such a checkbox. With it, you ensure your form complies with legal standards and builds user trust to maintain a high-quality subscriber list.
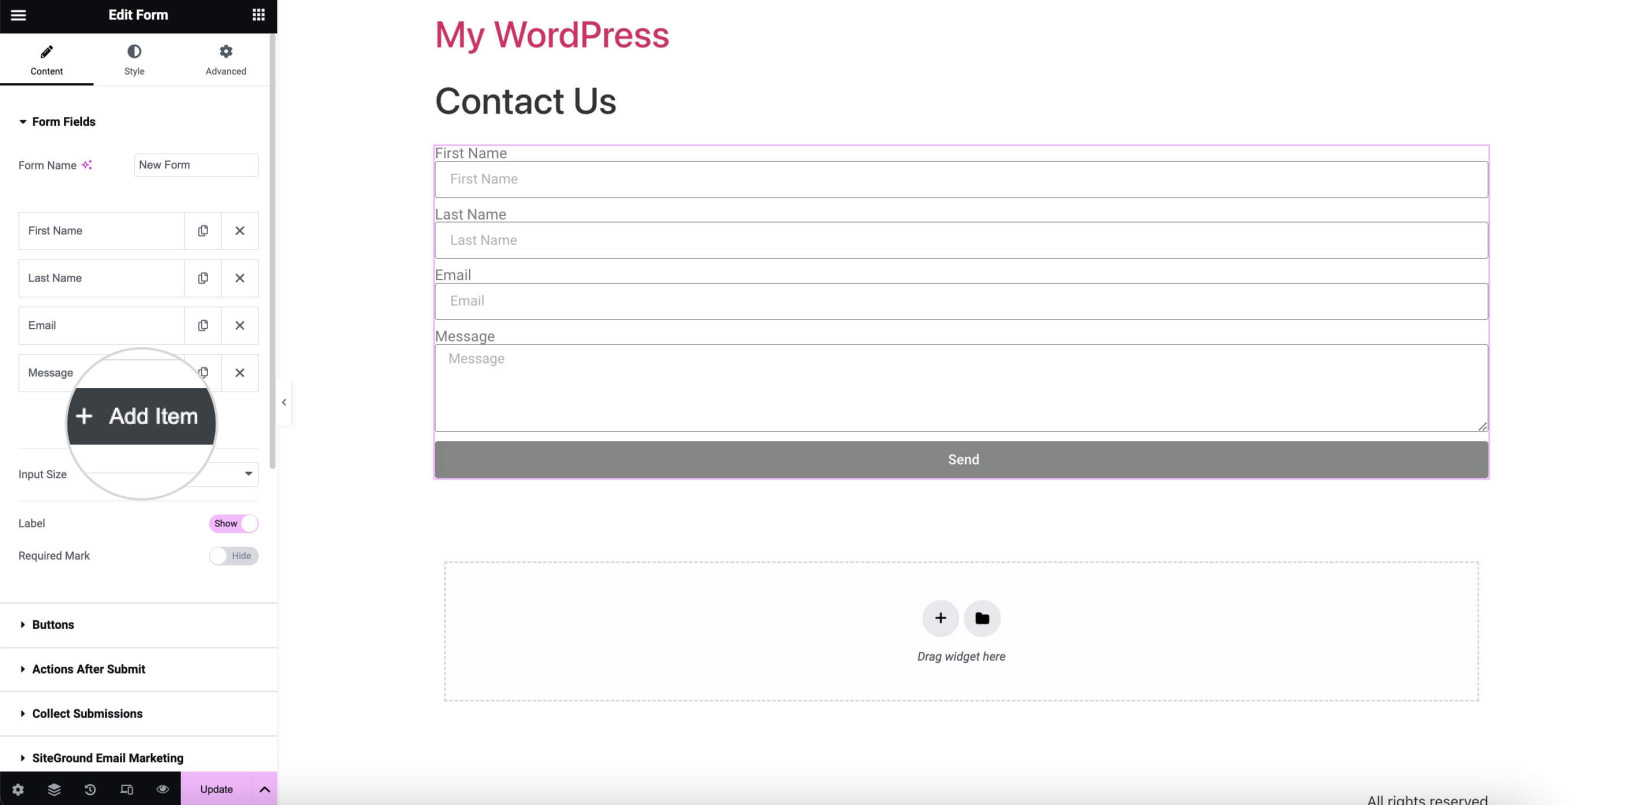
- To Add a Consent Checkbox, expand the Form Fields tab in the Elementor Sidebar and click the Add Item button.
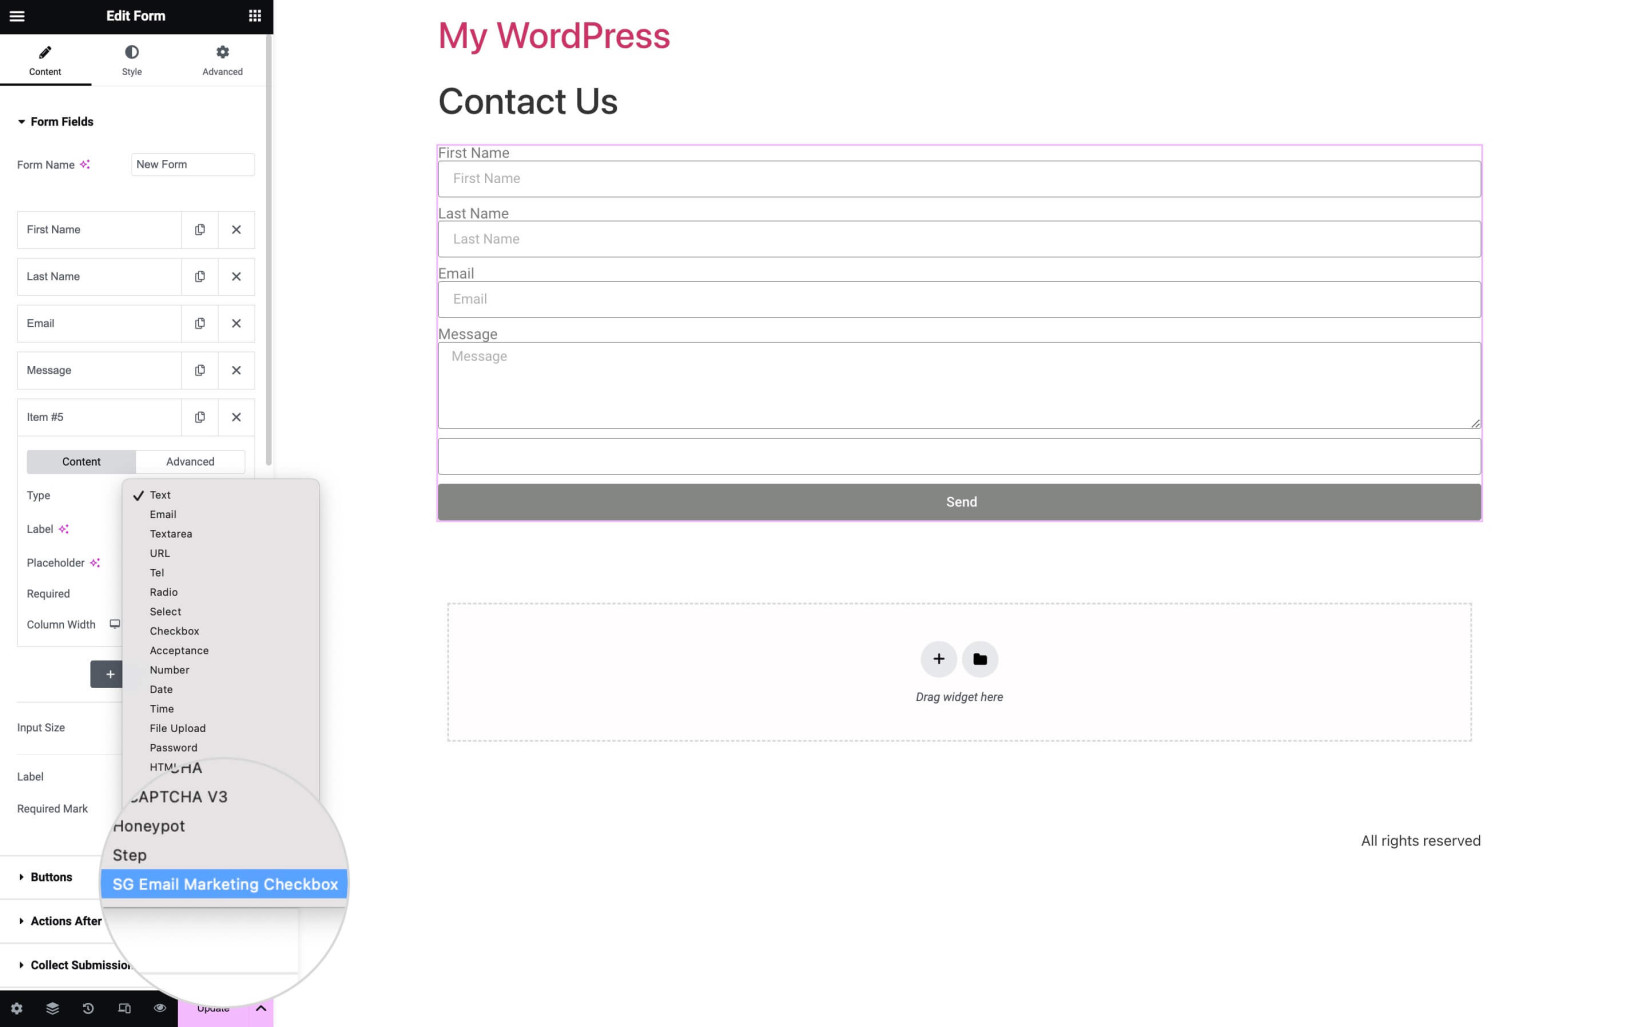
- Select the field Type by selecting SG Email Marketing Checkbox from the dropdown menu.
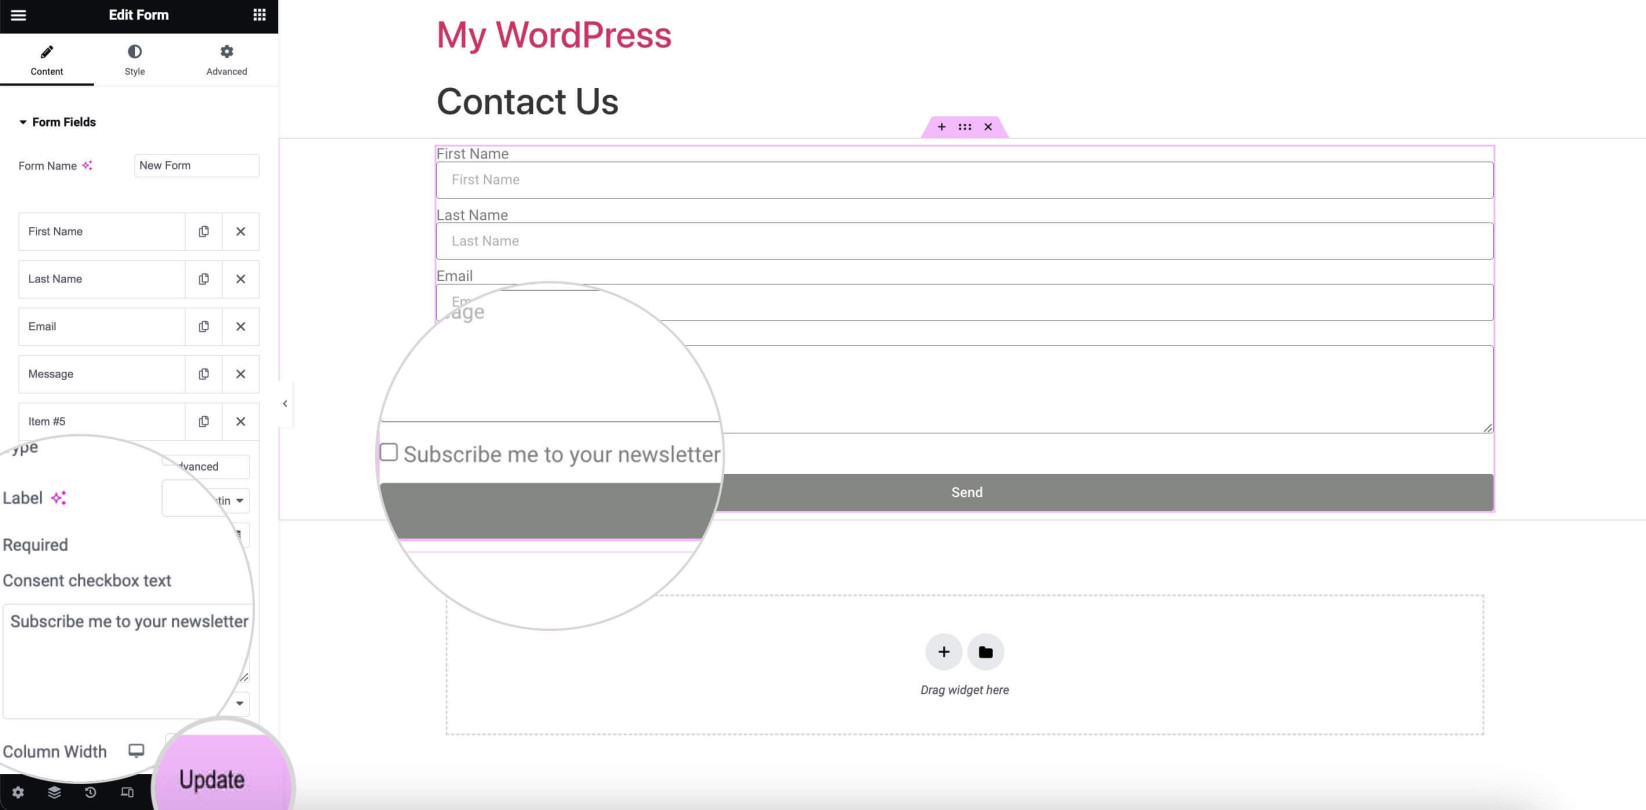
- You can also change the Consent Checkbox text from the field below
- Check to confirm if the Consent Checkbox is ADDED under the SiteGround Email Marketing tab.
Now that both tools are integrated, your Elementor Pro-Form will start adding your subscribers to your SiteGround Email Marketing Contact list. This can significantly boost your email list and enhance your marketing efforts.
Following these straightforward steps, you create a seamless connection between your forms and email campaigns. This way, you ensure that every new sign-up is a potential lead. Get started today and watch your email marketing thrive!