How to edit the hosts file on Windows, Mac, or Linux
Table of Contents
Have you ever found yourself in a situation where you’ve transferred your website to a new hosting, and you want to preview how it works before pointing to the website’s domain? Luckily, this is perfectly possible, and one of the most popular methods of doing this is by editing your computer’s hosts file.
In this article, we’ll examine what the hosts files are and what their applications.
Before DNS was introduced, there was no centralized and automated system for hostnames’ resolution. Each computer or local network used to rely on its host file, which contains a list of known hostnames and their respective IP addresses.
Since DNS was implemented, computers are no longer dependent on this file as they can fetch the hostnames’ addresses automatically from the DNS network.
However, the host file remains even in the latest operating systems (OS) as it is still useful.
You can map a chosen domain to an IP address of your choice. This change is local, it works only for your computer without affecting other visitors. The most common cases when you may want to use your host file are:
- You are starting a new website, but haven’t registered a domain name yet. You can modify your host file to connect a non-existent domain to the hosting’s IP and start building the website.
- You’ve migrated an existing website from one hosting to another. You want to preview how the migrated website works on the new hosting before you close your previous hosting account. So, you don’t want to connect your domain to the new hosting yet, but you need to preview how the website loads from the new hosting.
- You want to block access to a website from your own computer. This can be easily done by pointing a website’s domain to the invalid address 0.0.0.0, creating a loopback.
How to find your website’s IP address?
The hosts files are most commonly used to force a connection between your website, and a domain name that is pointed by DNS records to another address. In order to do that, you must begin by obtaining your website’s IP address.
The address is usually found in your hosting account’s control panel. For SiteGround users this is located in the website’s Site Tools > Dashboard > IP and Name Servers > Site IP.
To have an example for this exercise, we’ve created a website named my-new-website.com. This domain name is not registered and, therefore is non-existent and has no DNS records. Any visitor who tries to open this address will see the error “This site can’t be reached”.

In this case, the address is 35.214.215.226 which needs to be used in the hosts file when mapping my-new-website.com to this website.
Similarly, you can create a website, name it after a domain name pointing by DNS elsewhere, and map the domain to the website with your hosts file.
Read along to find out how you can edit your hosts file depending on the OS you are using.
How to edit the hosts file in Windows 8, 10 and 11?
Editing the hosts files on all Windows versions is essentially the same – you have to edit the hosts files with Notepad. The only difference is that from Windows 7 onwards, you must run Notepad as an administrator, whereas in older versions (Windows XP and earlier) this is not mandatory.
However regardless of the Windows version, the default Windows host file location is identical, unless you installed the OS in a different partition:
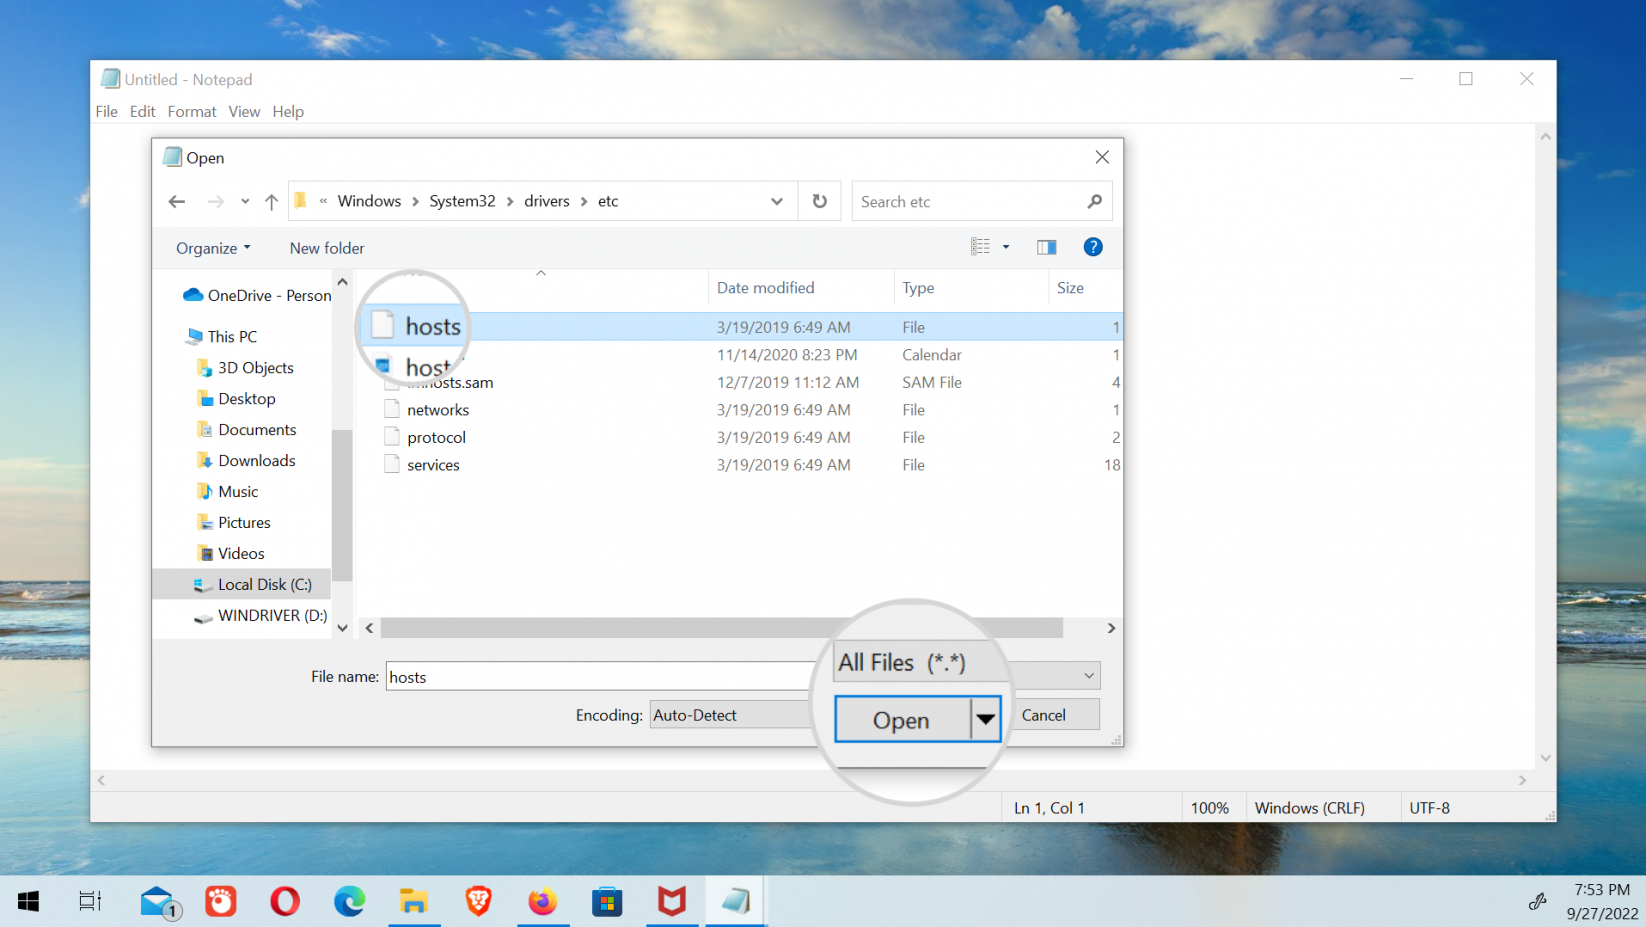
C:\Windows\System32\drivers\etc\hosts-
Step 1: Open Notepad from Windows Menu
In this guide, we’ll edit the hosts file on Windows 10. To begin with, click on the Windows icon (Start menu).
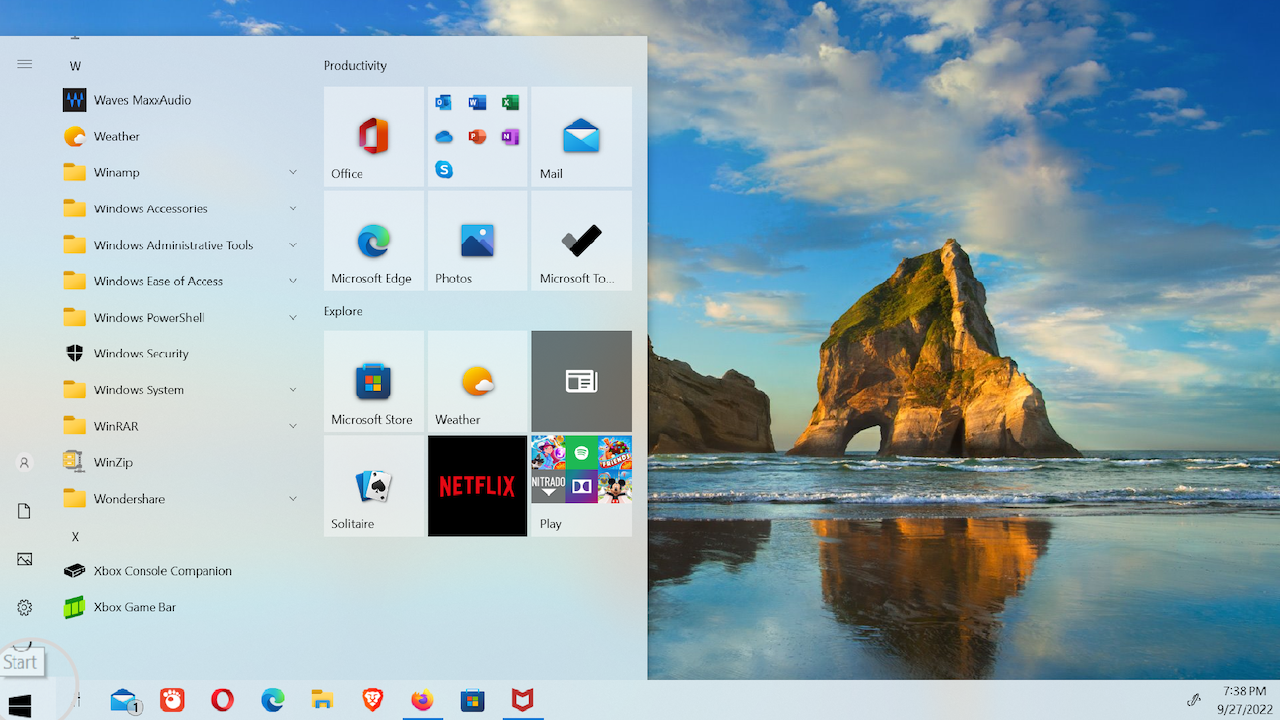
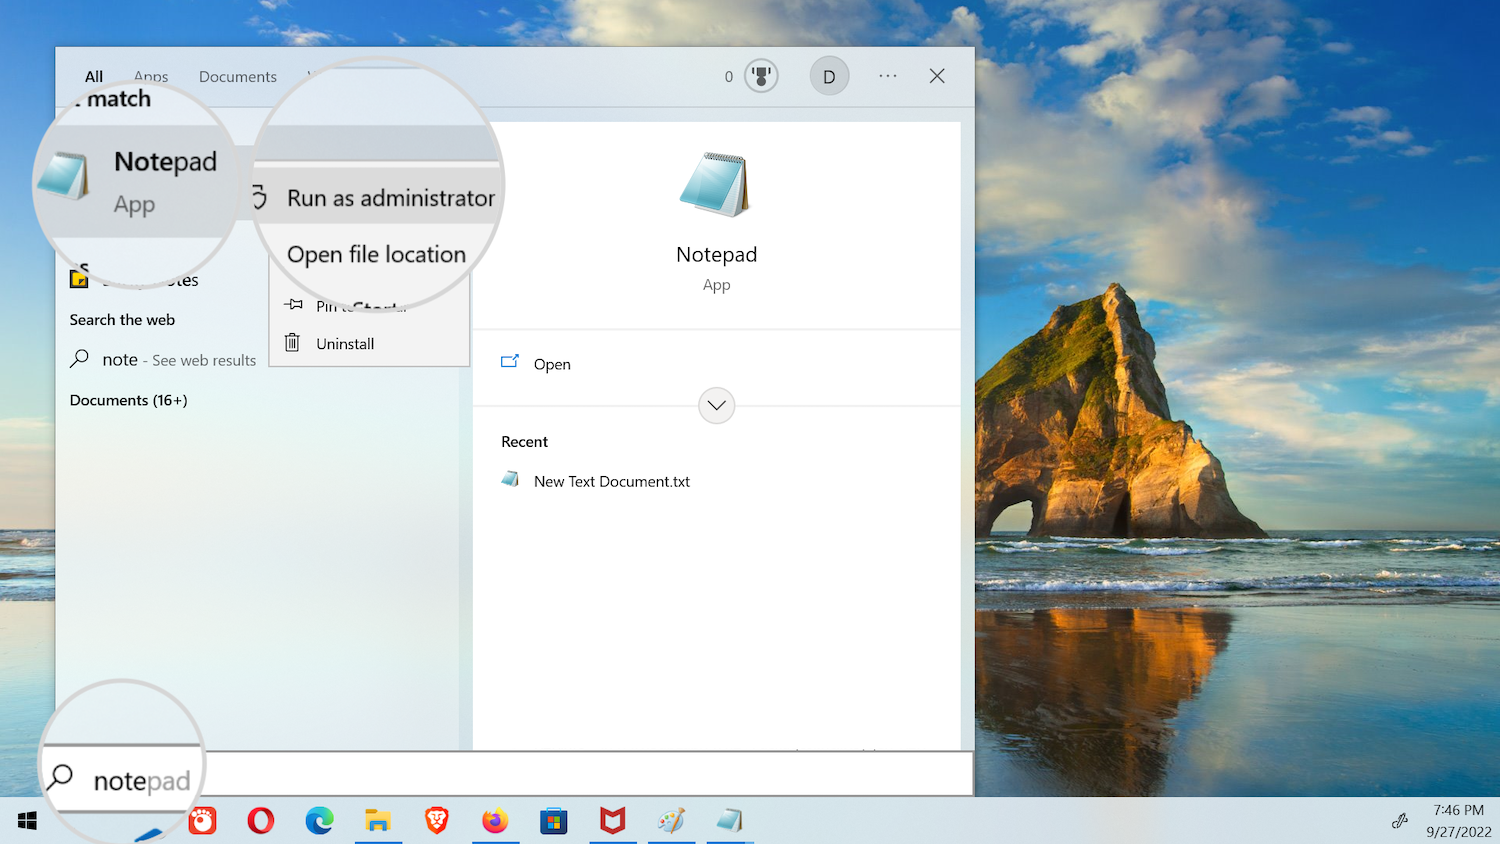
Start typing Notepad, which automatically enables the search function. The first result will be Notepad. Right-click on the icon and select Run as administrator.
-
Step 2: Open the hosts file in Notepad
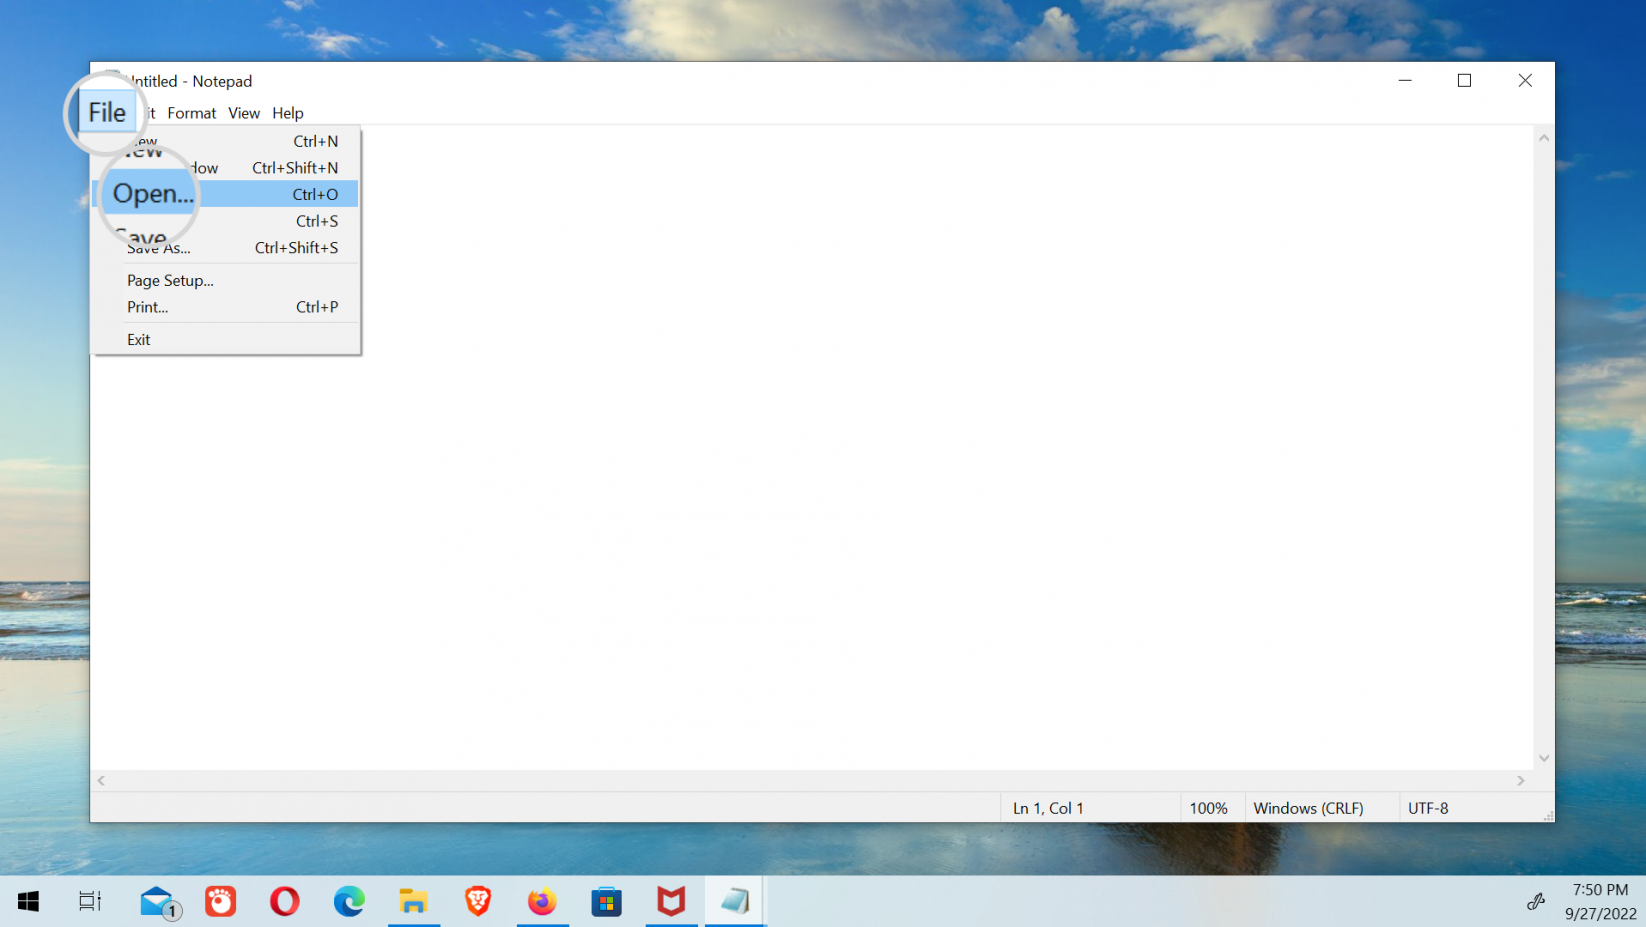
From Notepad’s window, click on the File menu and select Open, which will open a file selector box.
Make sure to select All Files otherwise the hosts file won’t show in the dialogue box as it is a hidden file and doesn’t have a .txt extension. Navigate to the hosts file path, select the file, and press Open.
-
Step 3: Edit the hosts file
The Windows 10 hosts file is pretty much the same as on any other operating system. It contains a few lines defining the address for the local host and other services, although it should be noted that they are commented with the “#” symbol. This means that they are not enabled but only left as examples.
To add your custom hostname’s settings, write a new line at the bottom of the file, omitting the “#” symbol.
The new entry should be in the following format:
IP_address yourdomain.com www.yourdomain.comReplace “IP_address” with the actual website’s IP and “yourdomain.com” with the domain you are mapping to the IP.
In our case, we are connecting the non-existing domain my-new-website.com to the IP address 35.214.215.226, therefore the line will read:
35.214.215.226 my-new-website.com www.my-new-website.com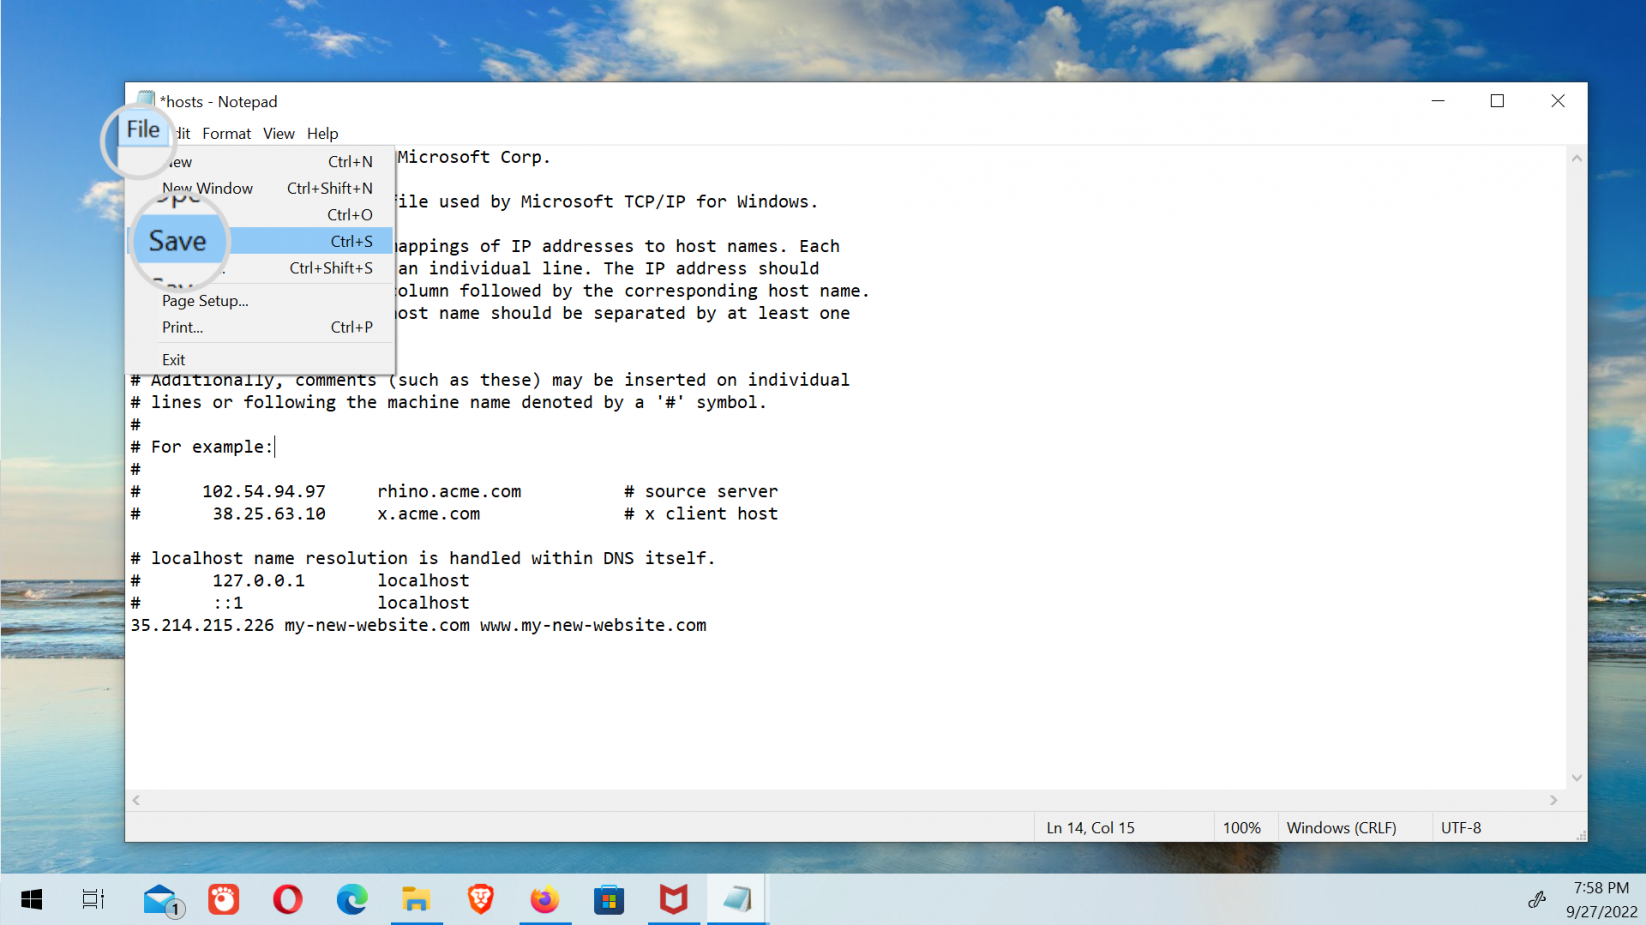
To keep the new changes, save the file with the keyboard shortcut Ctrl + S, or from File menu > Save.
How to edit the host file on any macOS version
-
Step 1: Open Terminal in macOS
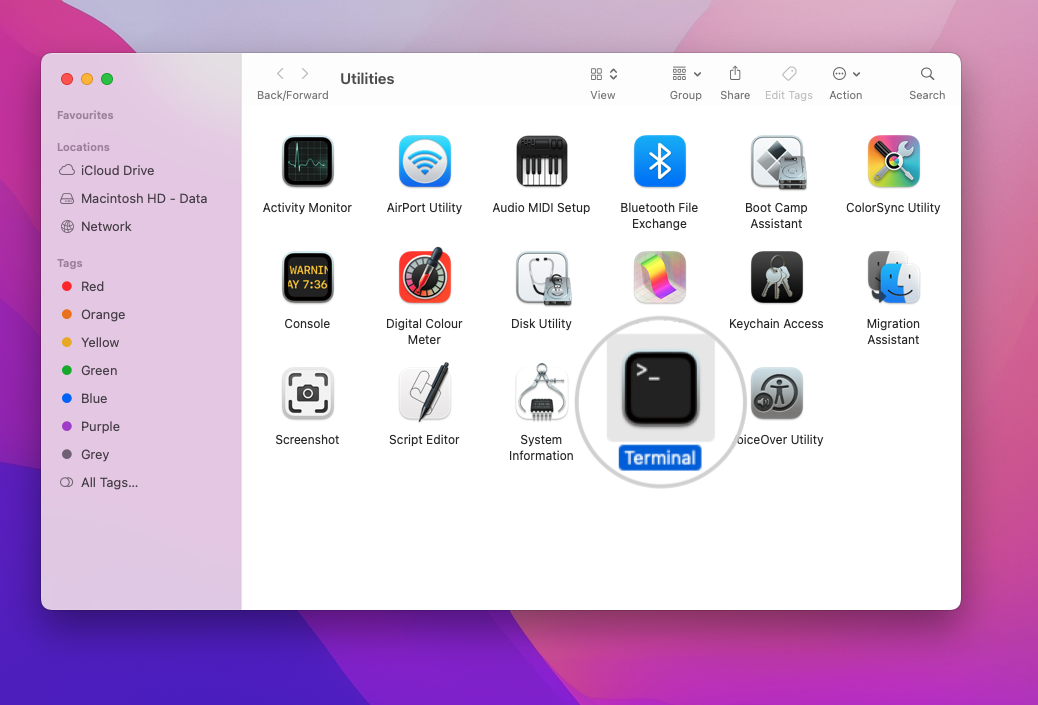
You need to use the Terminal application to edit the Mac hosts file. To open it, navigate to Finder > Go > Utilities.

Open the Utilities menu where the tools for Mac can be accessed. Find the Terminal icon and double-click on it.
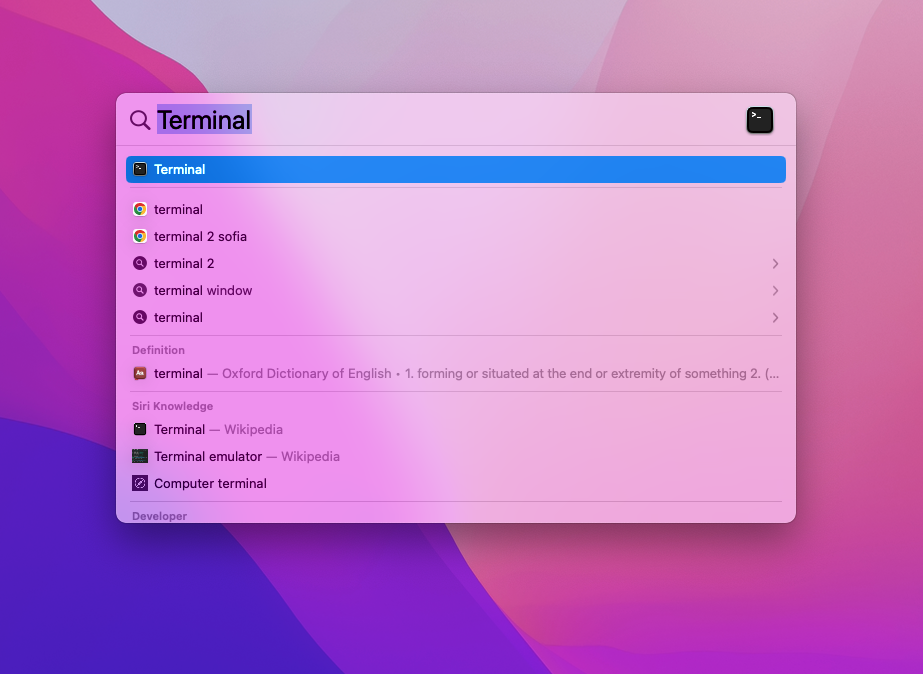
Alternatively, you can quickly open Terminal by bringing up the Spotlight Search bar with the keyboard shortcut Command + Space. In the pop-up window, type Terminal and press Enter.
-
Step 2: Open the hosts file in Terminal
Once the Terminal window is open, you can edit the hosts file with one of the available text editors.
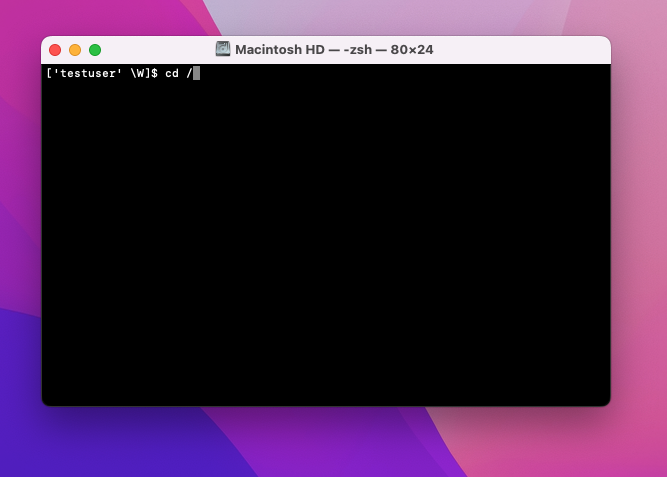
First, make sure you are located in your Mac’s top-level folder by typing the command:
cd /Press Enter to confirm the command, which will bring you to your Macintosh HD main folder.
The hosts file’s location on Mac computers is:
/private/etc/hostsIn our example, we are using the Nano text editor. To be able to modify the hosts file, you need to have administrator privileges (sudo). The command to open the file is:
sudo nano /private/etc/hosts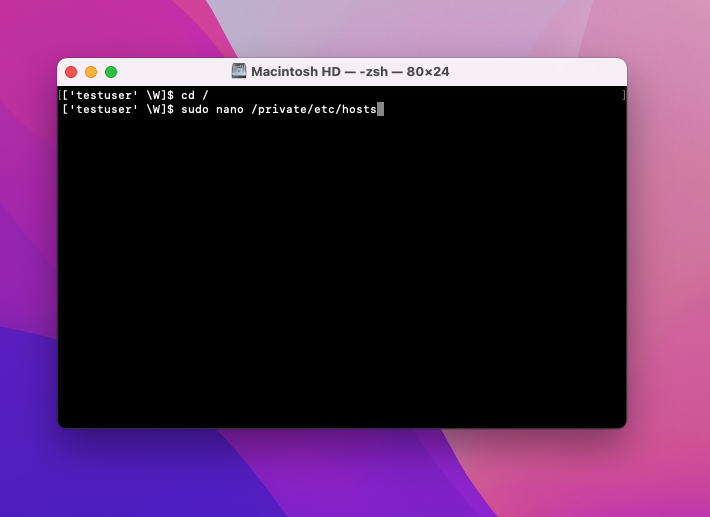
Once you’ve confirmed the command with Enter, you will be asked to provide the administrator password. Type in the password and confirm with Enter.

-
Step 3: Edit the hosts file in Terminal
This is where you can add your custom hostname settings. By default, the file only contains a few lines defining the address for localhost and broadcasthost.
With the arrow keys, move the cursor under the last line where you can add a new entry. To point a domain to a specific server use the following format:
IP_address yourdomain.com www.yourdomain.comYou must replace IP_address with the website’s IP and yourdomain.com with the actual domain name.
In our example, we want to use the non-existing domain my-new-website.com, which is not registered and doesn’t have active DNS settings.
The website for my-new-website.com is hosted on the IP address 35.214.215.226.
So, to force a computer to open this domain from that IP address, you should add the following line in the hosts file:
35.214.215.226 my-new-website.com www.my-new-website.com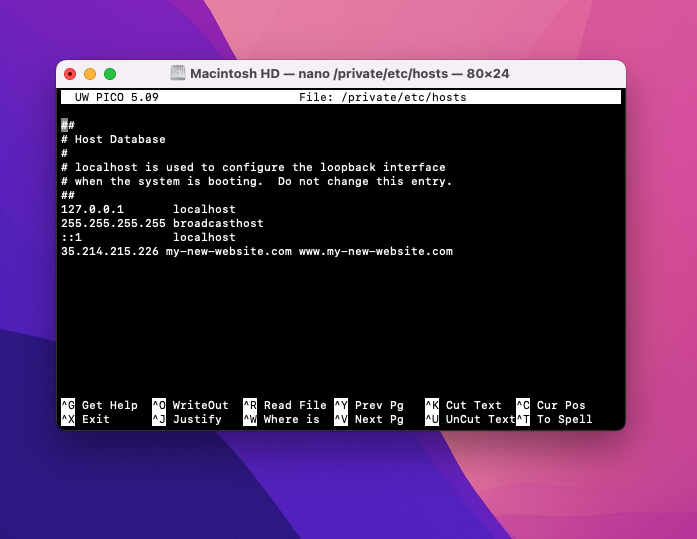
After you’ve finished adding the new settings, press the combination Control + O (WriteOut) to confirm them and then hit Enter. Finally, you can press Control + X to exit the Nano editor.
Edit the Linux host file
-
Step 1: Open Terminal in Linux
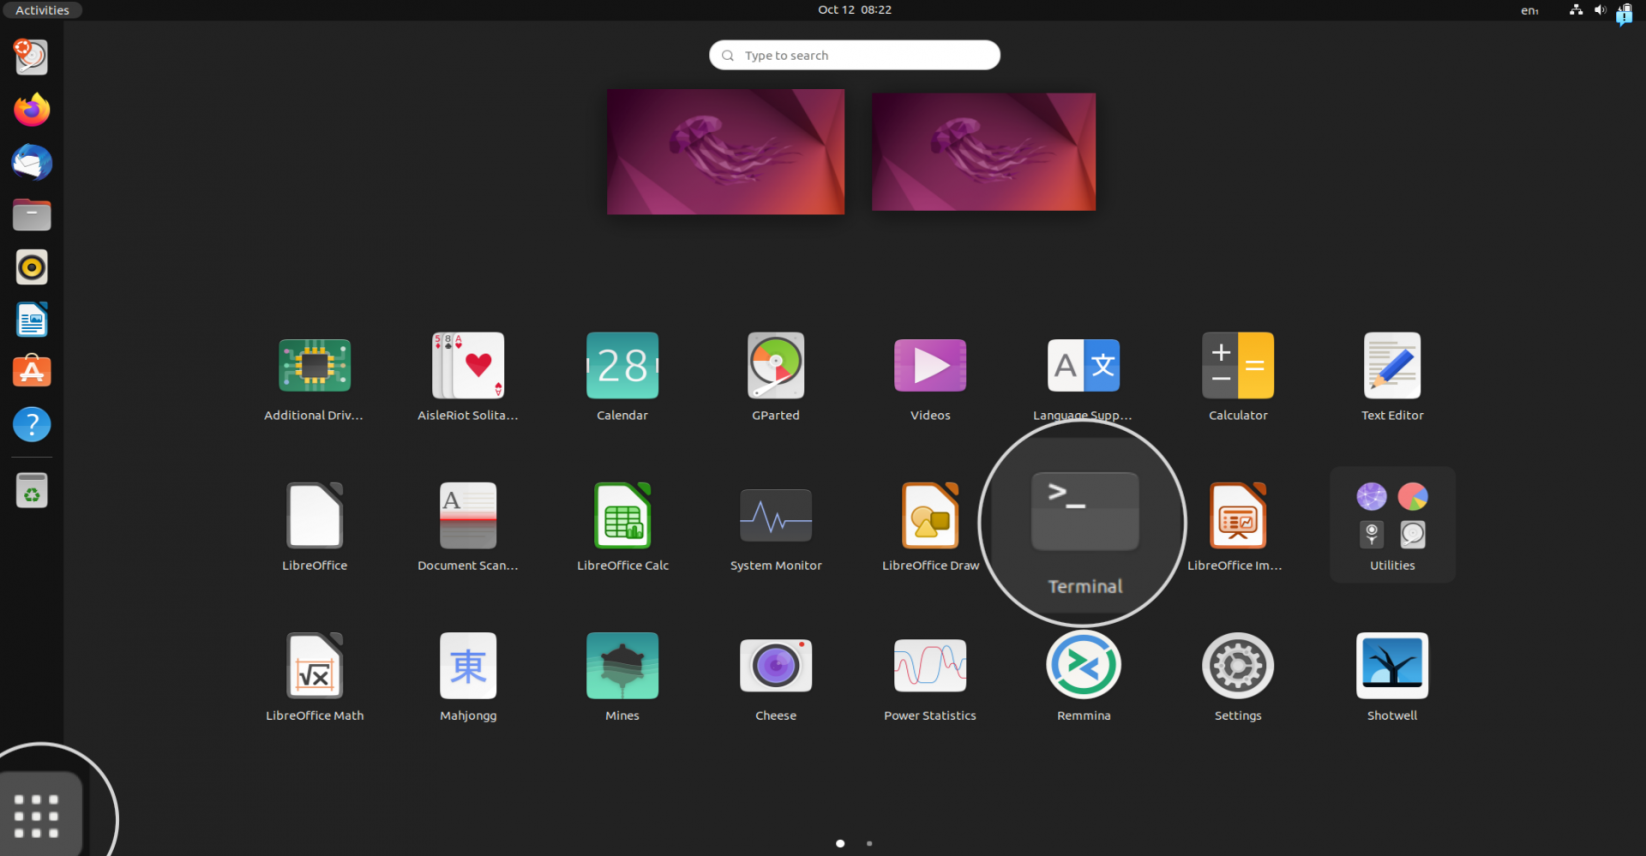
Just like in macOS, you can edit the hosts file on a Linux operating system from the Terminal application. To open the menu with all applications, navigate to the respective button in the bottom left corner. Depending on the Linux version, the tool may be located on the main page or in the Utilites section. Select the Terminal icon to open the application.
-
Step 2: Open the hosts file in Terminal
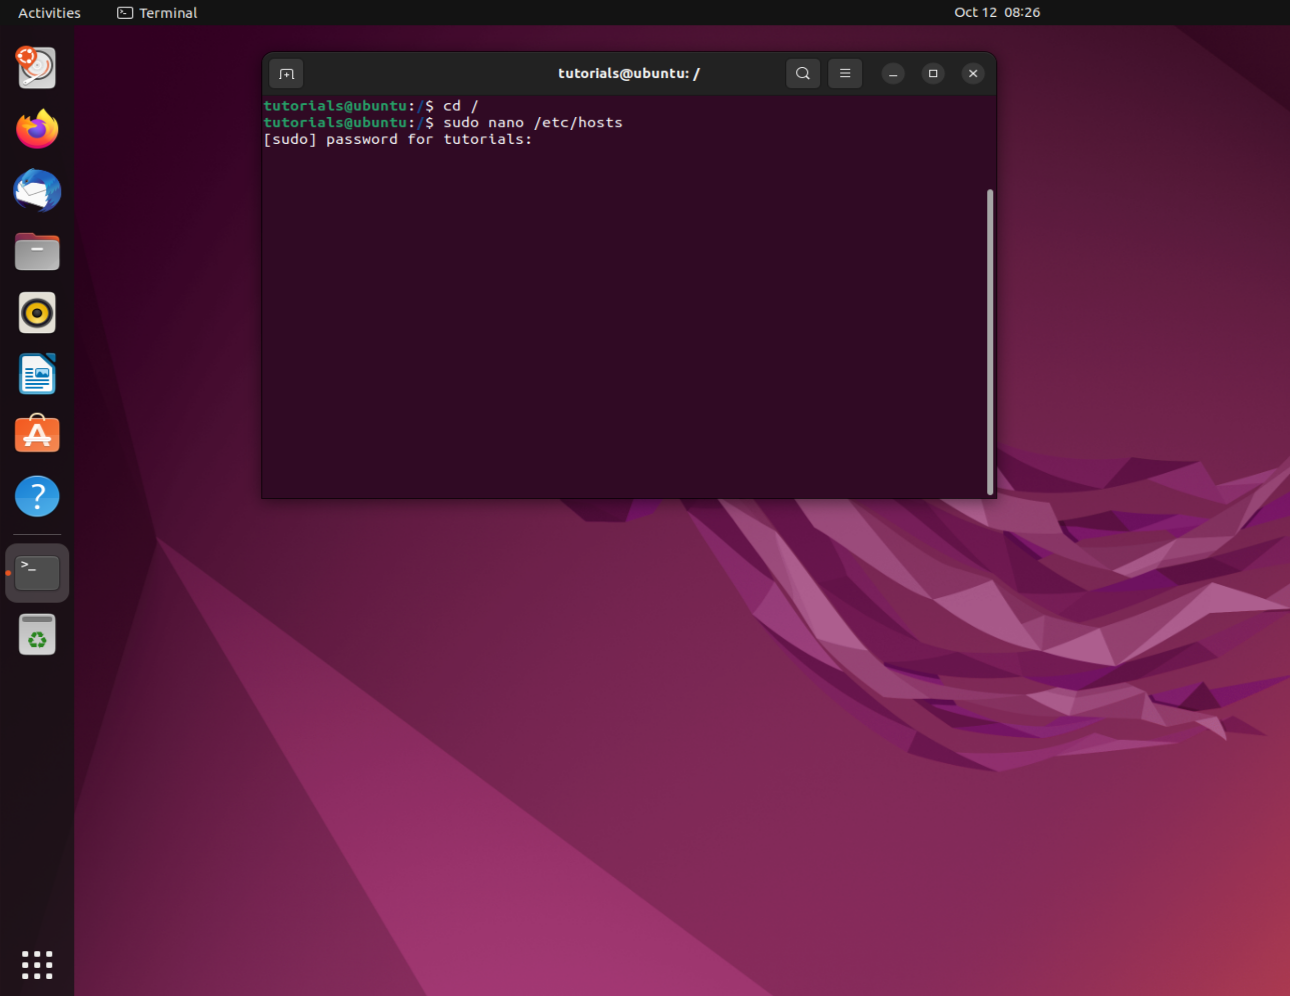
Once inside the Terminal console, make sure you are in the top-level folder by typing the command:
cd /The path to the hosts file on Linux is:
/etc/hostsEditing the file requires administrative privileges (sudo) and a text editor such as Nano. Use the following command to open and edit the file:
sudo nano /etc/hosts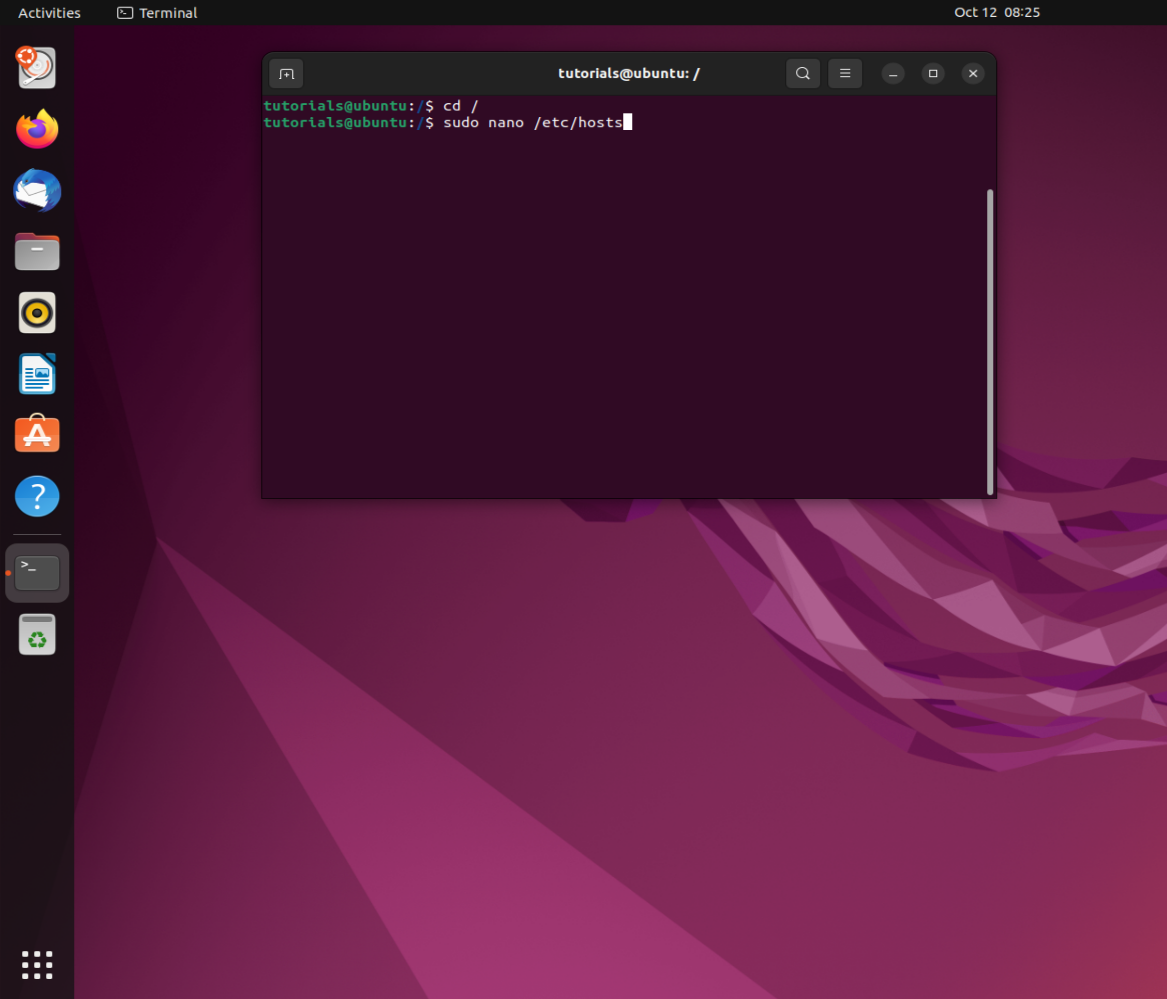
The system will prompt you to provide the administrator’s password before opening the file. After you type the password, press Enter.
-
Step 3: Edit the hosts file in Terminal
With the arrow keys, place the text cursor under the last written line and add the hostname settings. In our case, we are adding an address with the hostname my-new-website.com. Therefore, the line should read:
35.214.215.226 my-new-website.com www.my-new-website.com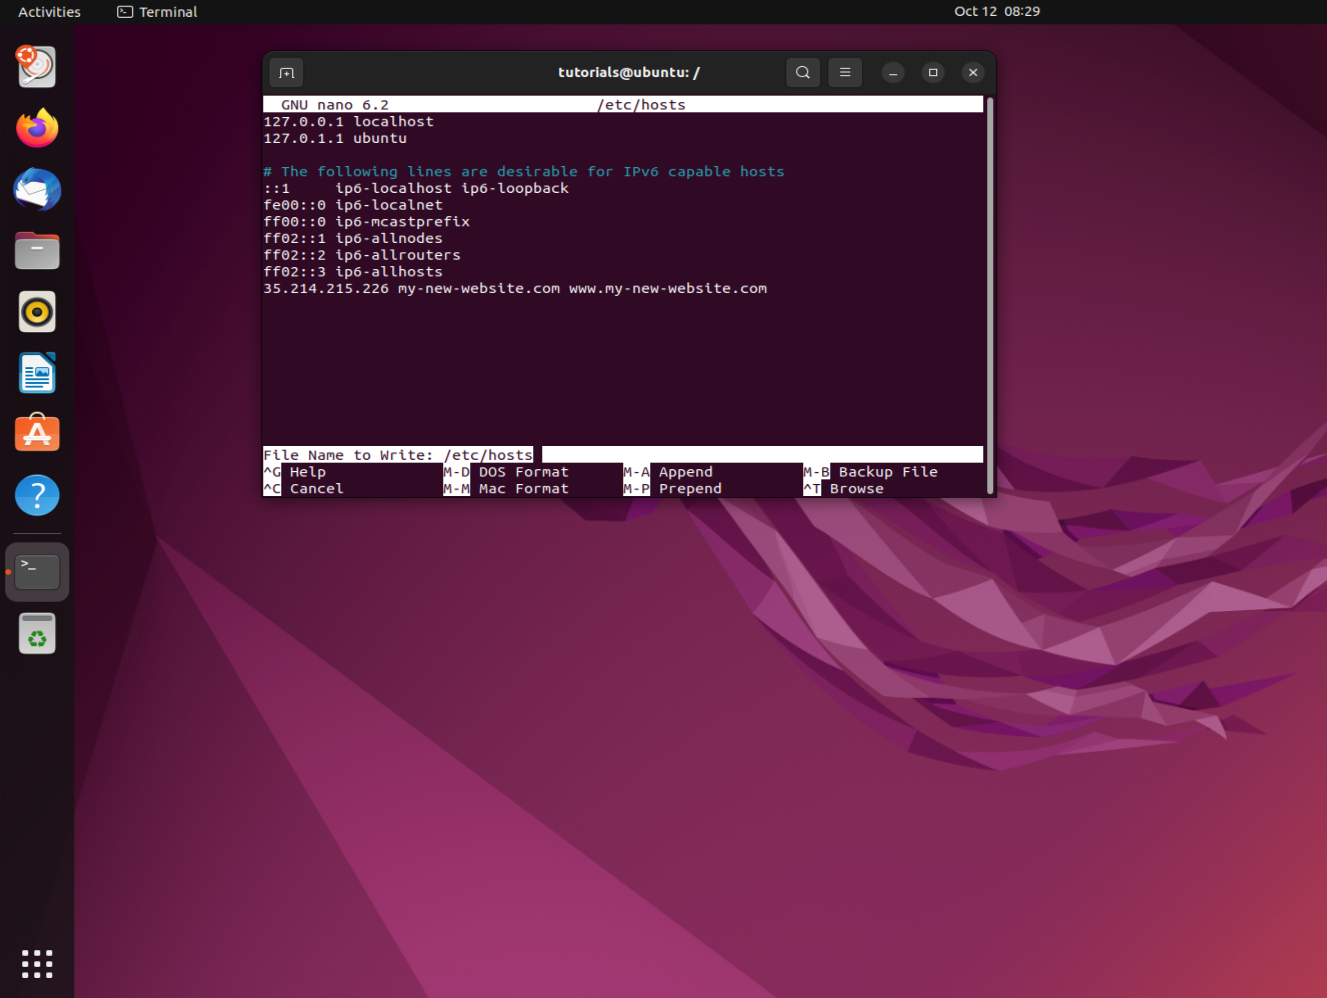
To confirm the new changes, press the key combination Control + O and press Enter. You can then exit the editor by pressing Control + X.
How can I test changes to the hosts file?
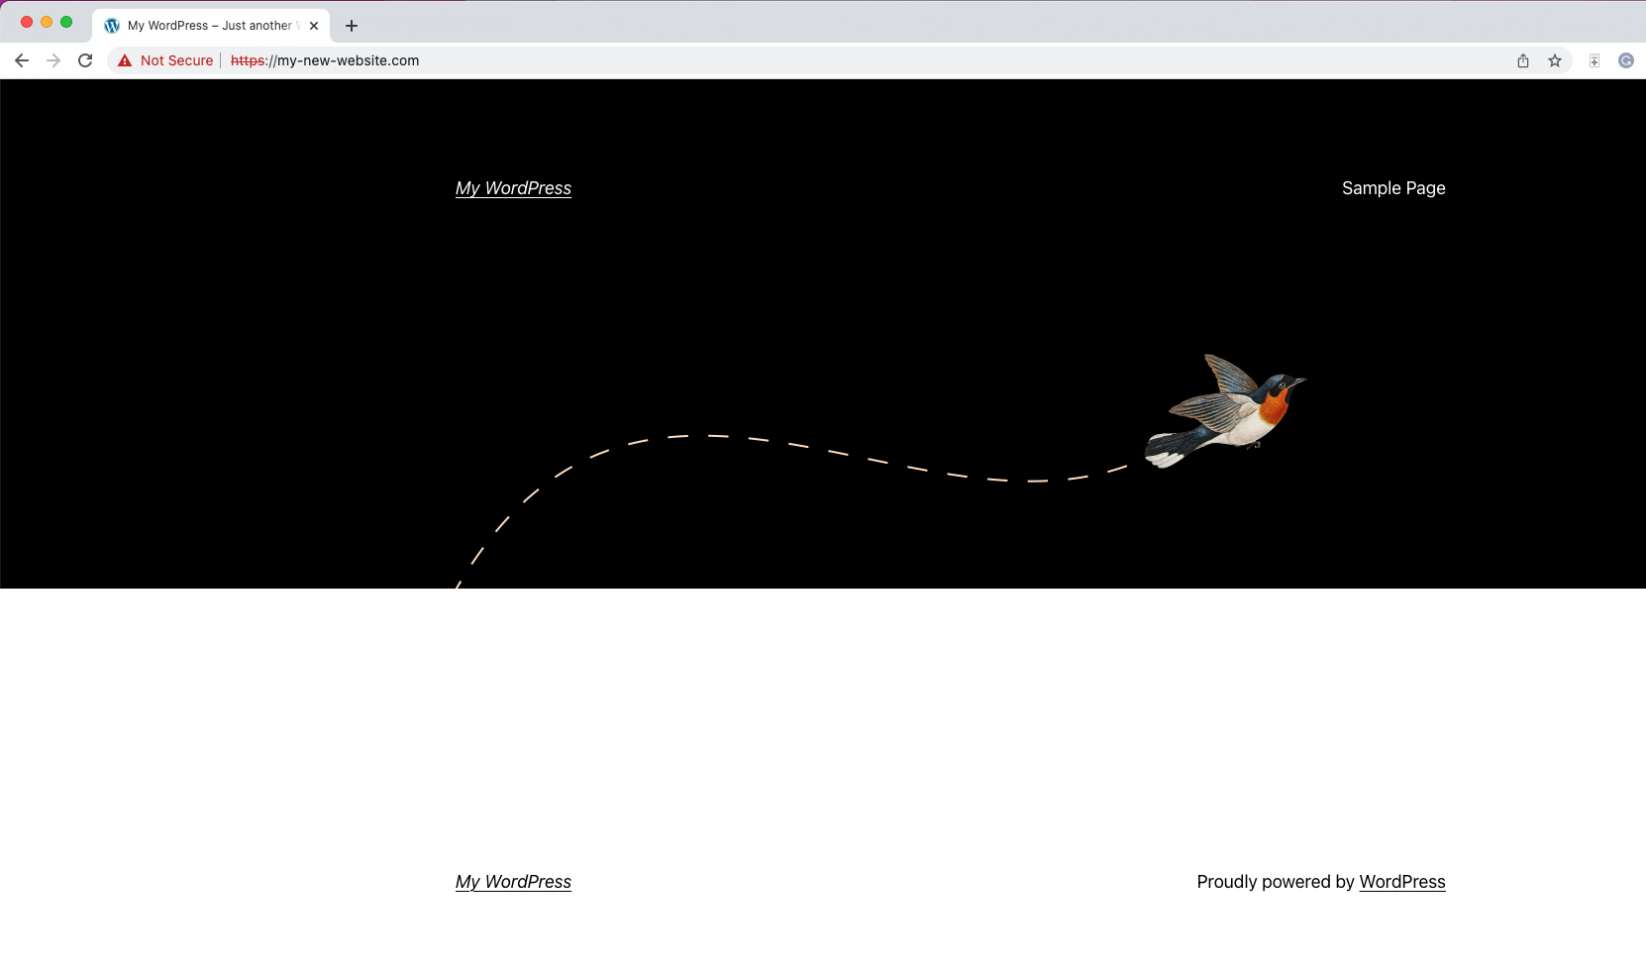
After you’ve added the hostname’s settings, testing the changes can be done from any web browser such as Chrome, Firefox, Opera, Edge, etc. If the changes took effect, the hostname will resolve from the specified IP address.
The example used so far is the unregistered domain my-new-website.com. It is a non-existent domain that has no DNS zone. If the changes have not taken effect, when you open the website in your browser you will see “DNS_PROBE_FINISHED_NXDOMAIN”, which is the typical error message for an unregistered domain.

However, if the hostname is correctly pointed to an IP address where a website has been installed, the website will open.
How to preview a website in other ways
The hosts file is the most reliable and stable way to preview websites, although there are alternative methods if you find editing the hosts file difficult. However, these alternatives have specific strengths and weaknesses and as such, are not suitable for every situation.
We will examine the other ways to preview a website and the scenarios in which you can use them.
Generate a temporary URL with SkipDNS
A popular method of previewing a website is using a temporary URL. Instead of having to modify your hosts file, there are websites that can generate a temporary URL that any computer can use.
One of the most popular websites able to generate this kind of URL is SkipDNS. On their homepage, you are presented with a form to complete.
You need to provide the website IP address in the field IP Address and the hostname in the field Live URL. As in our previous example, we want to point my-new-website.com to the SiteGround-hosted site’s IP 35.214.215.226.
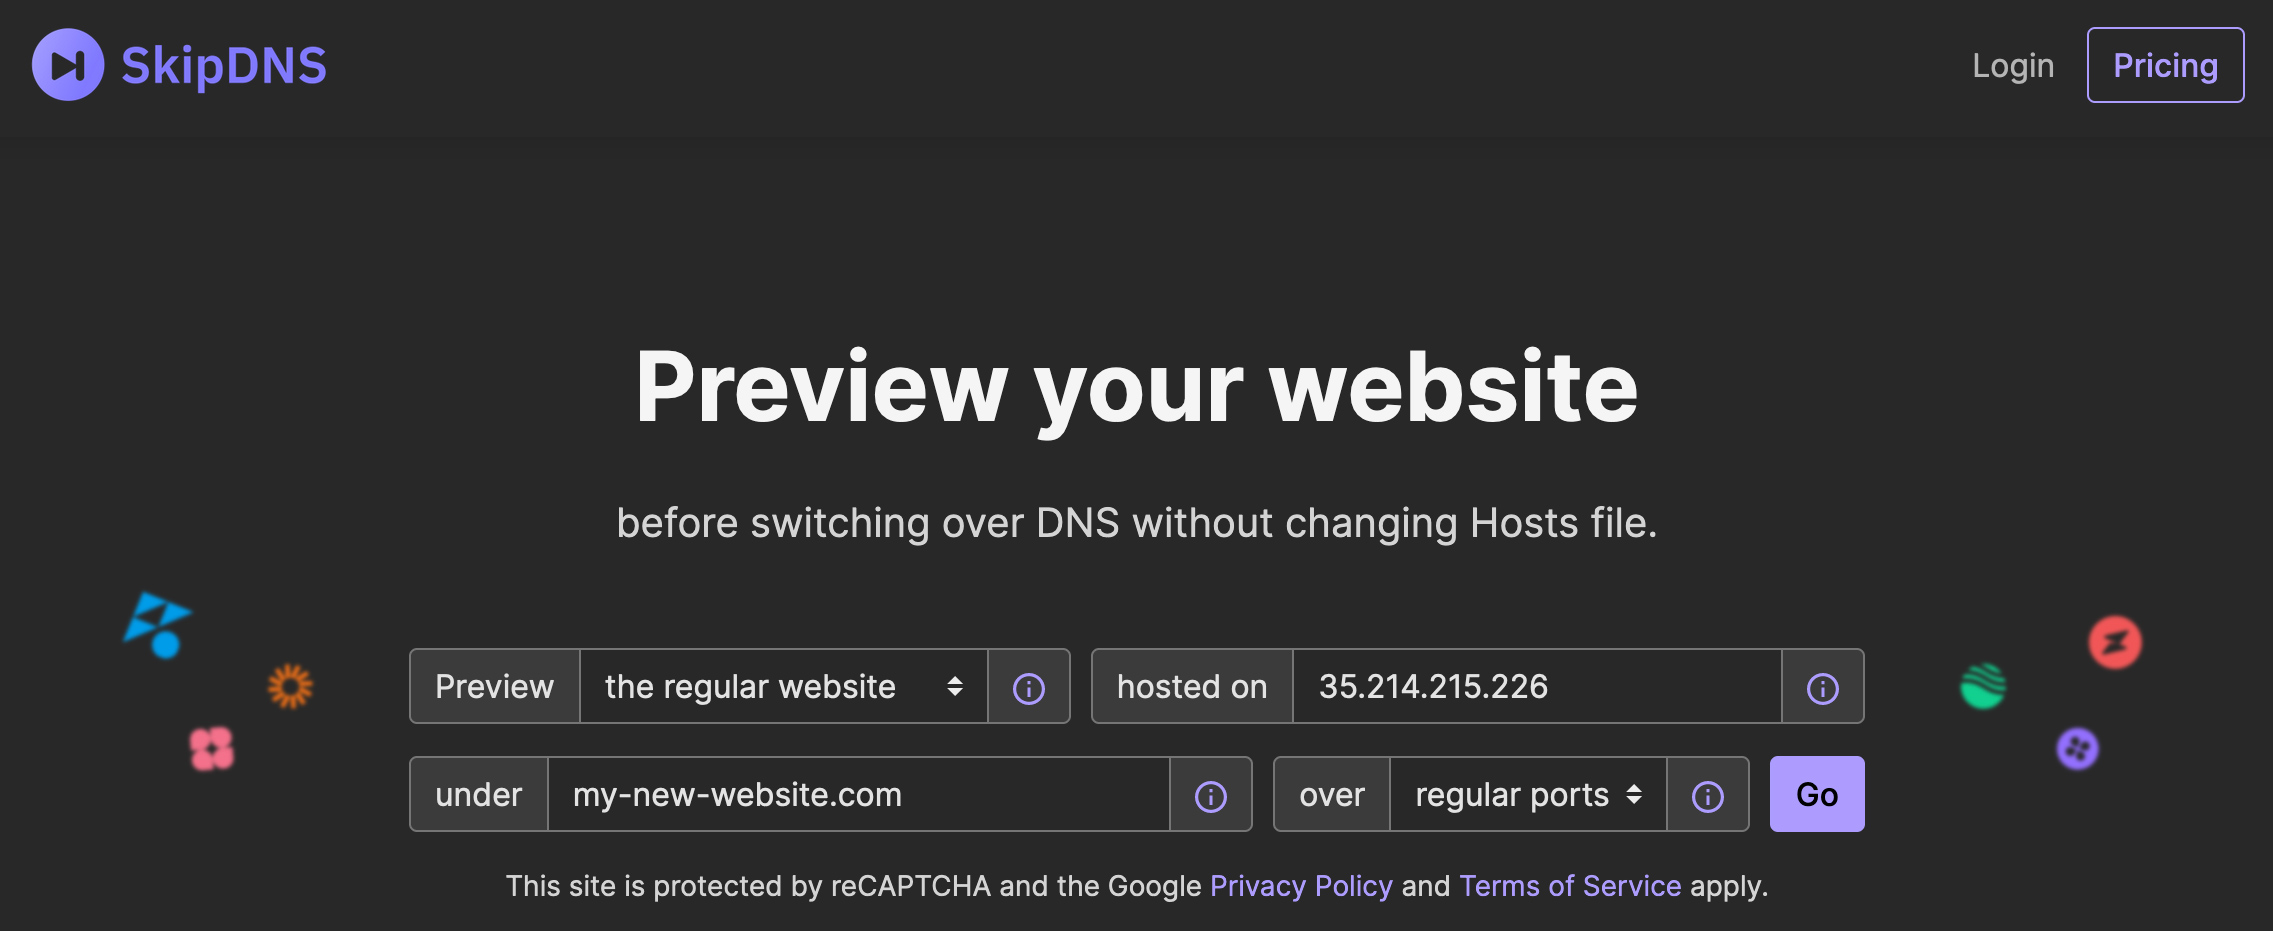
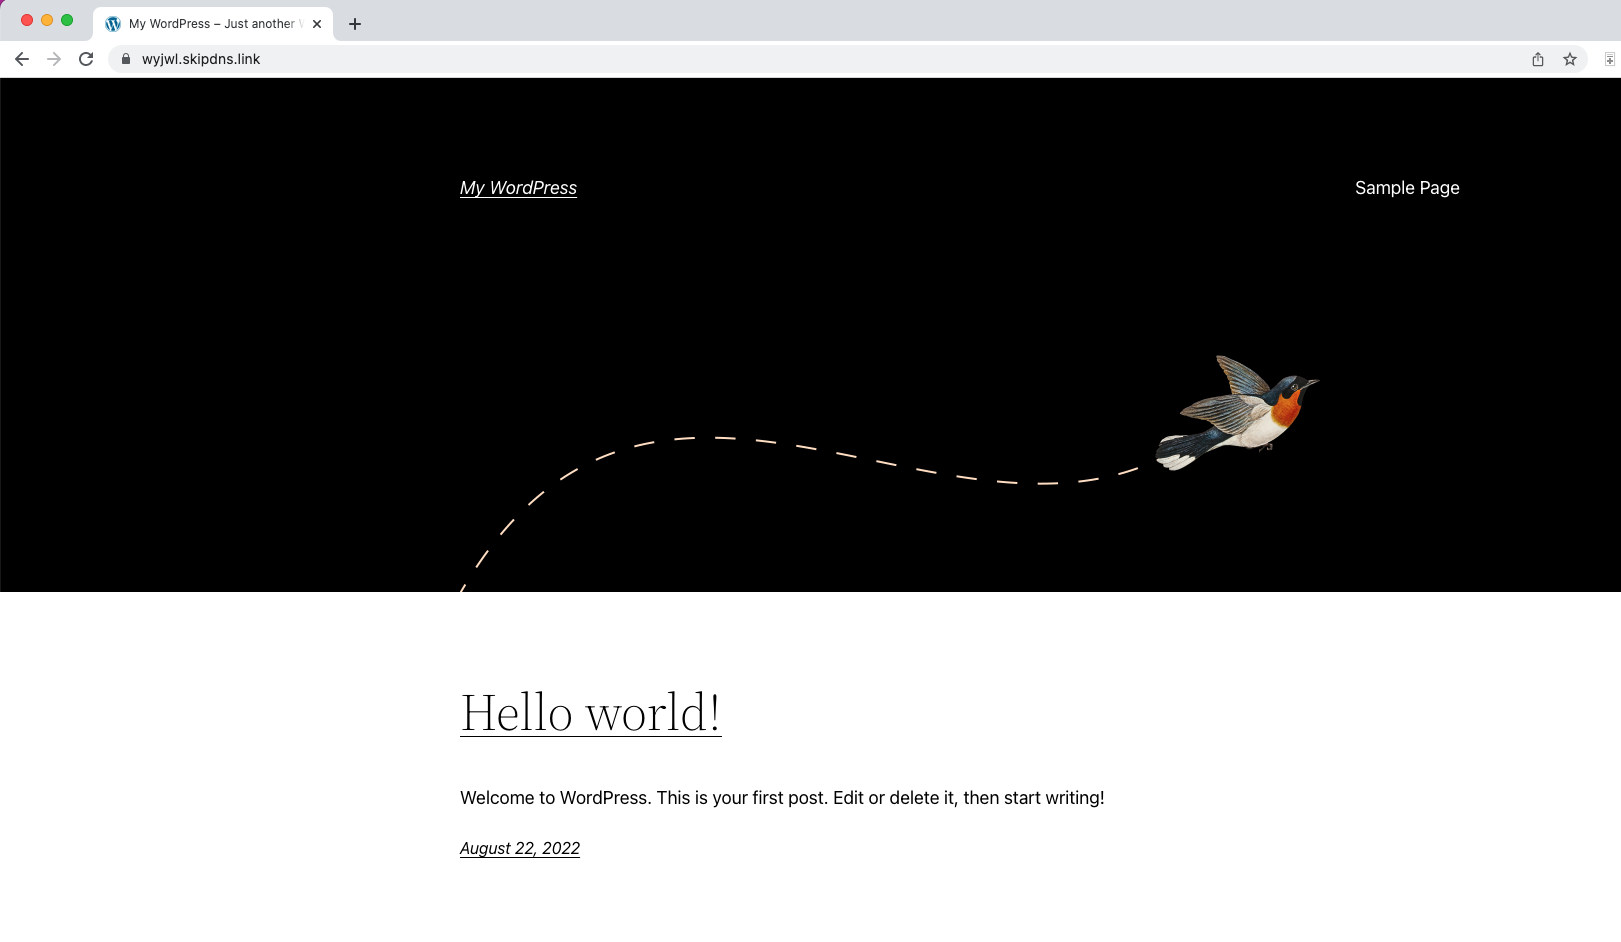
After providing these details, use the button Go to generate the temporary URL. You will then see the temporary URL that SkipDNS has generated to open your hostname from the specified IP address.
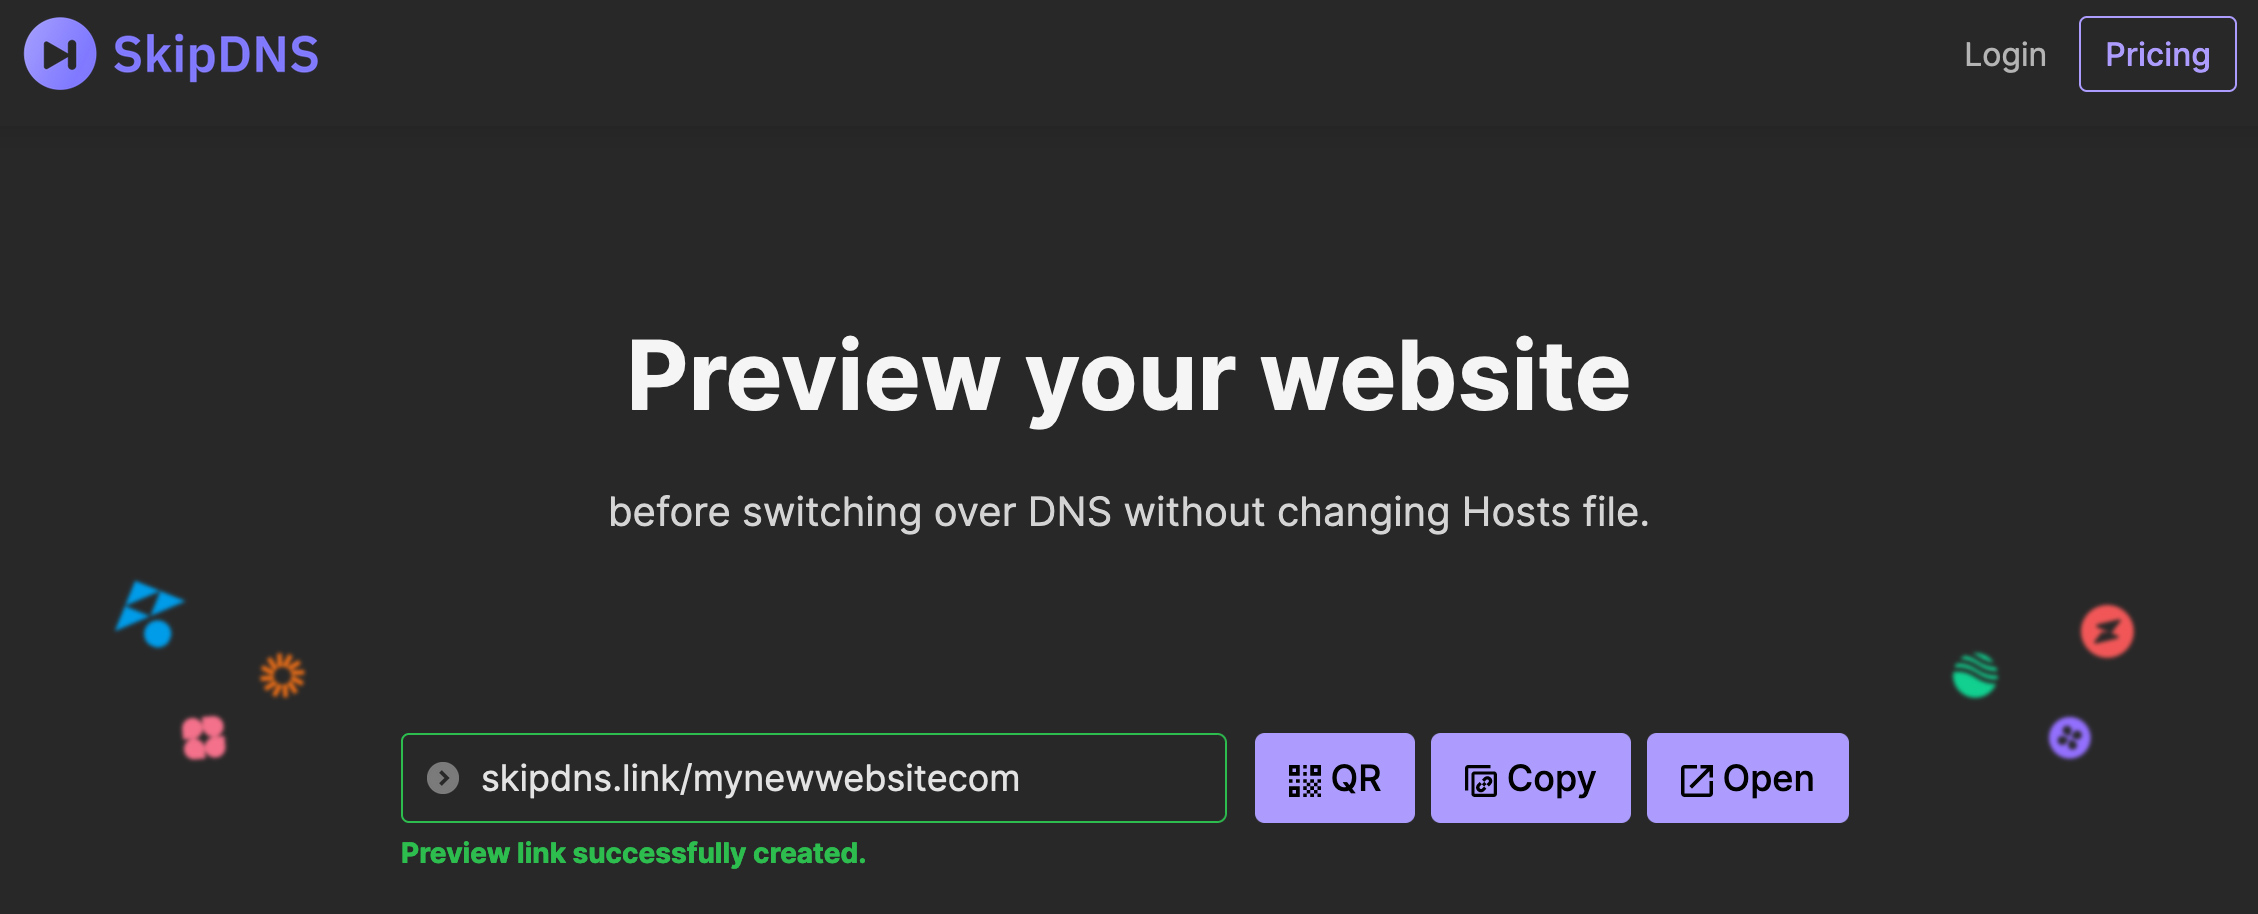
You can use this URL in any browser or computer to open your website, but keep in mind that this link is only valid for a limited time.
Use a temporary domain with SiteGround
SiteGround users have another option when it comes to accessing a website without a registered domain name – a temporary domain, auto-generated by the system. It is important to note that a temporary domain can only be set at the time of the initial website setup on your SiteGround account. Once you replace it with another domain the system deletes the temporary one.
Therefore, this method is suitable when you start a new website without a registered domain name. It is also useful if you’ve migrated an existing website but haven’t yet pointed its domain to your account and you need to preview the migrated content.
For more information, check out this article about temporary domains.
Summary
The hosts file can come in handy when you wish to create a custom hostname mapping for your computer alone, without affecting other visitors. In general, its most common applications are:
- Linking a non-existent domain to your website
- Forcing a domain to open a website different from the one it currently points to my DNS records from your computer
- Blocking access from a computer to a specific hostname
Editing the hosts file may seem daunting at first, but with clear instructions it’s not so hard. We hope this article managed to clear things up.