How does the SiteGround Site Scanner protect my website?
Table of Contents
There’s no two ways about it: keeping your website safe and secure is crucial for your online presence. With so many threats on the Internet, visitors are understandably cautious and unlikely to visit a suspicious site. Furthermore, SEO engines could severely penalize an infected website.
Having your site infected could reduce incoming traffic, which can consequently damage your business and reputation. That is why website owners must always stay vigilant and proactive to maintain their websites’ integrity.
SiteGround has developed Site Scanner, a security tool to keep your site safe and clean. This guide will explain what Site Scanner is and how it protects your site.
It automatically performs several critical checks every day and alerts you of any detected threats so you can react in a timely manner, before your website suffers substantial damage. Additionally, you can perform manual on-demand scans of your website at any point through the tool interface.
The Site Scanner Basic comes with the following essential monitoring features:
- Daily URLs scan – Site Scanner performs daily automatic URL scans of your website and checks if they contain any malicious links or content. You will be instantly notified on your account’s administrative email if a potential threat is detected. You will also see a warning in your SiteGround’s Client Area.
- Daily Domain blacklist check – on a daily basis, this scheduled scan also checks whether your domain is blacklisted in the databases of the most popular search engines, browsers, and antivirus organizations. If your domain is found in any of these blacklists, the Site Scanner will notify you promptly via your email.
- On-demand scans – through the tool’s interface you can perform comprehensive on-demand scans at any time. The manual on-demand scans go over your website URLs and files, as well as the domain blacklist checks.
- Reports history – the tool keeps reports from the manual and automatic scans from the last 30 days, which you can review at any time through the tool’s interface.
- Email notifications – whenever the Site Scanner detects malicious content, it instantly sends an email notification to your administrative email. Additionally, you receive a weekly summary of all the scans from the past week. You can also easily disable or enable the weekly summary reports from the tool’s interface.
- Site protect – you can allow or limit the website’s access points via FTP, SSH, PHP uploads, and shell or PHP scripts with an intuitive and easy-to-use interface. This is especially handy if you suspect any hacking attempts that you want to stop or prevent.
The Site Scanner Premium adds additional features that protect your website even further:
- Daily Automated files and URLs scans – in addition to the domain blacklist check and URLs scan, all website files are automatically scanned every day (including the files of subdomains, staging copies, and subfolders).
- Automatic scans and quarantine for newly uploaded files – this is an optional feature that you can easily enable or disable at any time. The Site Scanner scans any new file uploaded to your website. In the case that a file is deemed suspicious, it is isolated into quarantine so you can review it and decide if you want to release it or permanently delete it.
How can I manage the Site Scanner settings?
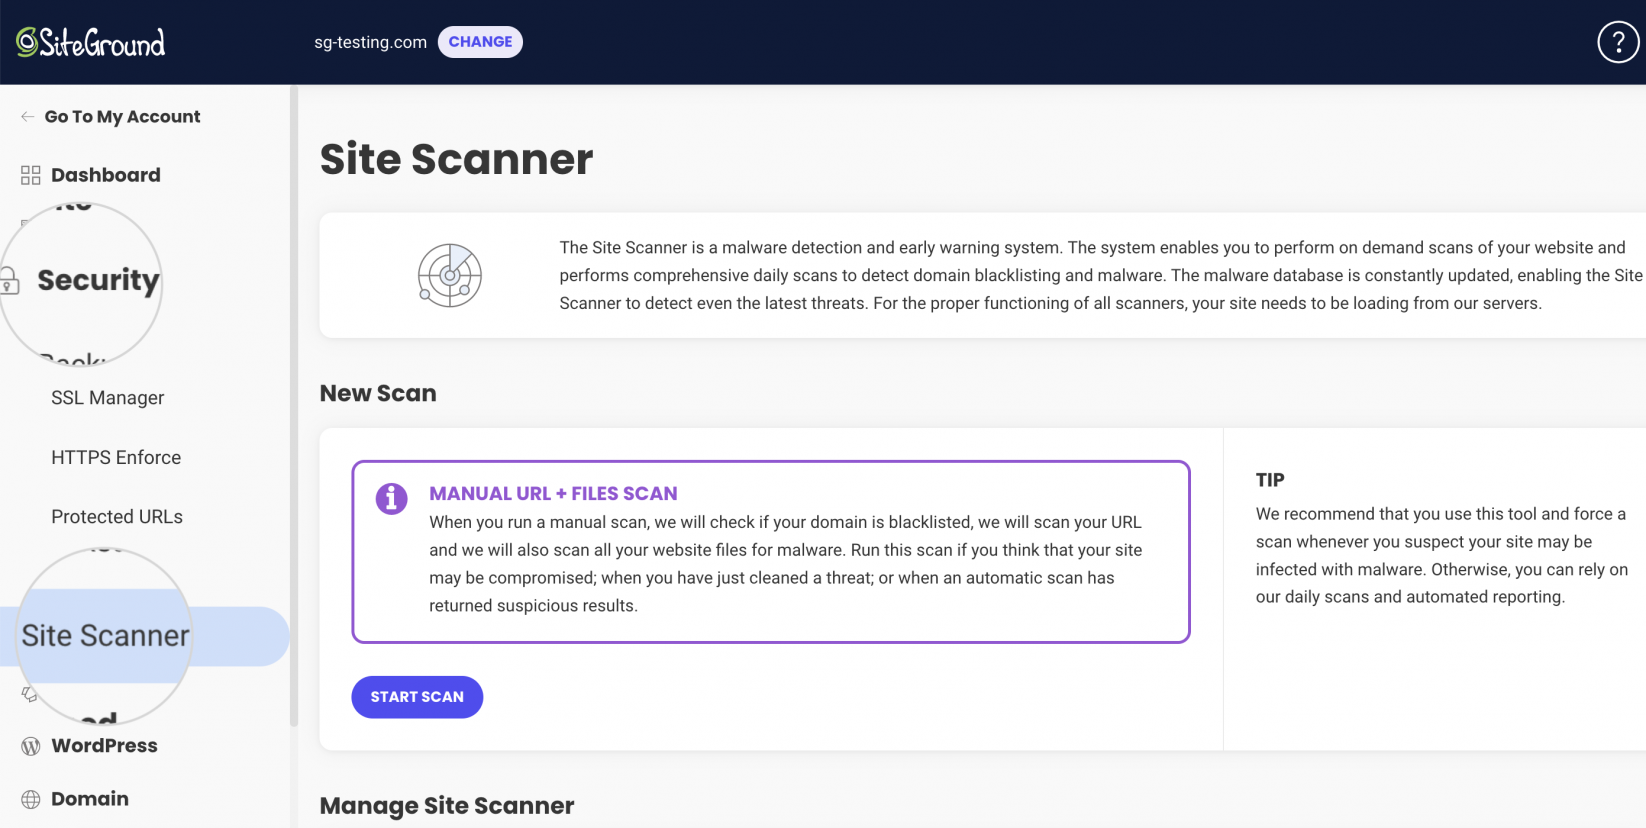
To access the Site Scanner tool, go to your website’s Site Tools > Security > Site Scanner.
On-demand scans
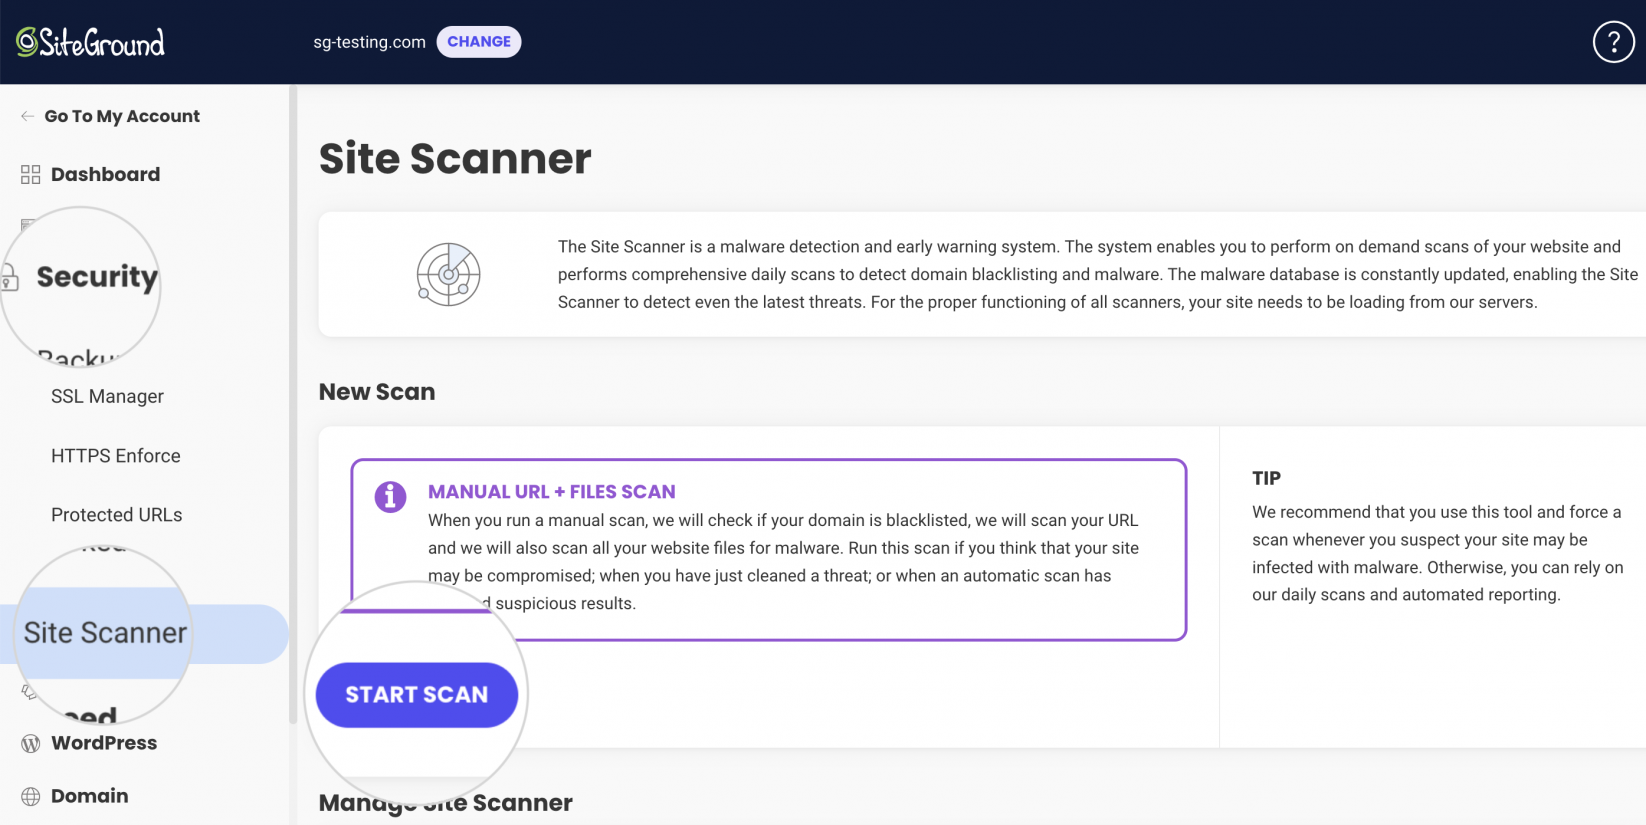
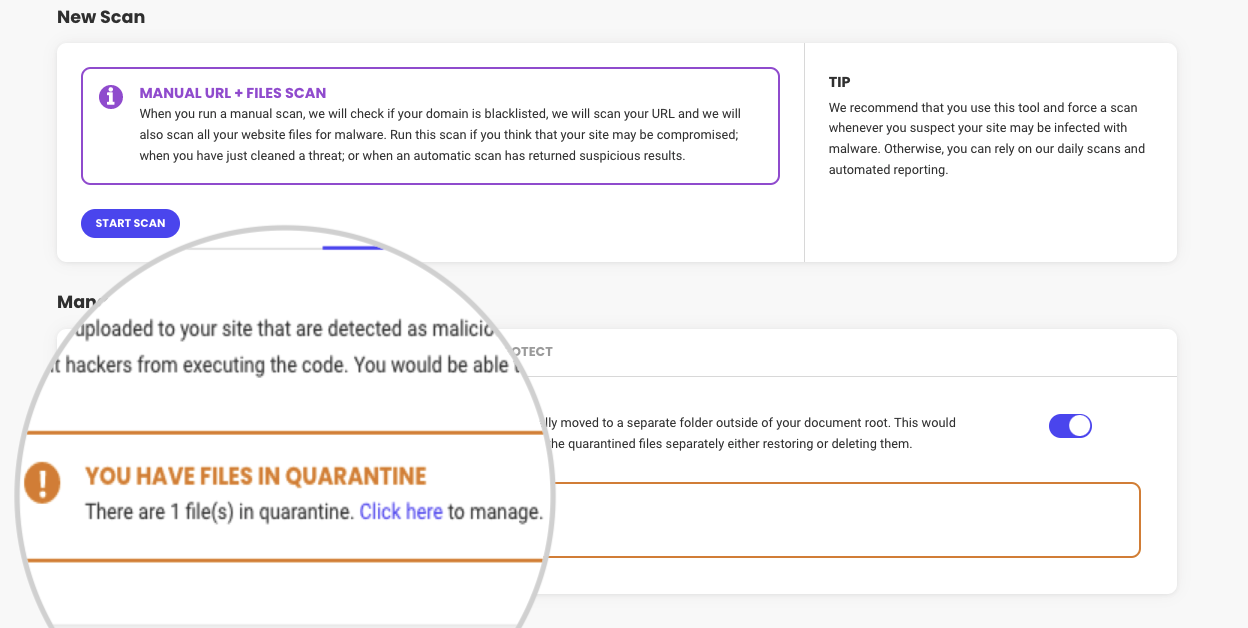
If you’re concerned that your website might be infected or you want to check if a malware removal was conducted correctly, you can run an on-demand scan. The Site Scanner allows you to perform up to 10 on-demand scans per day that check the domain blacklists, website URLs, and files.
To initiate the scan, go to the section New Scan and press the button Start Scan.
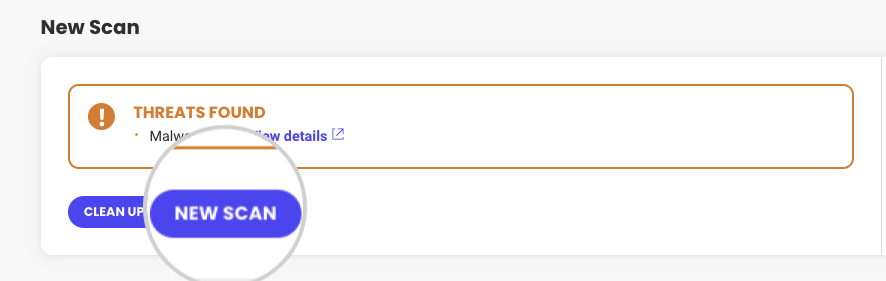
If the scan finds a suspicious file, URL or a blacklist issue with your domain, you will see a notification, listing all issues in separate lines. Click on the link View details next to each issue to see detailed information about it.
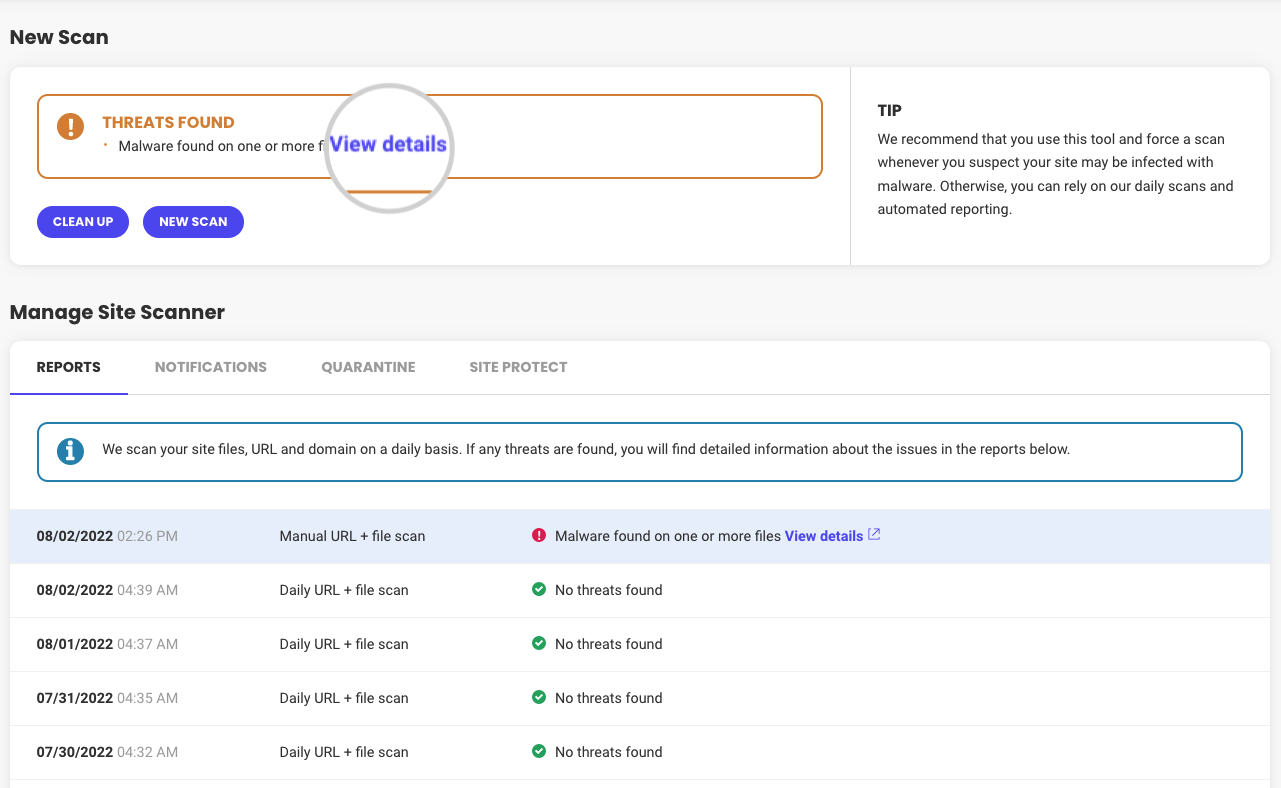
A pop-up window will appear with detailed information about the affected files, URLs or domain.
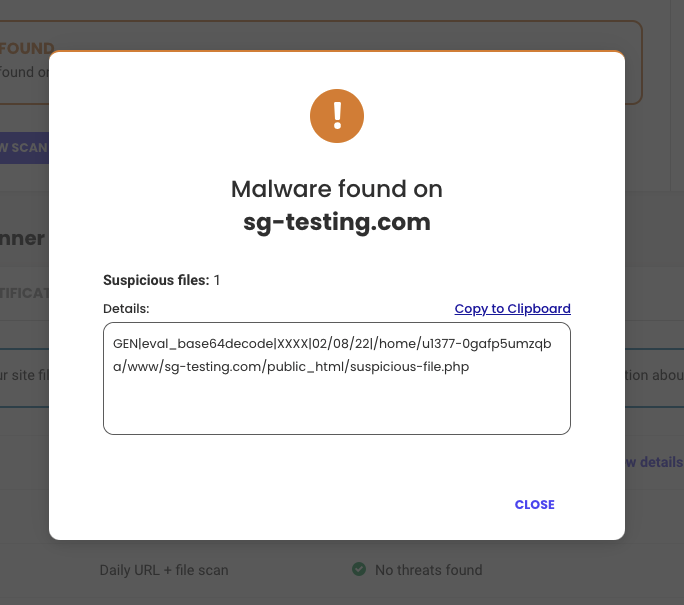
You can then proceed to clear the malicious code manually or seek assistance from security experts.
After the malicious content is removed, you can initiate a New scan to confirm that the website is clean.
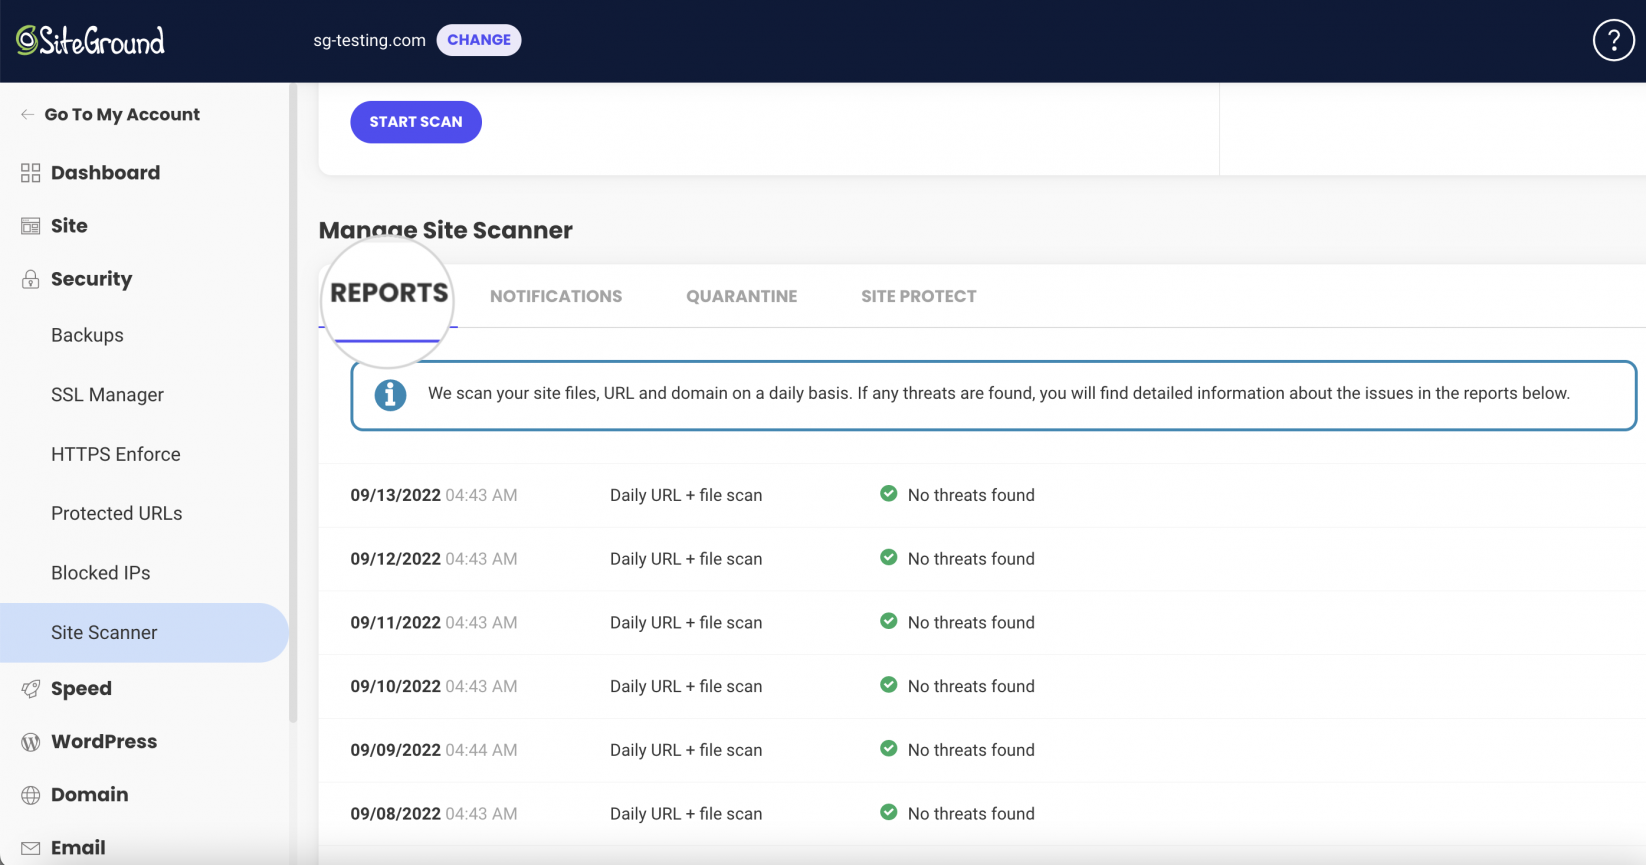
Reports
The Site Scanner keeps history of all scans from the last 30 days. If malware is detected, the reports will contain detailed information about the infection.
You can access the logs from the Manage Site Scanner section in Site Tools > Security > Site Scanner, under the tab Reports.
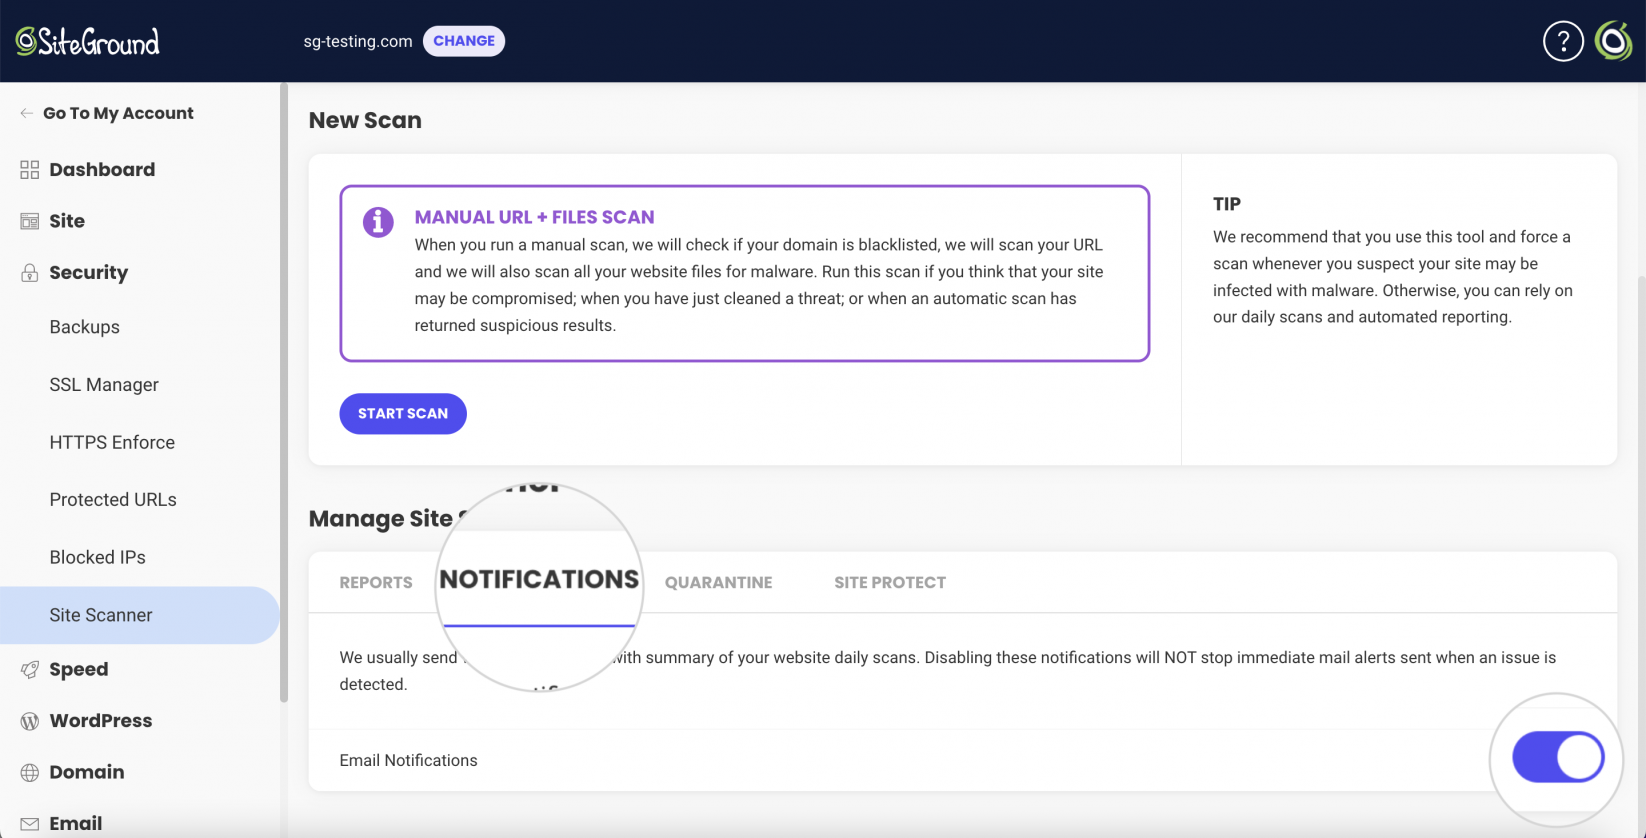
Email Notifications
If the Site Scanner detects malware on your website, it instantly sends an email notification to your administrative email so you can take timely action. You also receive a weekly summary of your website status regardless of whether the website is infected or clean.
You can choose to disable the weekly reports and only receive warnings if the website is infected. It can be done from the Manage Site Scanner section in Site Scanner, under the tab Notifications, by switching the slider for Email Notifications.
File upload quarantine
The Site Scanner Premium plan adds another layer of protection by scanning newly uploaded files on your website. If a new file is infected, it is isolated to prevent it from harming your website.
You can manage the quarantine options from Site Tools > Security > Site Scanner > Manage Site Scanner > Quarantine.
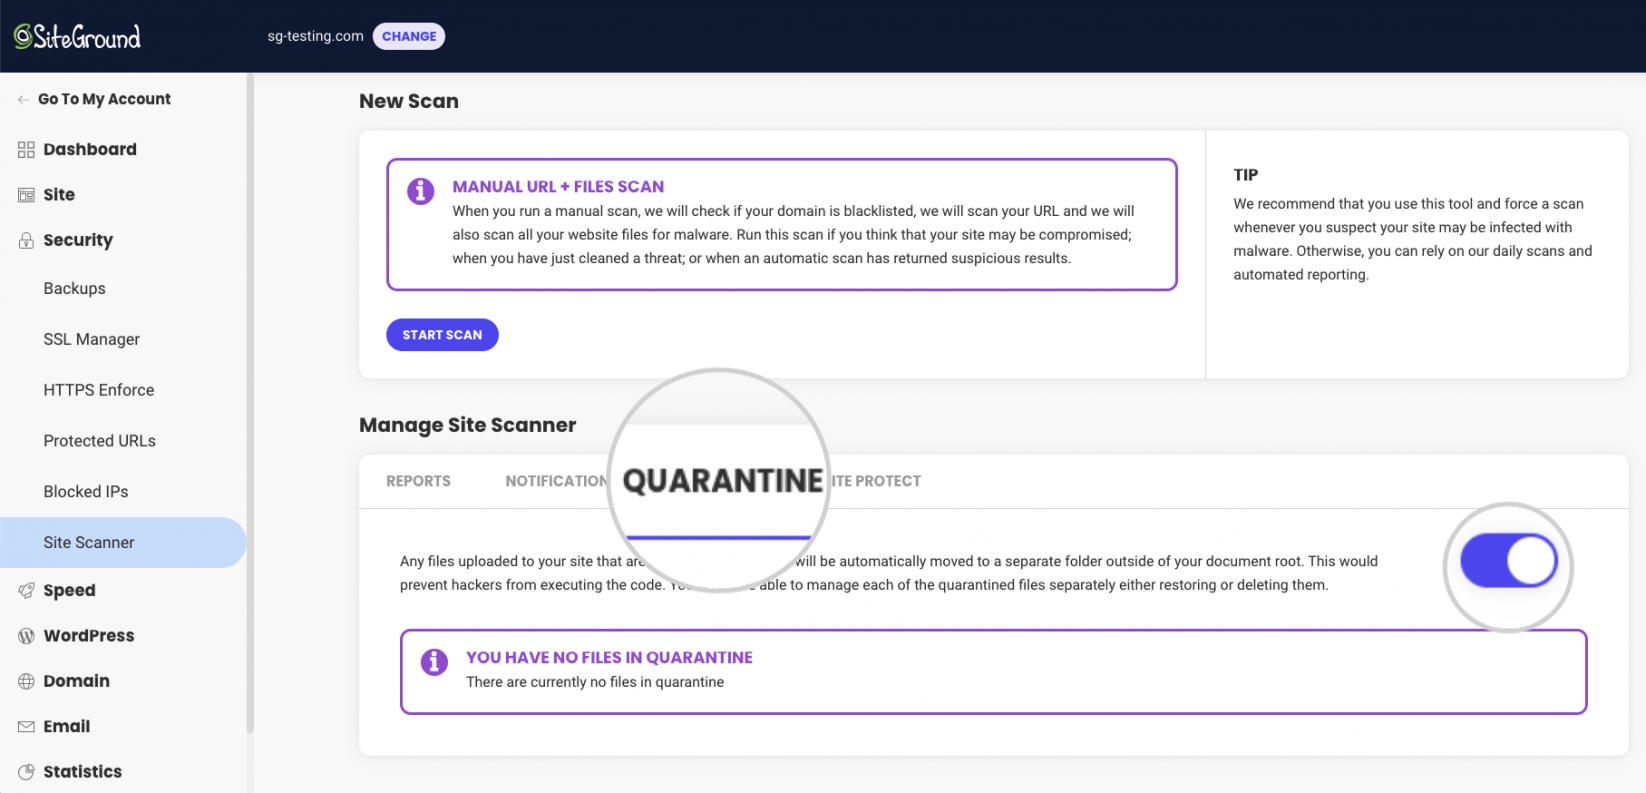
The Quarantine protection is optional and disabled by default. You can enable it or deactivate it at any time by switching the slider button.
If it is disabled, all new files will be directly uploaded. Keep in mind that if they are infected, they will still be detected by future scans.
If Quarantine is enabled, an infected file will not be uploaded into the website folder and is placed in a folder isolated from your website. You will see a warning of the detected file on the Quarantine page.
To review the file and perform follow-up actions, press the Click here link in the notification. You will see a pop-up page that specifies the infected files and provides options on how to treat them.
If you believe the file is harmless, you can select the radio button Return selected files to their original location, check the box next to the file and click Confirm.
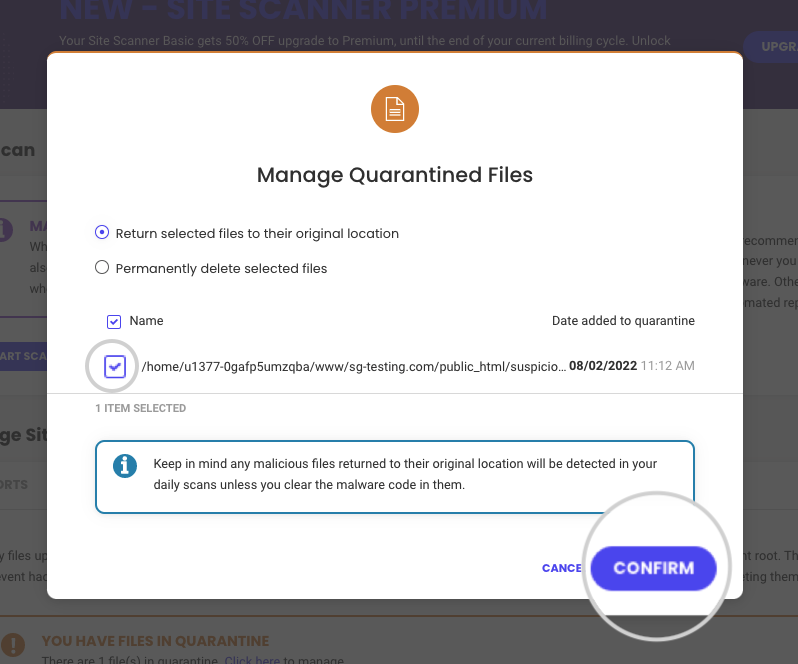
To delete the file, select the radio button Permanently delete selected files. Check the boxes for the file and the warning: “I understand that deleting the selected files will permanently remove them from my account.” Finally, press Confirm to delete the file.

Site Protect
Site Scanner also allows you to limit connection to your website from different access points. It is an extremely useful feature, allowing you to fortify your website security whenever you think your website has been compromised or you want to prevent any unauthorized upload or script execution.
The options are controlled in the Manage Site Scanner section in Site Tools, under the tab Site Protect.
You will see the different types of access which you can disable by switching the slider next to each one.
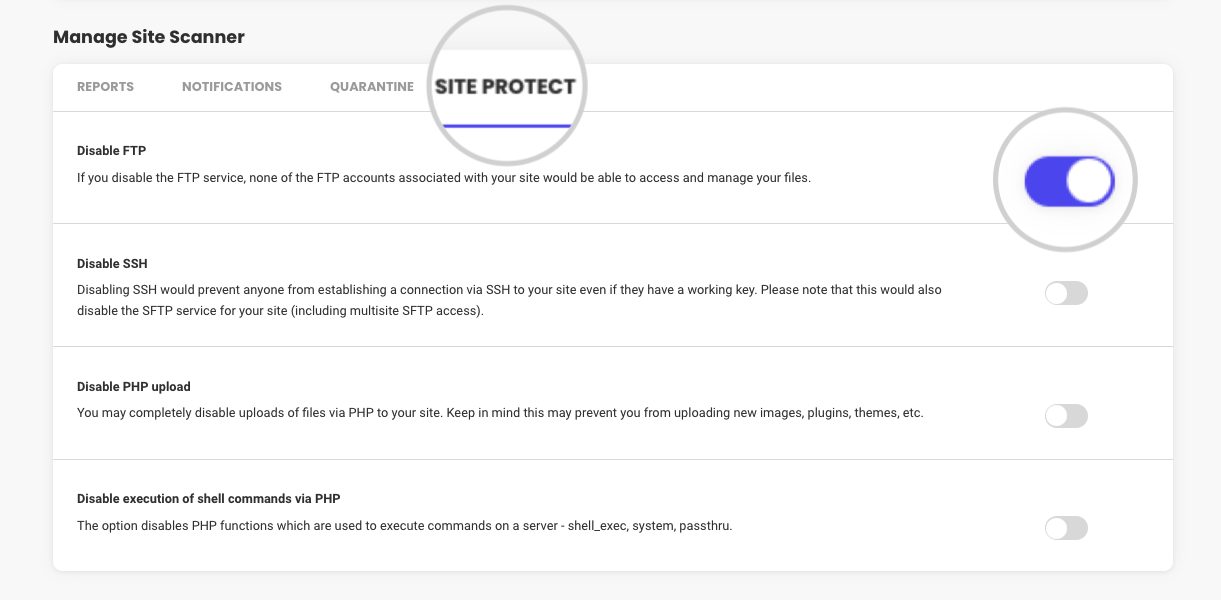
- Disable FTP – Closes all FTP connections towards your site. It prevents any scripts or unauthorized users that obtained FTP access from uploading new files or modifying existing ones. Keep in mind that by disabling FTP, scripts and plugins using an FTP connection will not work, and you won’t be able to connect to your site from your FTP accounts.
- Disable SSH – By turning SSH off, all SSH connections to your website will be rejected even if users have the correct credentials. This prevents scripts or users from executing commands and modifying your website’s files via SSH connection.
- Disable PHP upload – Many malicious scripts infect your website by uploading files via PHP uploads. This feature restricts all uploads via PHP scripts. Many CMS applications (WordPress, Joomla, Drupal) use PHP uploads, and by disabling this feature, you won’t be able to upload media files, themes, or plugins from the application’s dashboard.
- Disable execution of shell commands via PHP – Disables PHP functions that execute commands on the server, which can be used to run malicious code. Such commands are shell_exec, system, passthru, etc.
Frequently asked questions
What is the difference between Site Scanner Basic and Site Scanner Premium?
Site Scanner Premium is an upgraded version of Site Scanner Basic. It includes all features found in the Basic plan and adds several exclusive functions that further bolster your website’s security. These functions are:
- Daily automatic scans of website files along with the URLs scan and domain blacklist check
- Automatic scans for all newly uploaded files
- Quarantine for malicious uploaded files
How can I purchase the Site Scanner?
Go to your Client Area > Marketplace > Hosting services, scroll down to the section Additional Services and press the button GET for Site Scanner.
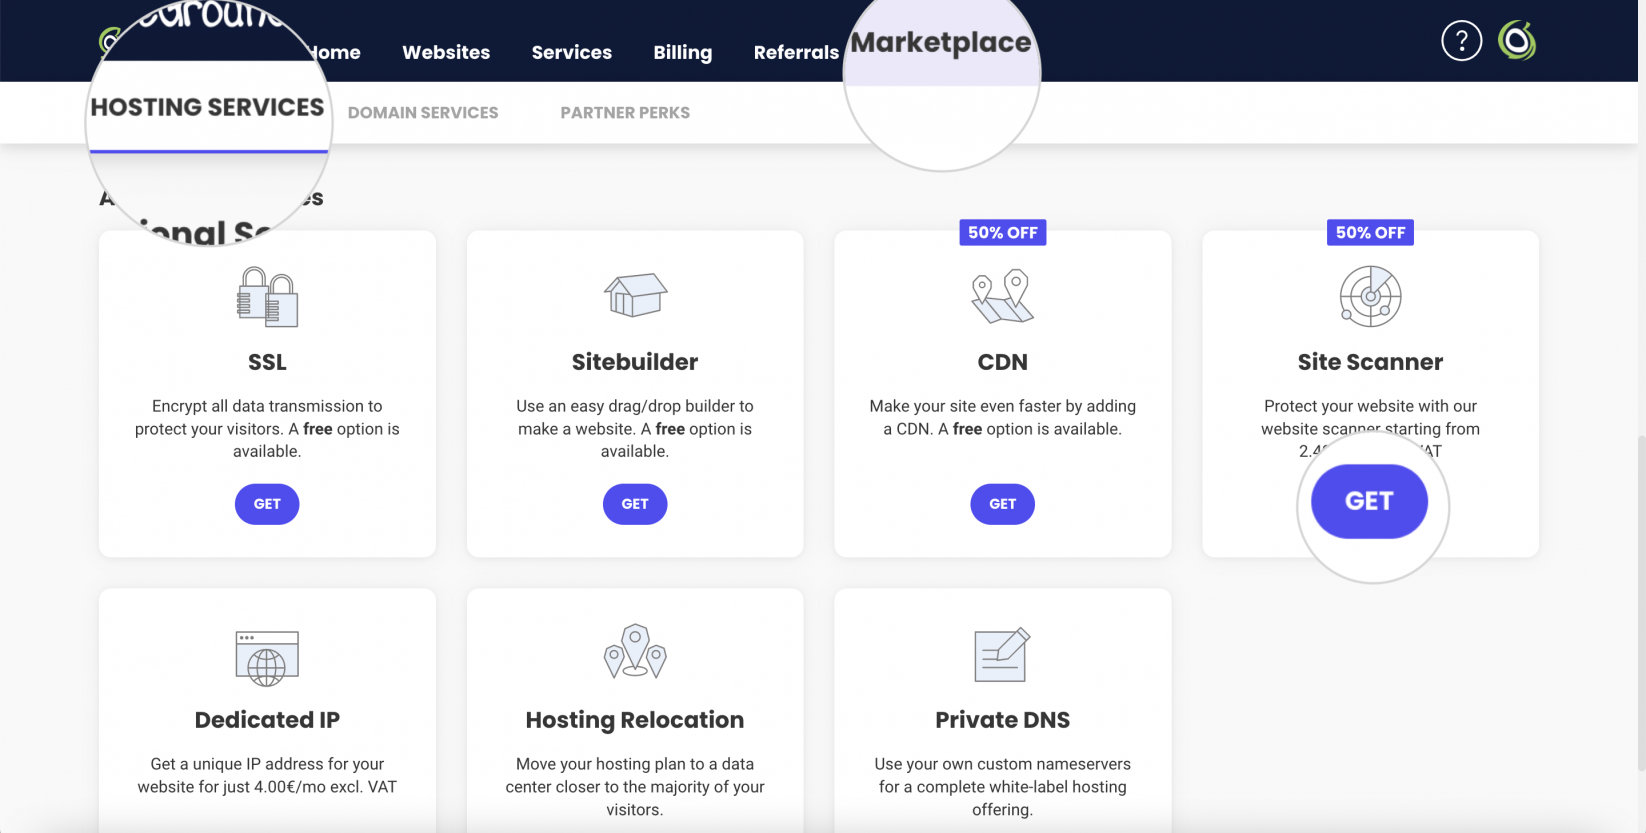
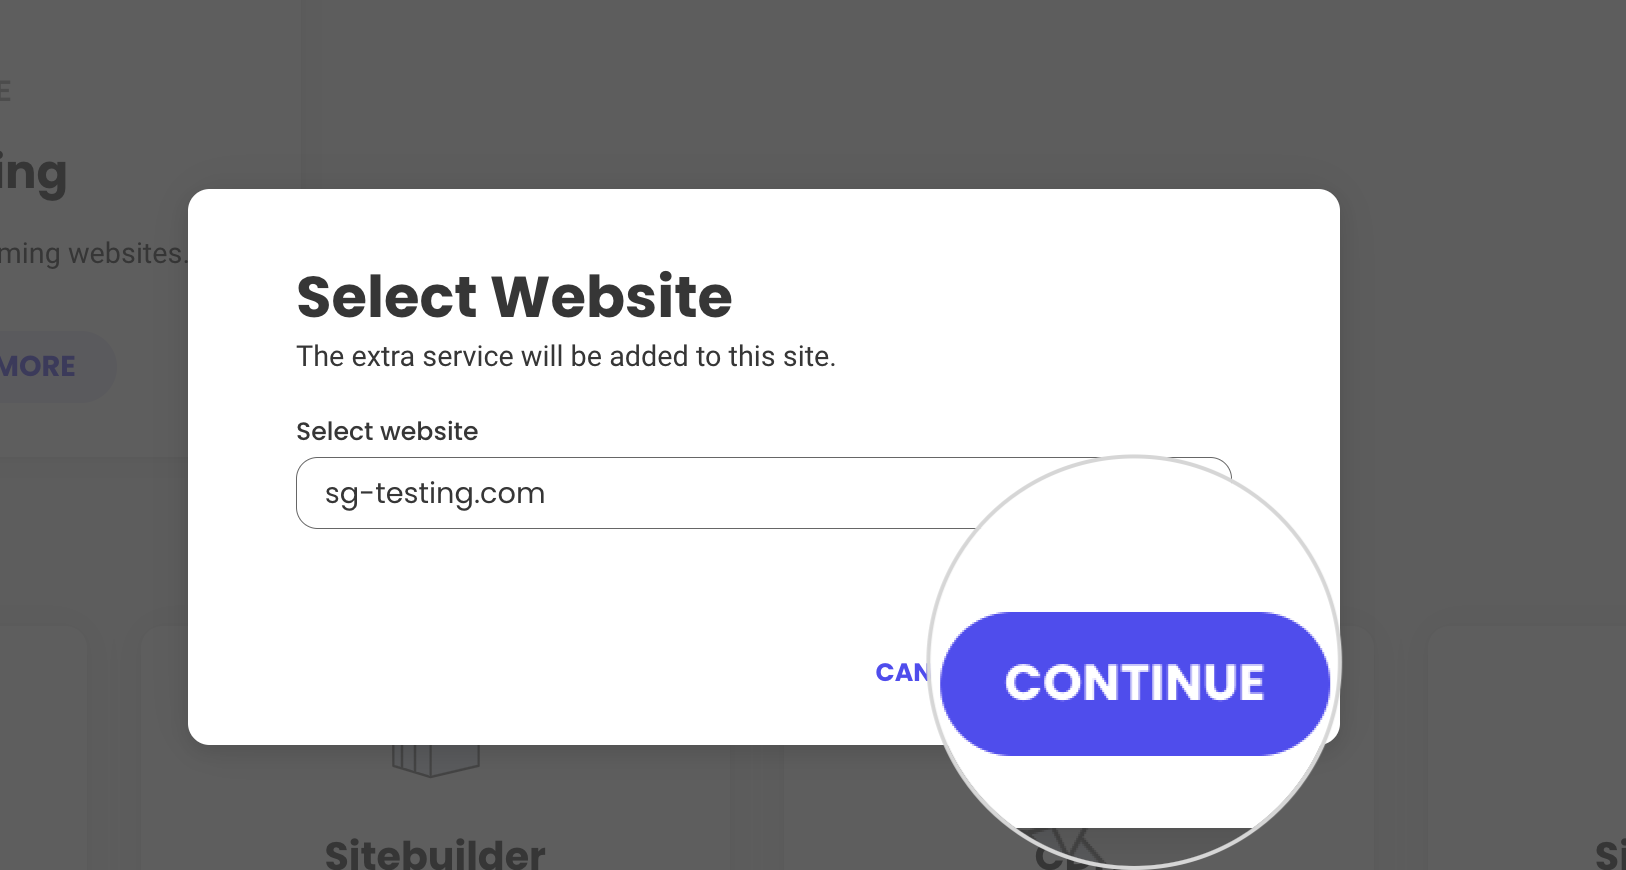
If you host multiple websites, a pop-up window will appear prompting you to select the website for which you wish to add the Site Scanner. Choose the website from the drop-down menu and hit the button Continue.
On the next page you can choose between the Site Scanner Basic and Site Scanner Premium plans and complete the order.

Can I purchase a separate Site Scanner for my subdomain?
It is not possible to purchase the Site Scanner extra service for a subdomain. It can be ordered and activated for websites of primary domains only.
Does Site Scanner renew automatically?
For the convenience of our customers, Site Scanner is set to automatically renew. That way, you don’t have to worry about a possible suspension of this service due to a missed renewal.
If you want to manage the Site Scanner auto renewal settings, you can do so from Websites > kebab menu next to the chosen site > Website Settings, then under Added Extras click on the kebab menu and select Renewal Settings.
Summary
Maintaining strong security is crucial for your website’s performance and reputation. There are a plethora of malware threats that can cause serious harm to your website and reduce your incoming traffic. The SiteGround Site Scanner helps you fortify your website’s security and identify these threats as soon as they arise.