Contact Statuses in SiteGround Email Marketing - Subscribed, Unsubscribed, and Suppressed
Table of Contents
One of the most important aspects of running successful email marketing campaigns is the effective management of your contact list. You must ensure your campaigns reach the right people who agreed to receive emails. On the other hand, you shouldn’t send emails to people who explicitly opted out.
For this purpose, SiteGround Email Marketing provides an intuitive interface that lets you manage your subscribers easily. Read on to learn about the different contact statuses and how to manage them.
Where Can You Manage Your Contact List
You can manage your contact statuses in your Client Area > Services > Email Marketing > Contacts. Contacts are organized into three tabs based on their current status – Subscribed, Unsubscribed, and Suppressed.
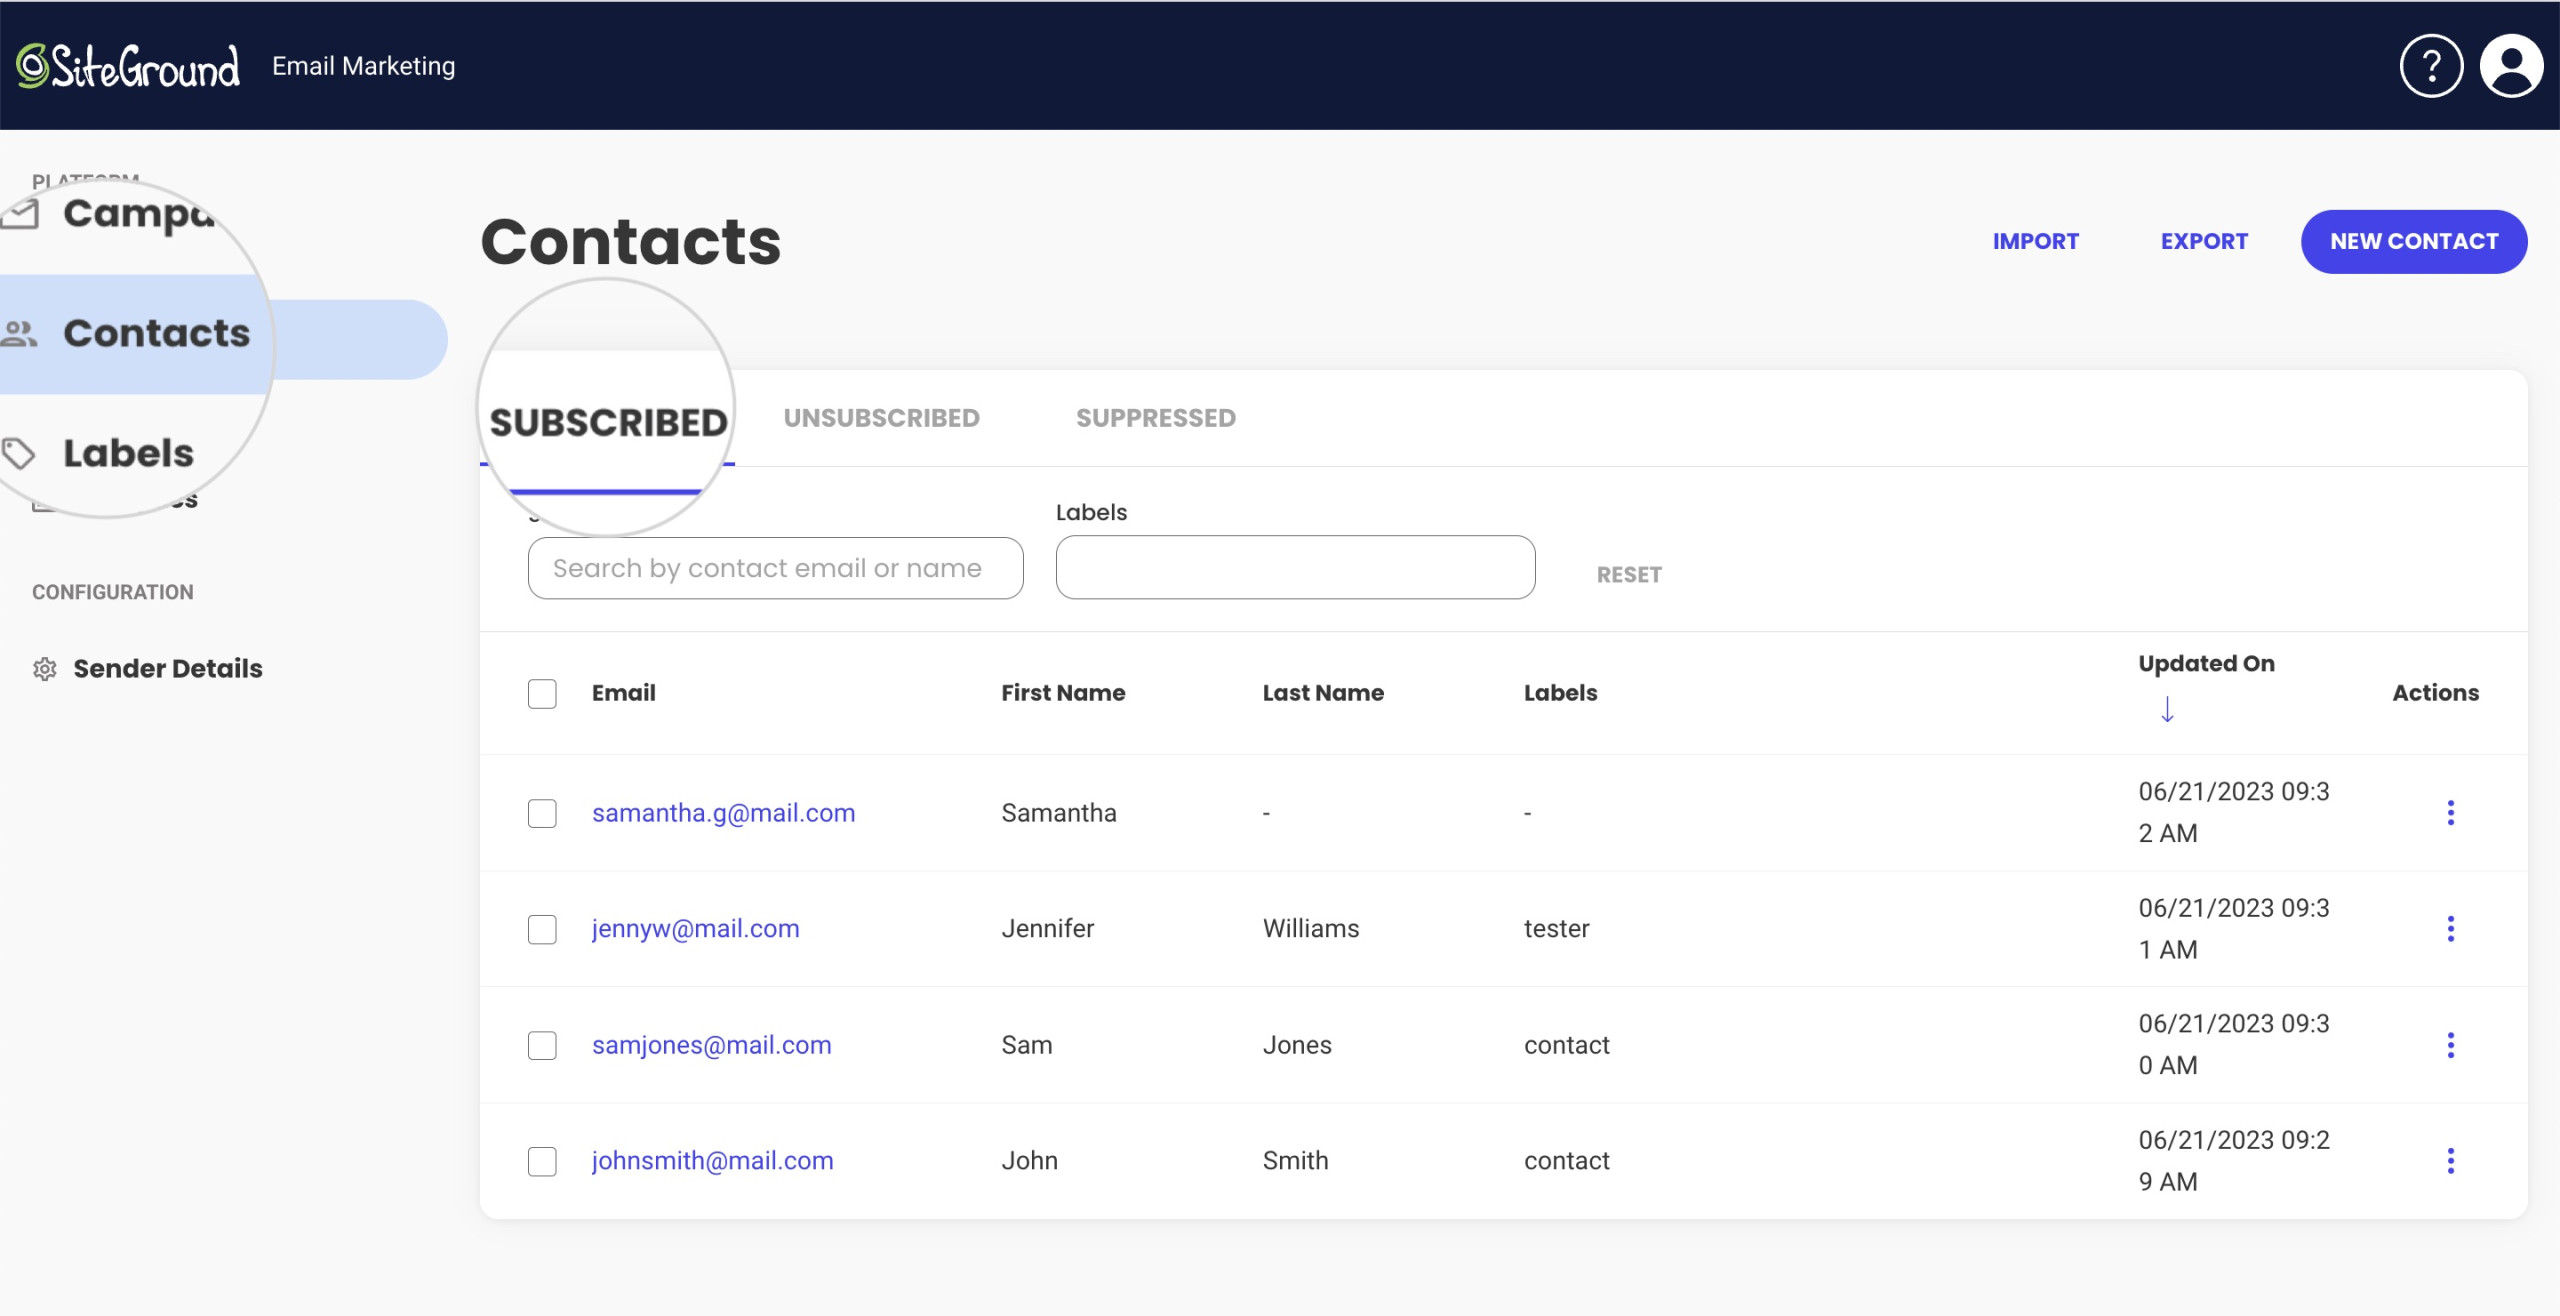
Clicking on a tab lists all contacts with their respective status.
What Are the Contact Statuses in SiteGround Email Marketing
The contacts are divided into three main status groups – Subscribed, Unsubscribed, and Suppressed.
Subscribed
The Subscribed status indicates contacts of recipients who are currently subscribed to your email marketing communication channel. These contacts will receive your campaigns as long as you select them when sending a campaign. You can change the status of any subscribed contact to Unsubscribed from the Contacts page, or a recipient can opt out of your campaigns by using the Unsubscribe button in a campaign mail that you sent them.
Unsubscribed
Contacts with Unsubscribed status won’t receive your marketing emails. A contact can become unsubscribed if the recipient has personally opted out of your marketing emails by using the Unsubscribe button in a campaign sent by you. Alternatively, you can change the contact status to Unsubscribed from the Contacts page in SiteGround Email Marketing.
Suppressed
Suppressed contacts won’t receive your emails. The system automatically sets this status when you send a campaign email to a contact and the email “hard bounces” from the recipient server. As a result, the contact is placed in the Suppressed section in order to prevent further bounces and, consequently, your domain being blacklisted for spam.
Usually, an email can “hard bounce” due to one of the following reasons.
- The recipient’s email address is invalid. Usually, this is a result of a typo in the address. The recipient email server treats a misspelled email address as non-existent.
- The recipient’s email address no longer exists.
- The recipient’s spam filter rejects the email.
How to Change a Contact Status
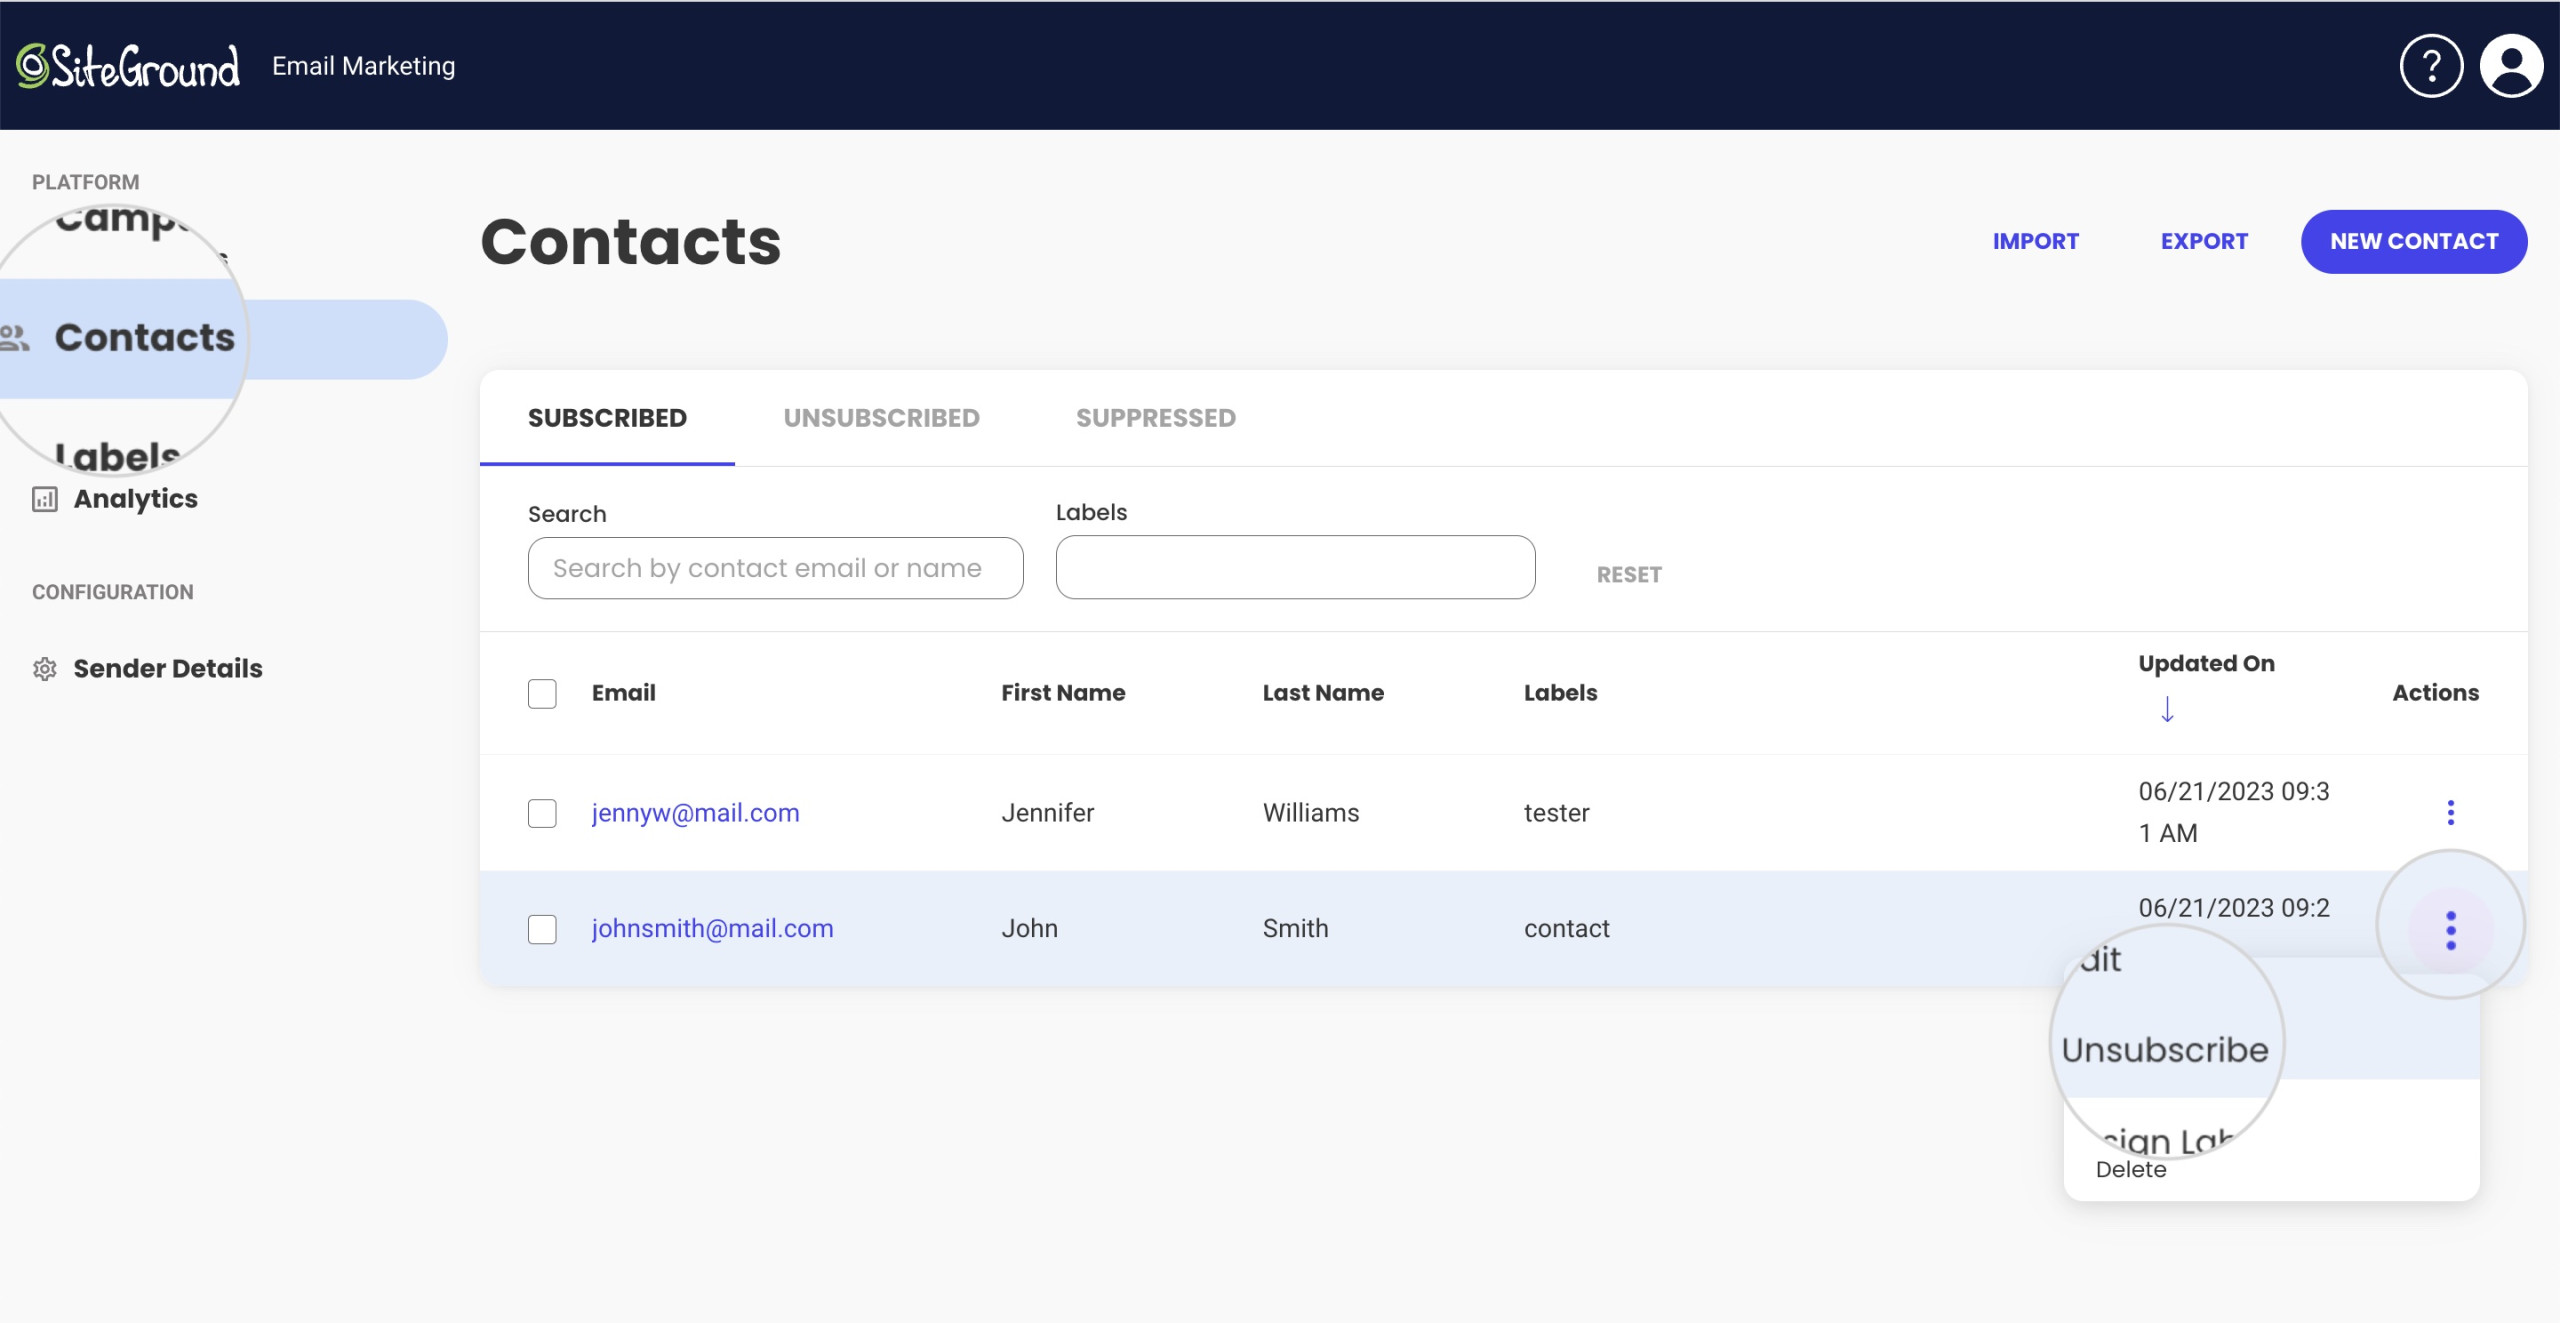
You can change the status of the contacts in Email Marketing > Contacts. To change a contact from Subscribed to Unsubscribed, click on its corresponding Actions menu and select Unsubscribe.
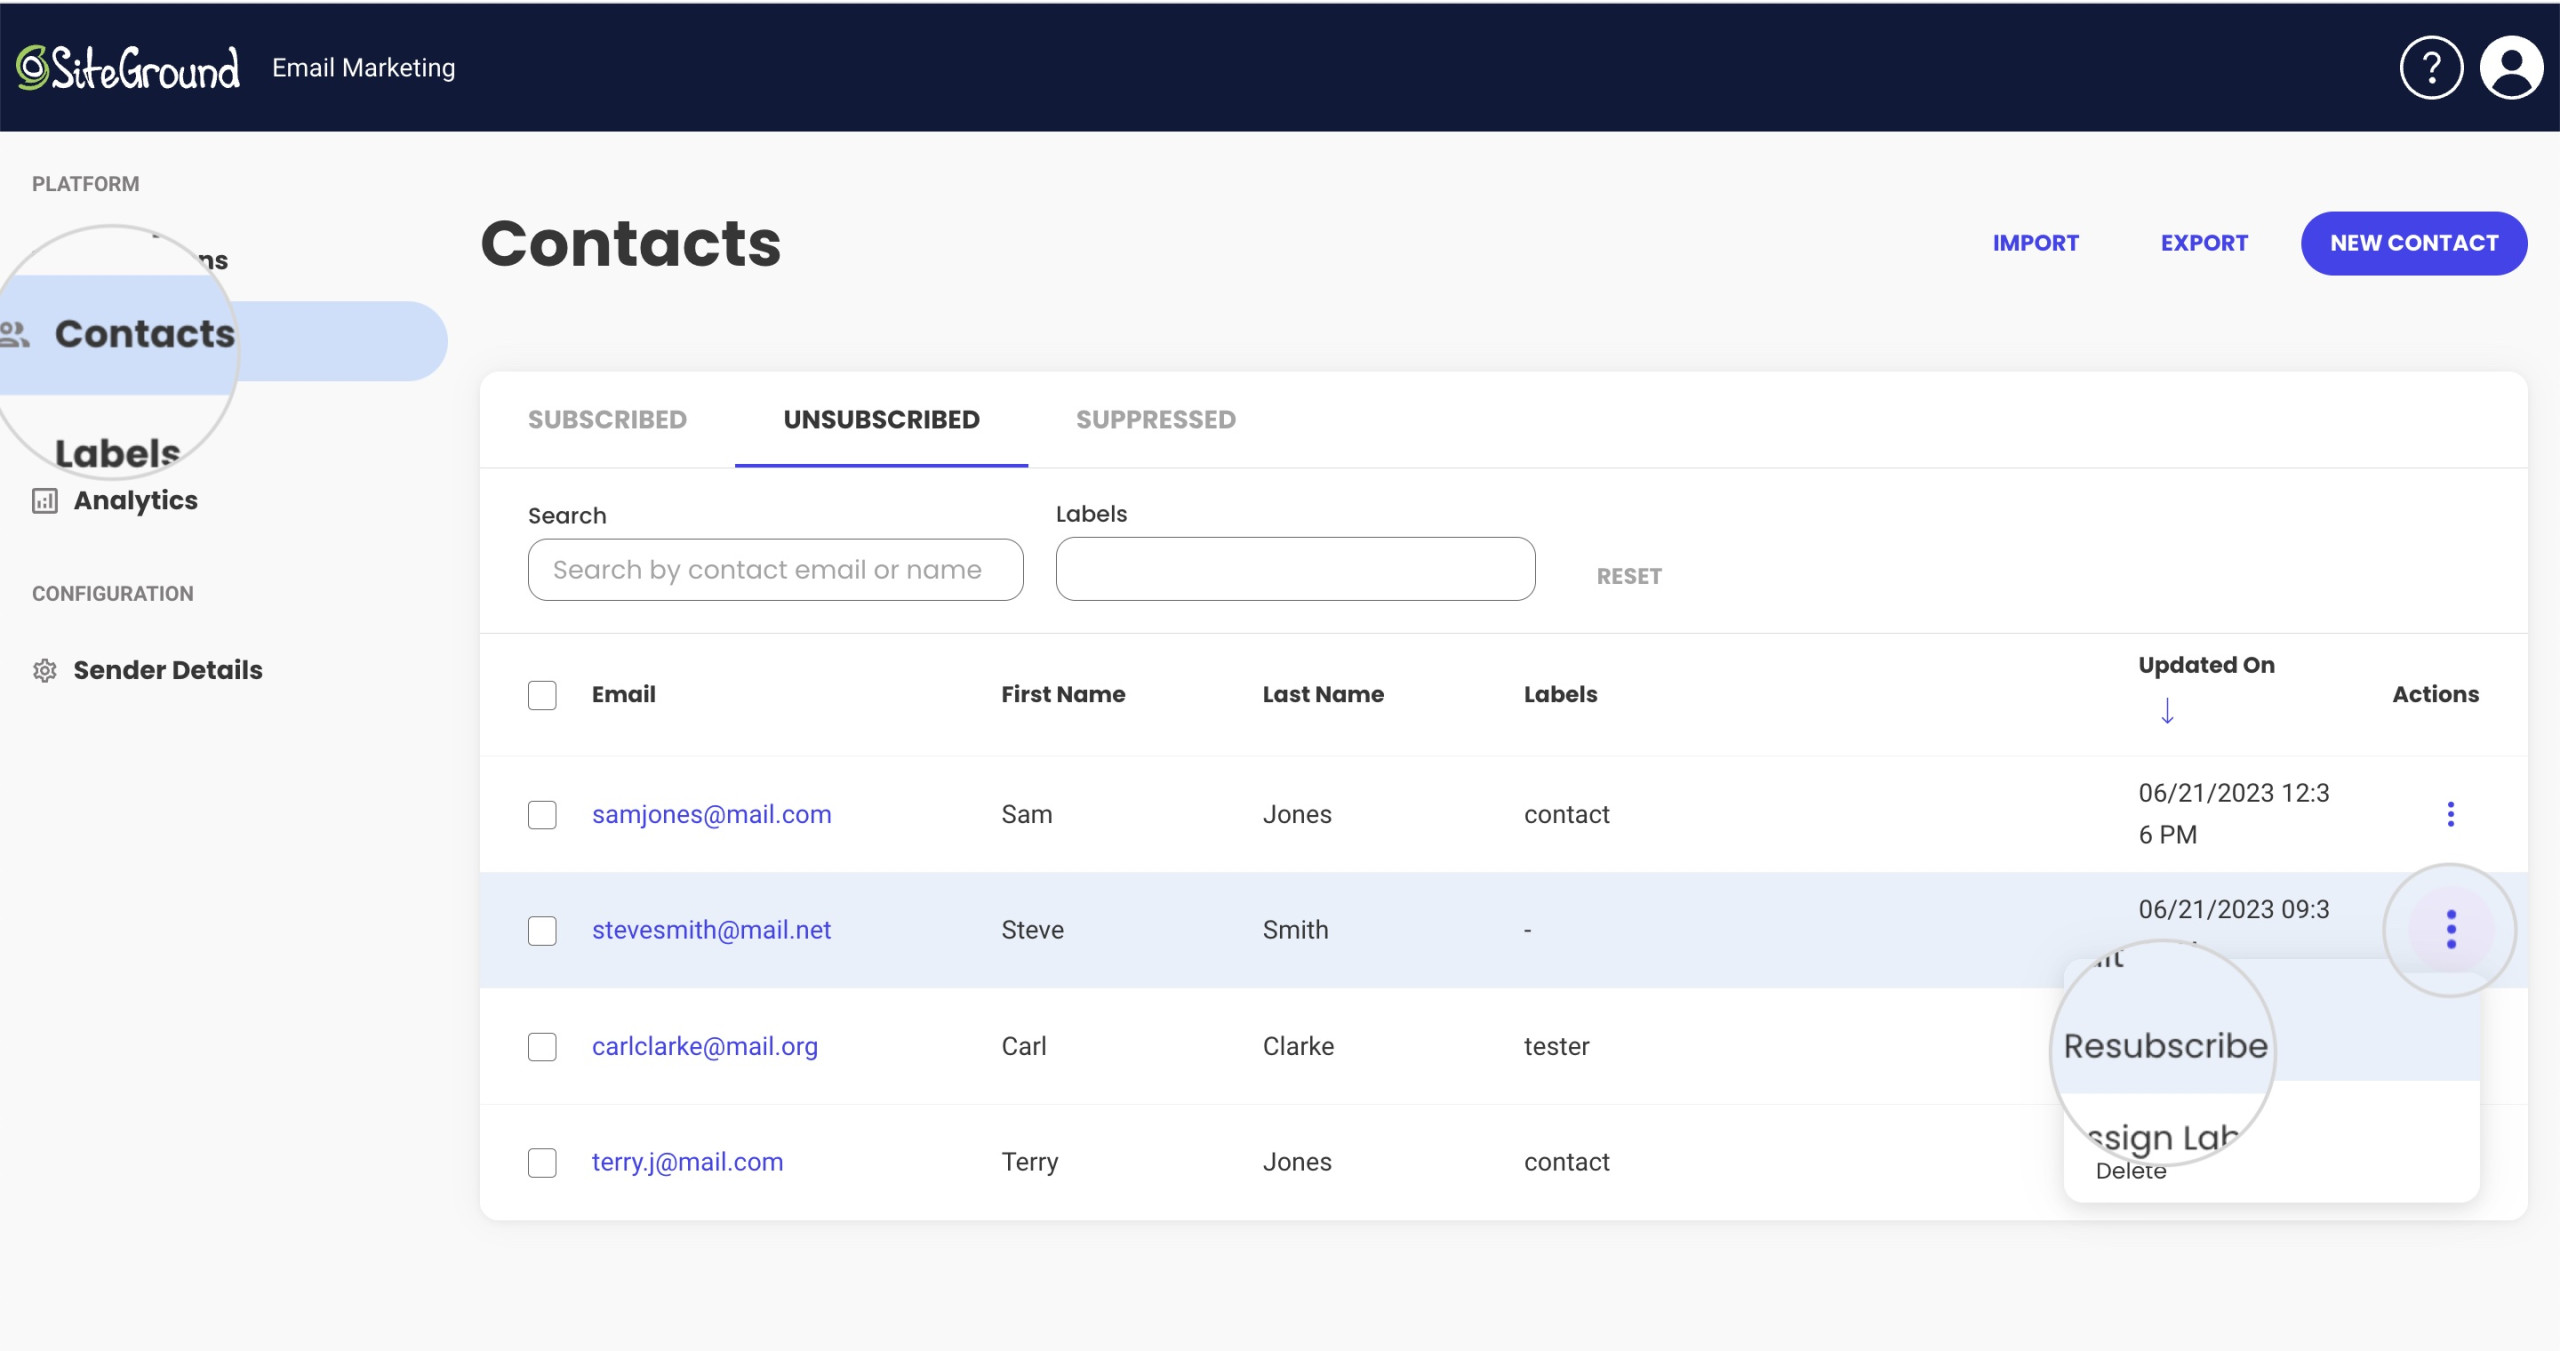
To change an unsubscribed contact to subscribed, open its Actions menu and click on Resubscribe.
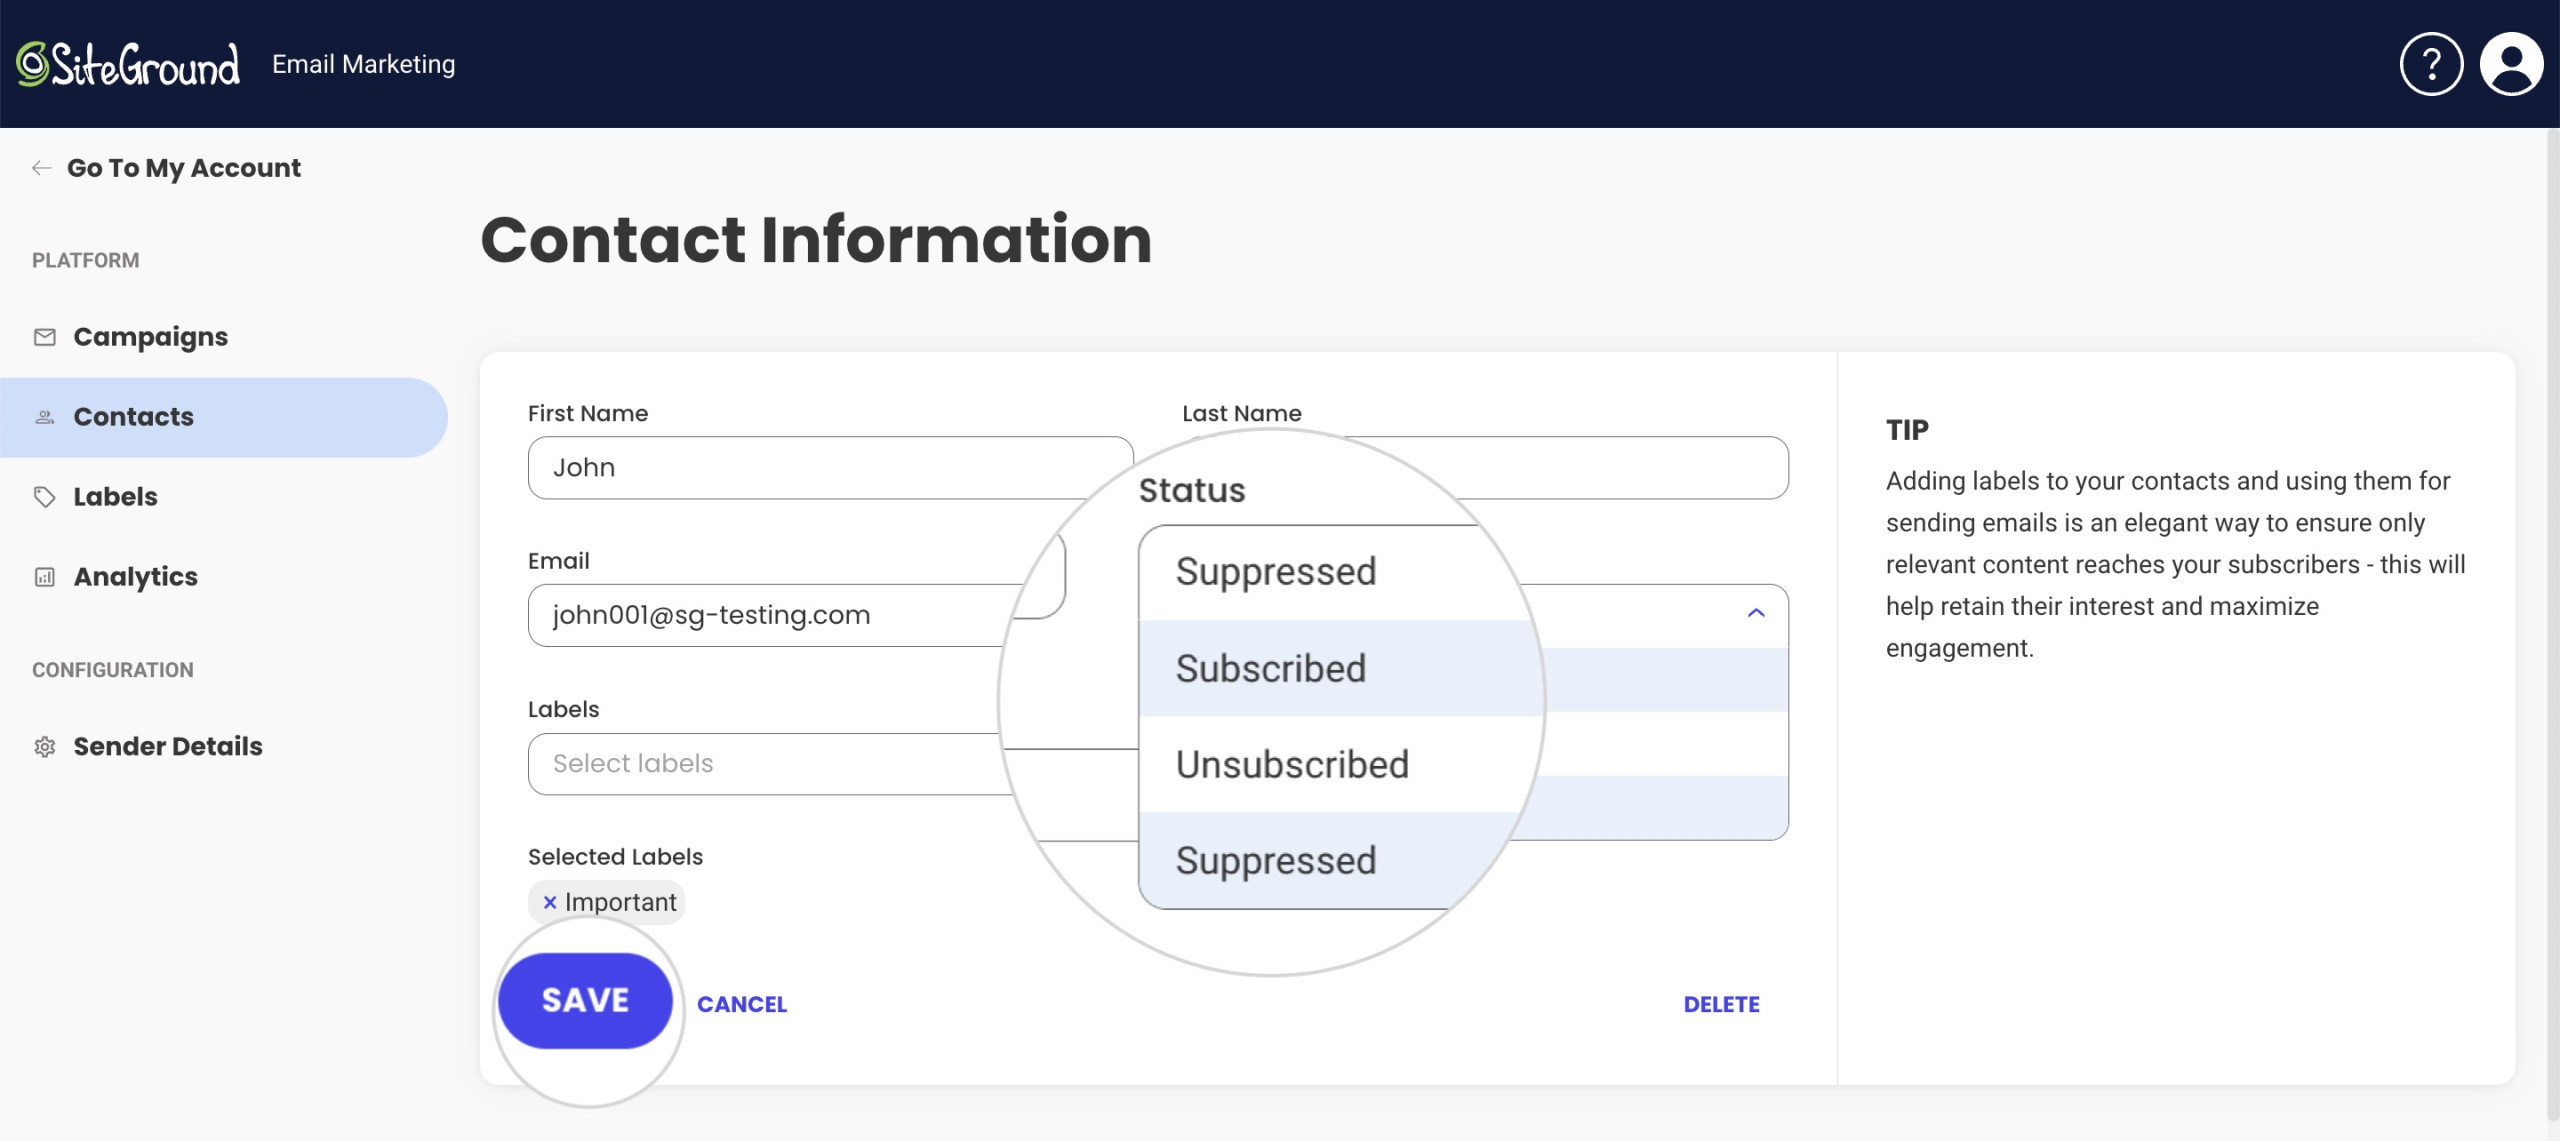
You can’t change a contact status to Suppressed. The system automatically assigns this status when it detects a delivery problem. However, you can change the status of an already suppressed contact to Subscribed or Unsubscribed from its Actions menu > Edit.
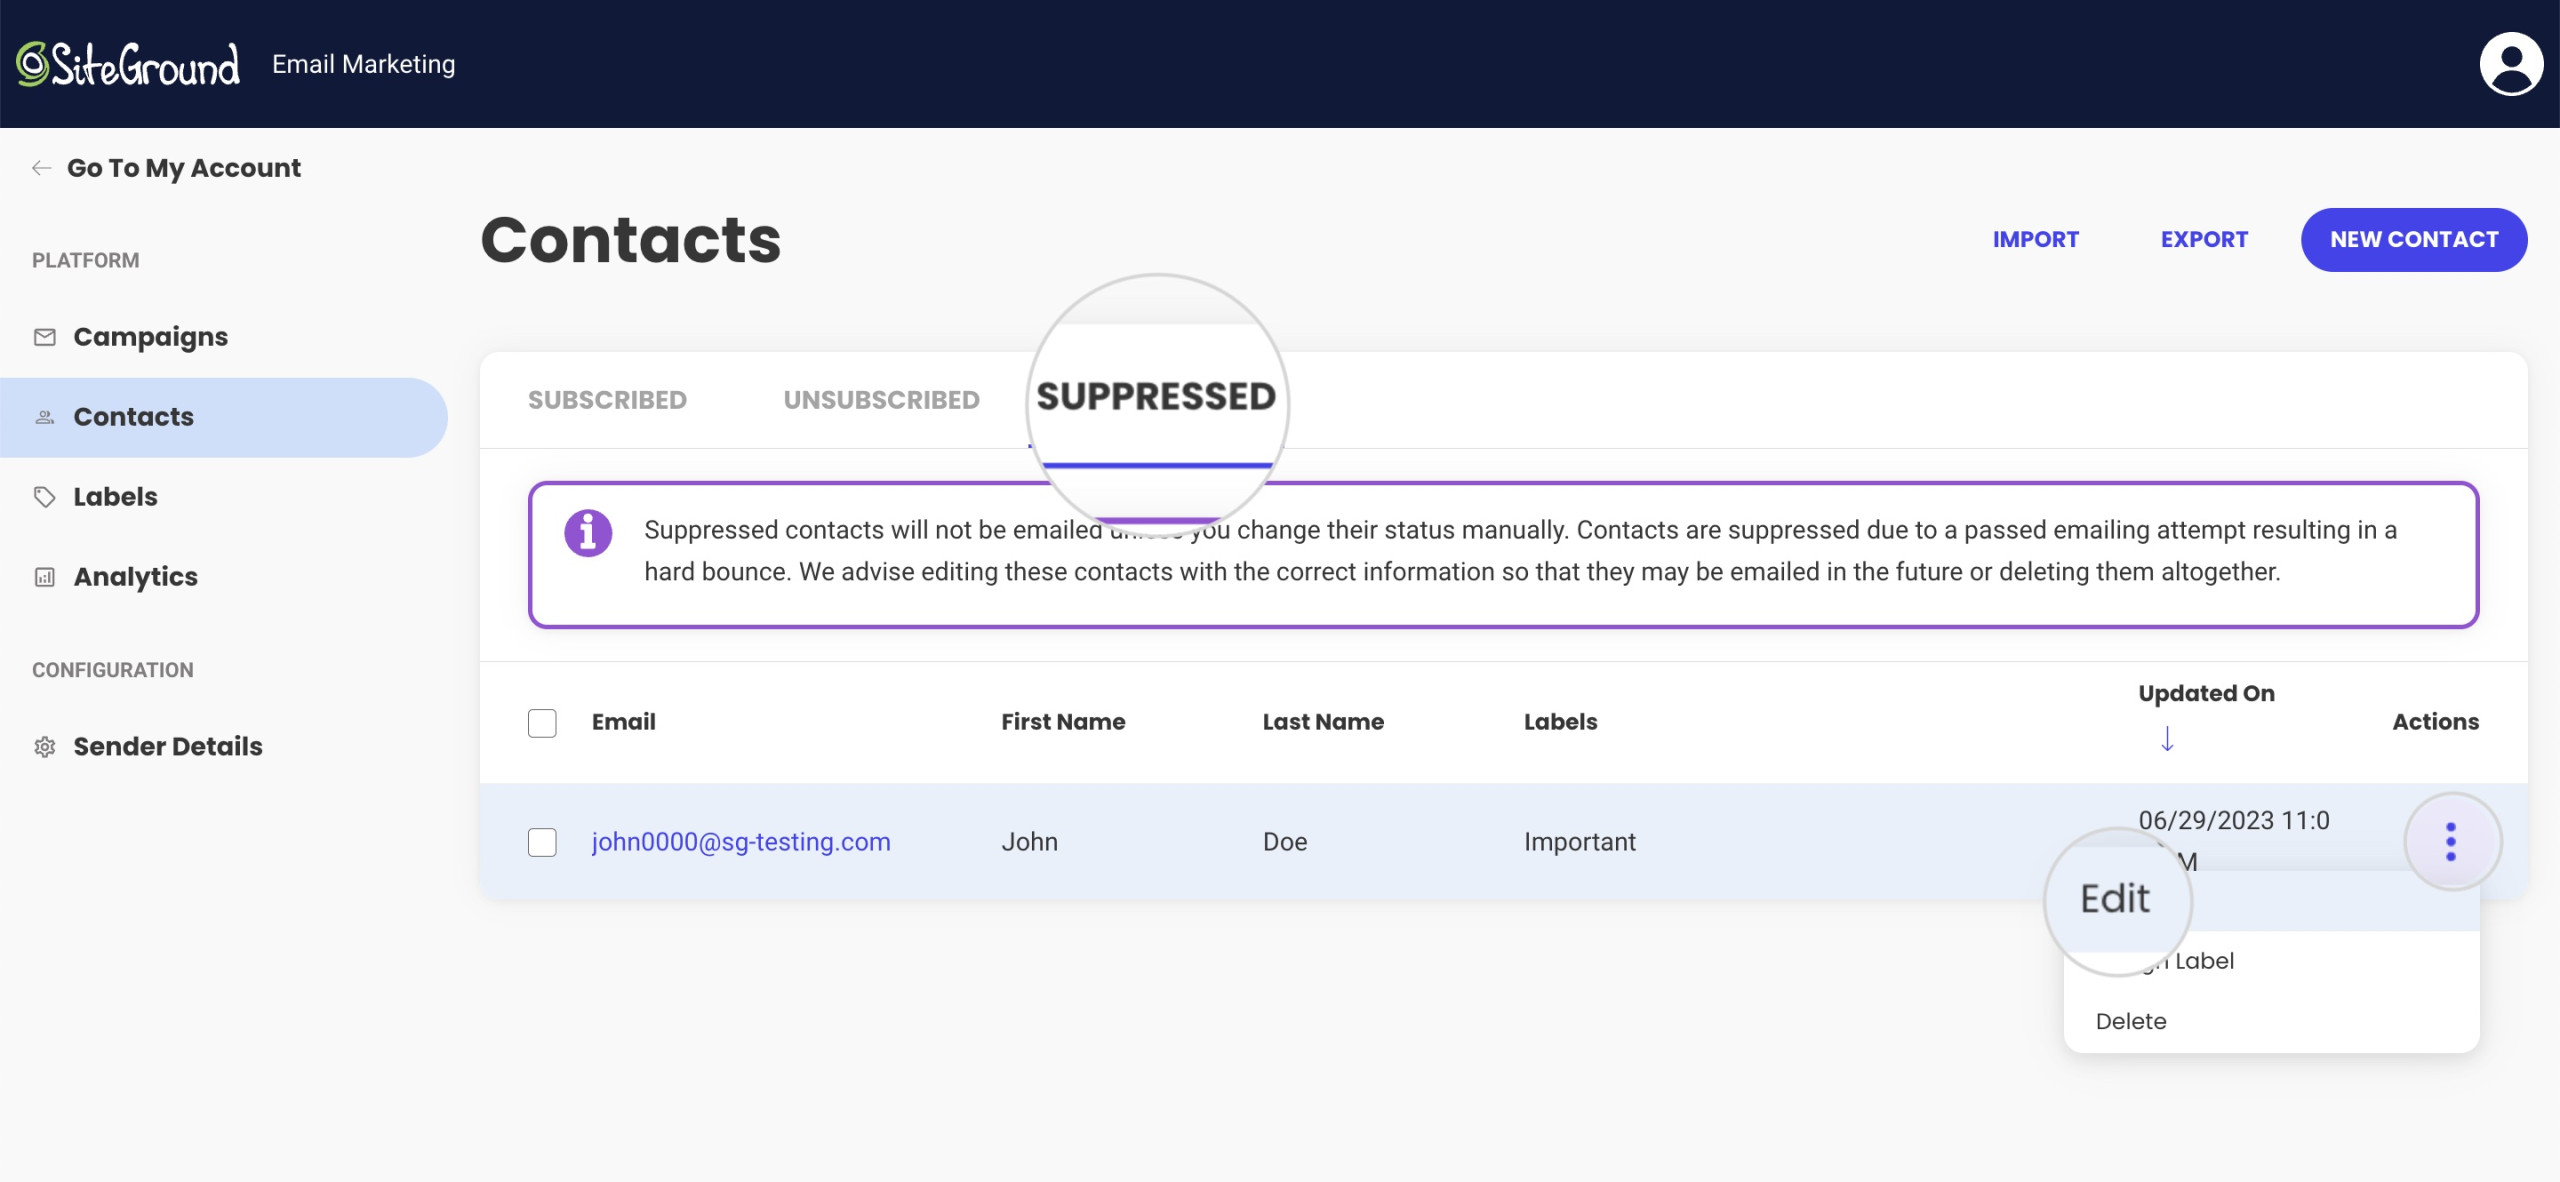
On the next screen, you can use the Status drop-down menu and change the contact status to Subscribed or Unsubscribed. To confirm the new settings, press Save.
How to Change the Status from the Contact Details Page
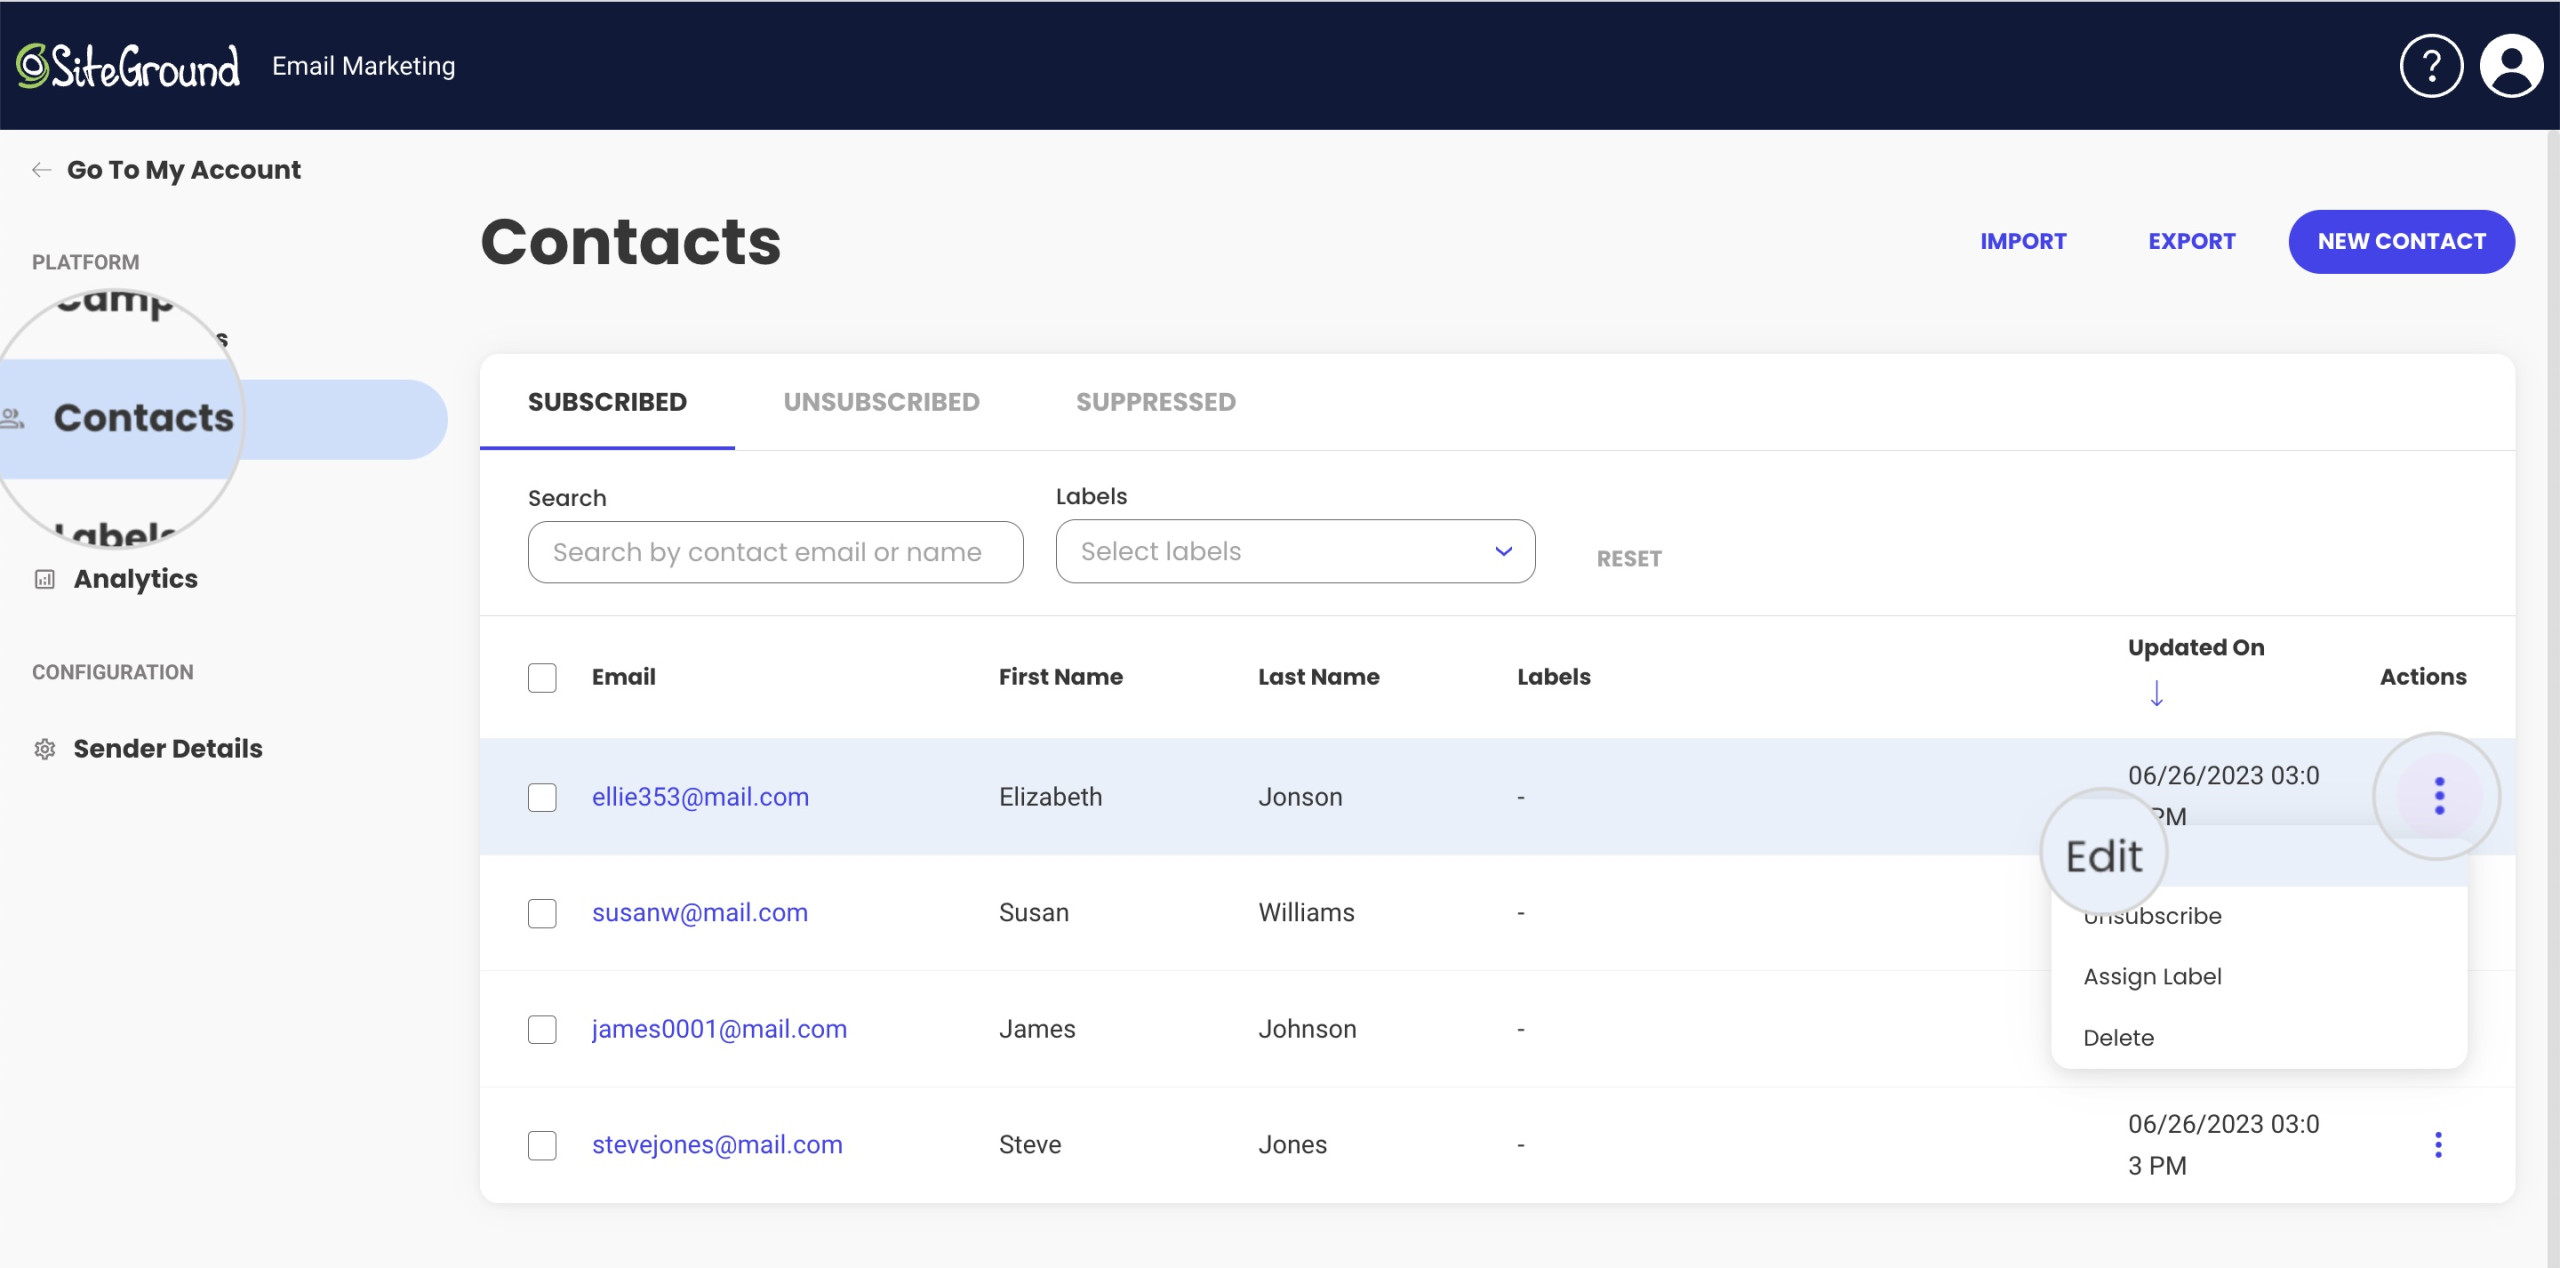
Alternatively, you can change a contact’s status from its details page in Contacts. Open the Actions menu for the chosen contact, and select Edit.
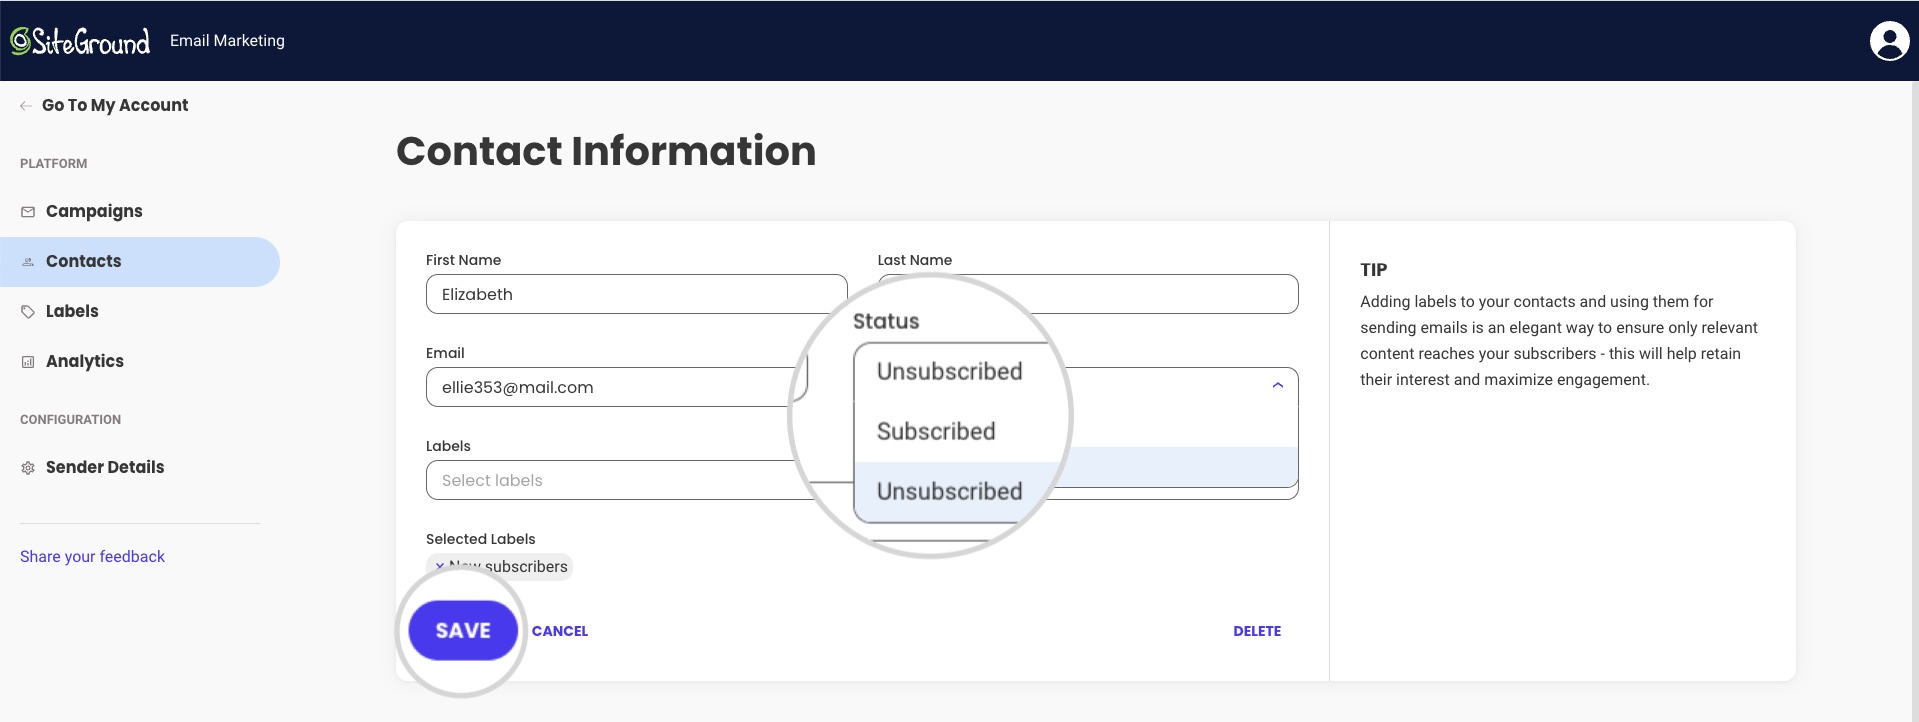
Choose the new status from the drop-down menu Status, and confirm the change with the Save button.
How to View the Contact Status Changes
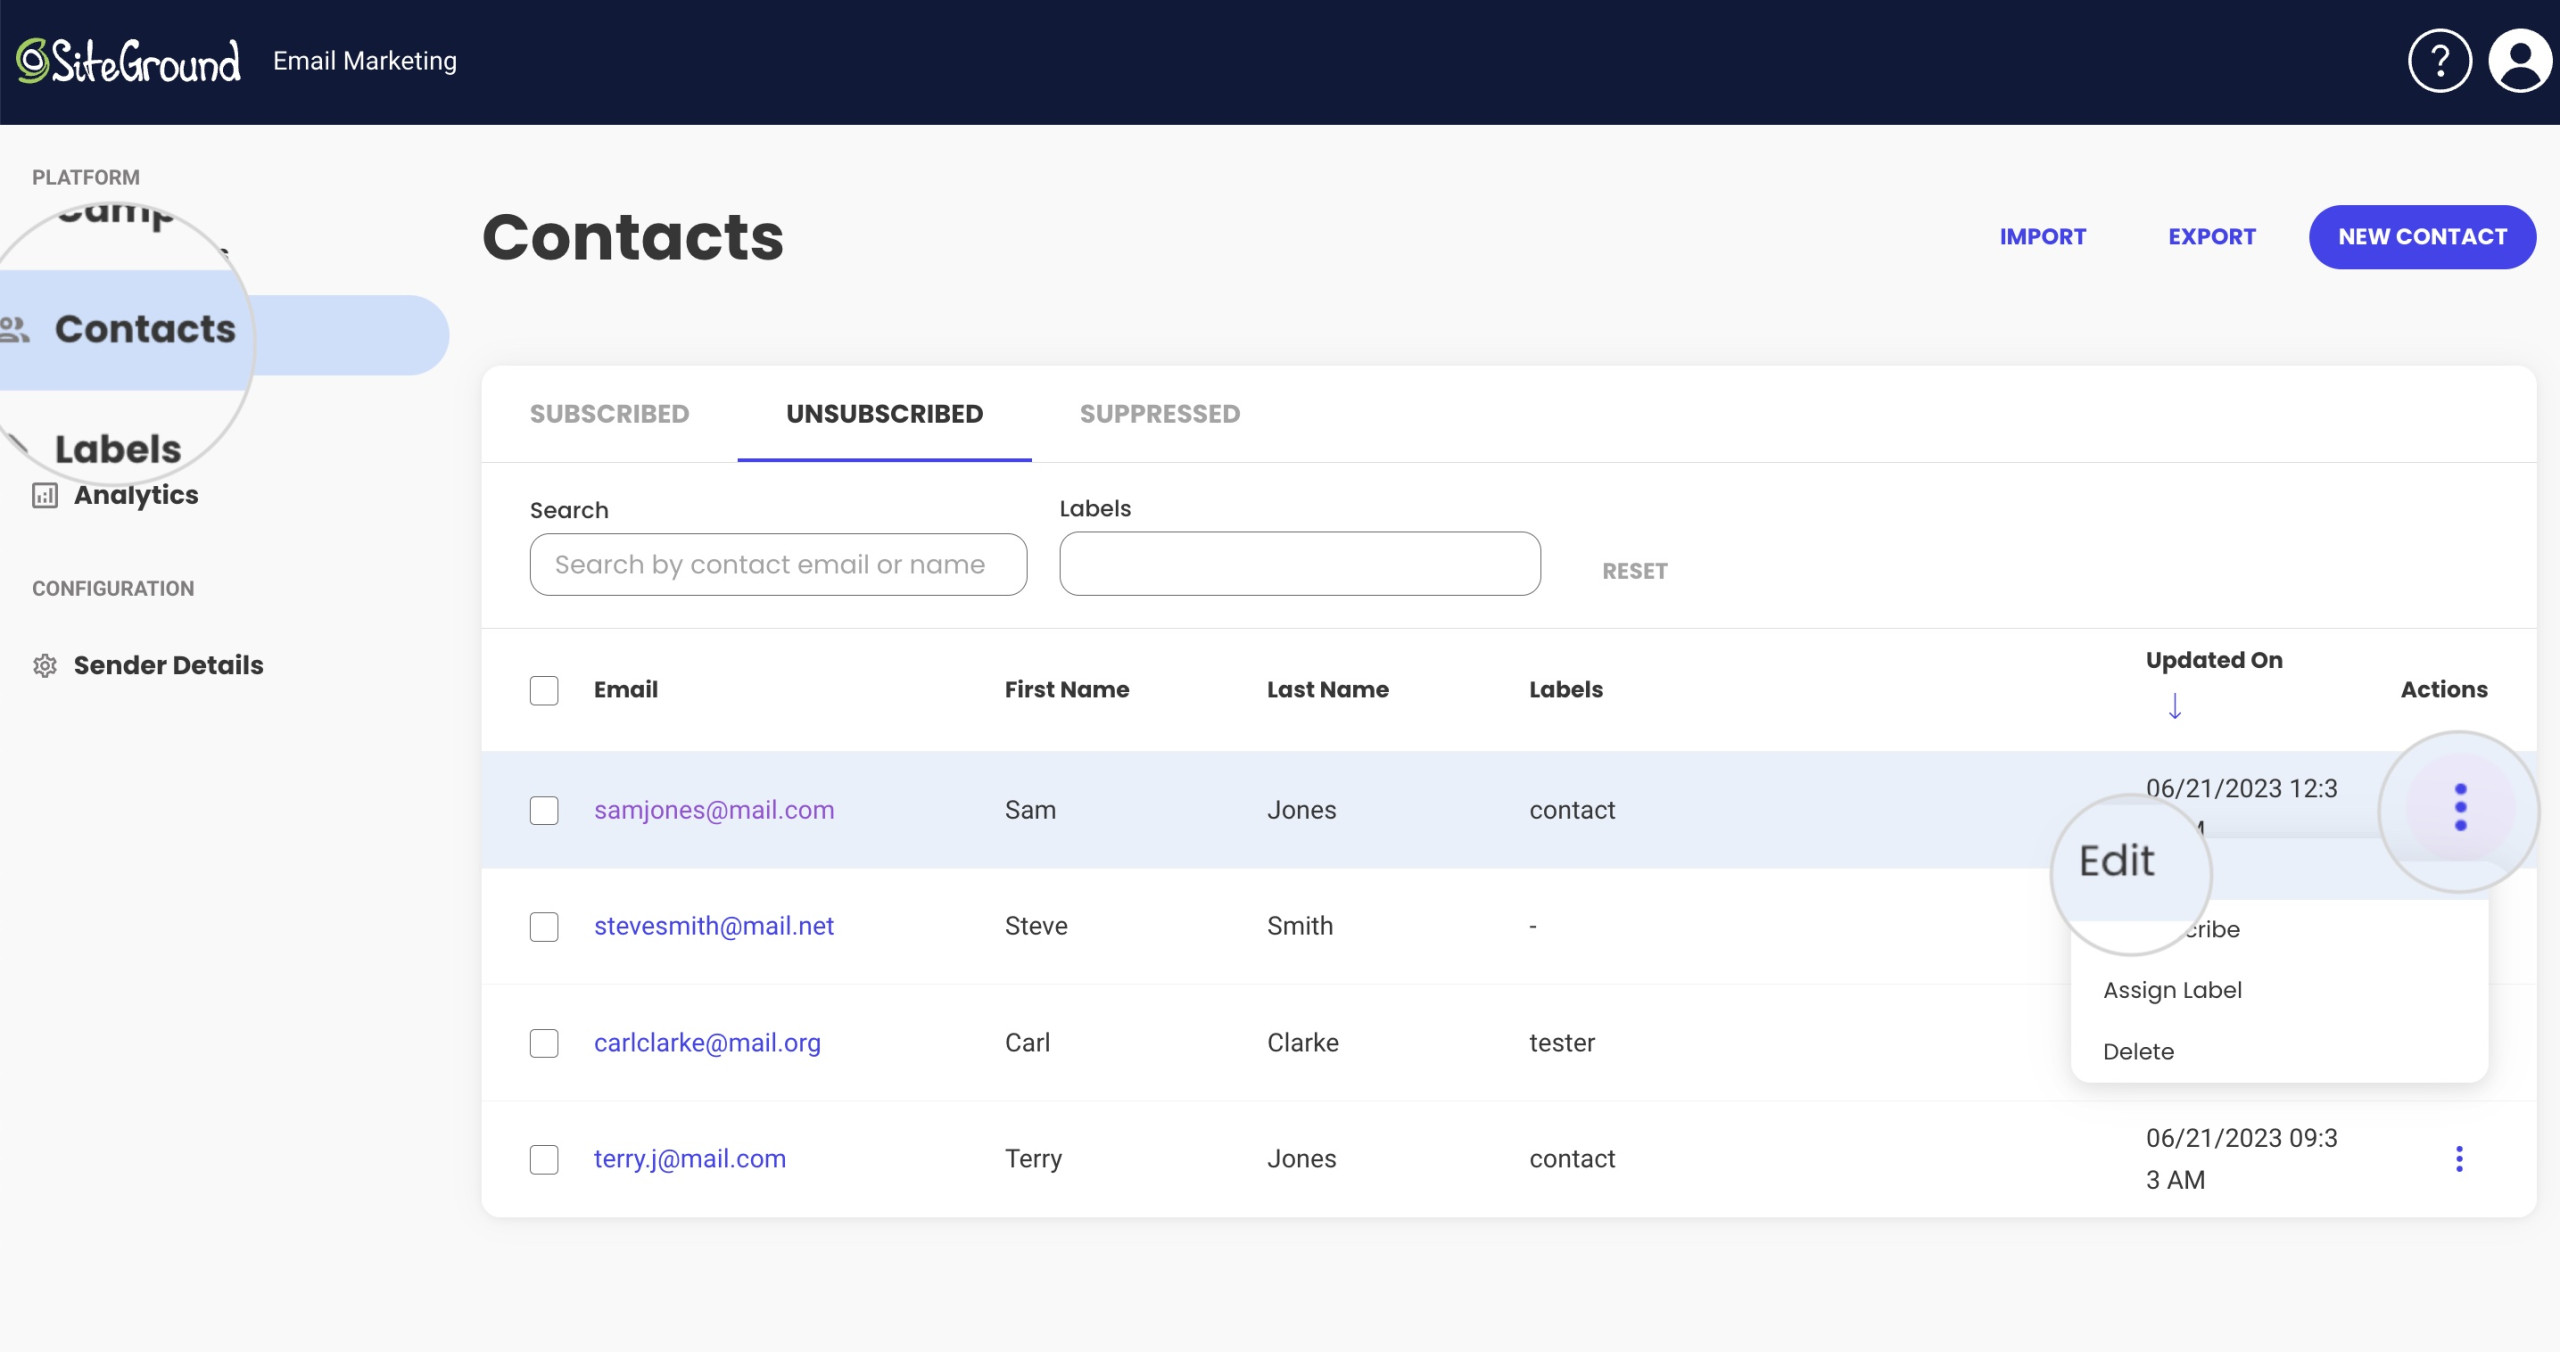
The system records all status changes in a separate change log for each contact. To open it, choose a contact from the Contacts page, and from its Actions menu, select Edit.
You can see the status changes under the Status Change Log section.
- The column Changed by indicates if the change is done by the subscriber or you (Admin).
- The column Change reflects which status the contact was changed to.
- Date and Time shows the exact date and time of the change.
