How to Improve your Joomla! Speed
Table of Contents
We know that speed is among the most important factors for the success of your website. By default, Joomla! isn’t slow but you can do a lot to optimize it and achieve great speed for your site. Here you will find the most essential actions you can take to speed up your Joomla! website.
Keep Joomla! and its Extensions Updated
Having the latest version of Joomla! is important for your site speed because in each version there are multiple code improvements. Even if the changes are small – new Joomla! versions are generally performing better than previous ones. For more information on how to update Joomla! to the latest version check out our Joomla! Update Tutorial. Keeping your Joomla! extensions up-to-date is as important for the speed of your website as the Joomla! itself. For more information on how to keep your Joomla! components, modules and plugins up-to-date, refer to our tutorial on How to Update Joomla! Extensions.
Enable Joomla! Caching
Joomla! 4
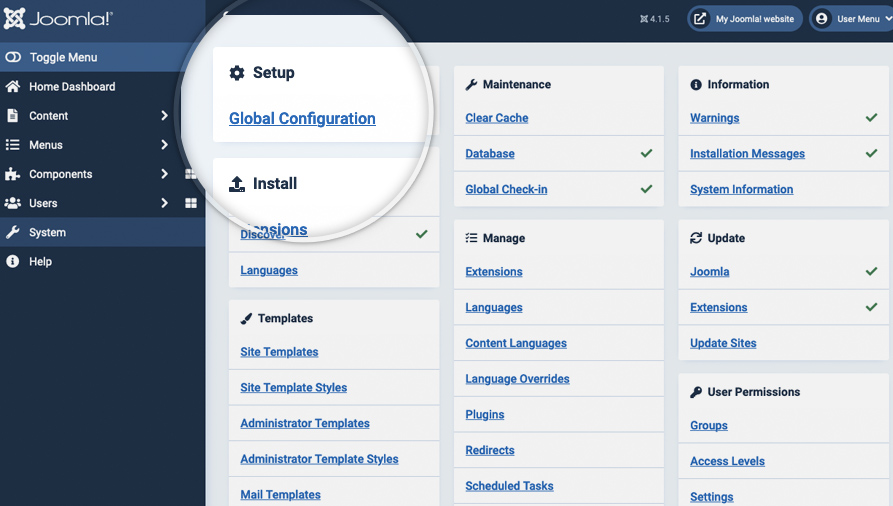
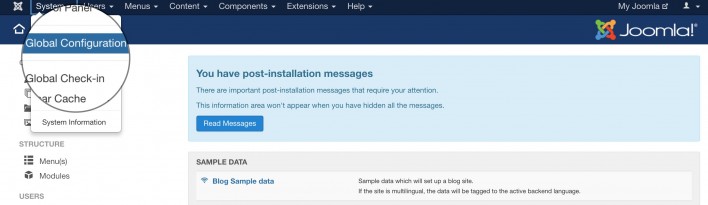
If the cache is not enabled, every time your visitors load one of your pages, Joomla! 4 has to do a few things – fetch the content from its database, load all the plugins, components and modules you have installed, load your template file and combine all that into a single page. Needless to say, this process takes time. This is where the internal Joomla! 4 caching system comes to help. When you enable the cache, the first time someone loads your page, the result from the above-mentioned actions is stored. Then, all the next visitors will directly get the stored version of that page as if it was a simple, plain HTML file which is much, much lighter and loads faster. This is why caching is one of the most important things to enable in order to have a fast Joomla! 4 site. To enable the Joomla! 4 caching, go to System > Global Configuration.
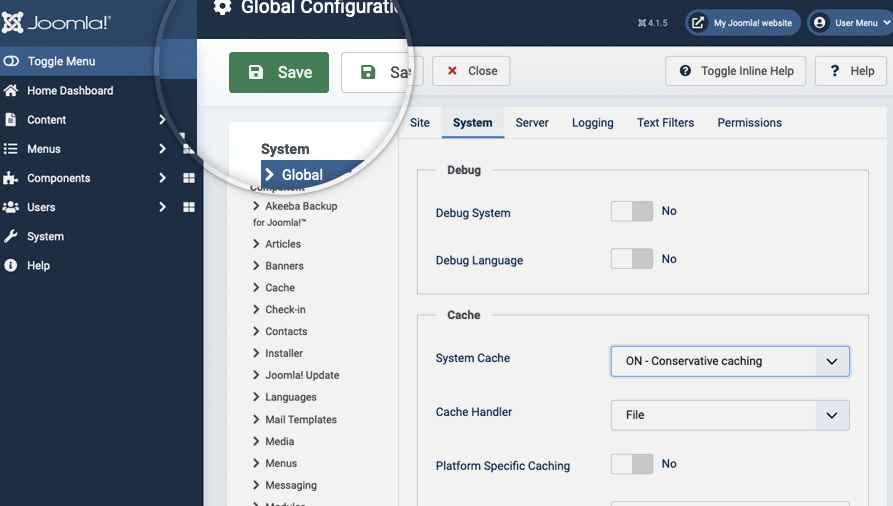
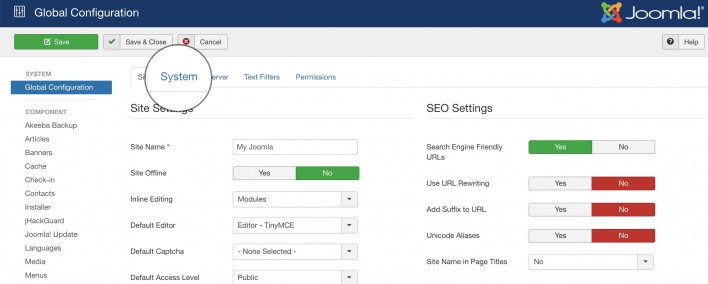
Next, click on the System tab to get to the caching settings.
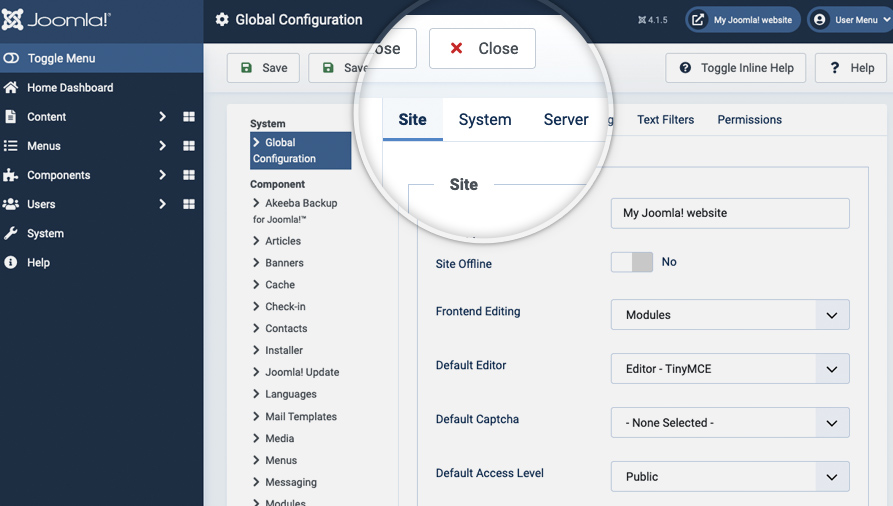
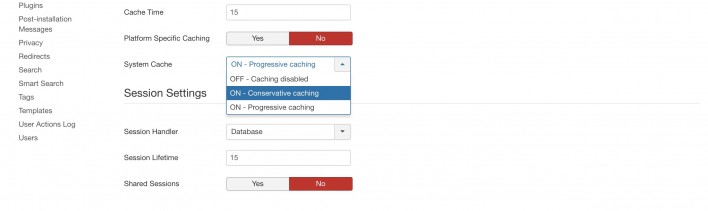
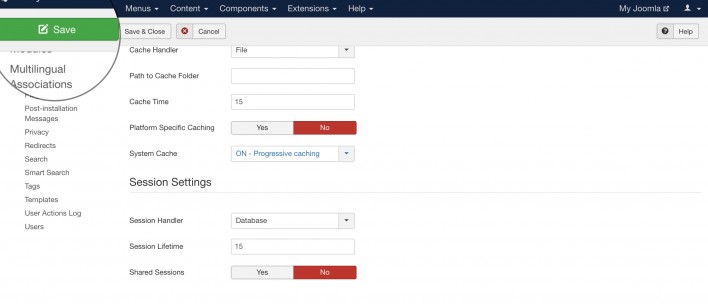
On the right part of this page, you will find the Cache Settings. Find the Cache label and click on the drop-down next to it. From the list, you should select the ON – Conservative caching option. The other available option – Progressive Caching works a bit different – it stores a cached version of your site per each one of your visitors. It is useful in some particular cases and we don’t recommend you to use it unless you’re absolutely sure you need such caching enabled.
Once you set the caching to Conservative Caching, click on Save at top of the page.
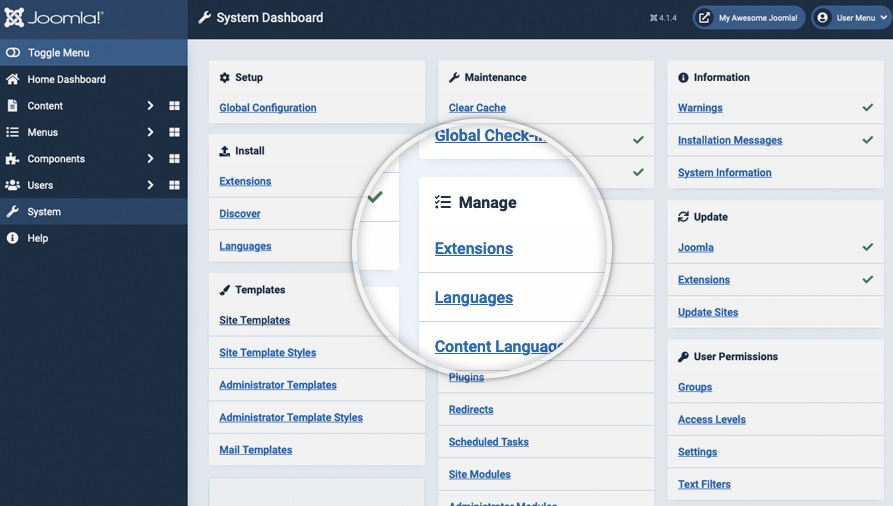
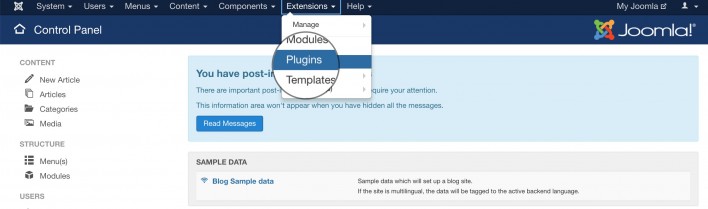
There is one final step that you need to make before the Joomla! 4 caching system actually starts working – to enable the System – Page Cache core Joomla! 4 plugin. To do this go to System -> Manage -> Extensions.
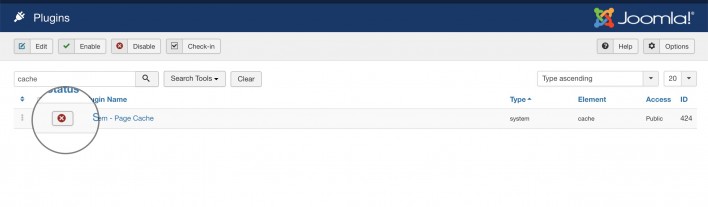
Here you will see a big list of all the extensions, currently installed in your Joomla! application. The easiest way to locate the caching plugin is to use the search field. Just type in cache and press the magnifying glass button next to the search field.
Once you do that, you will see the System – Page Cache plugin and a cross button next to it indicating that the plugin is disabled. To change its status to enabled press on the cross button.
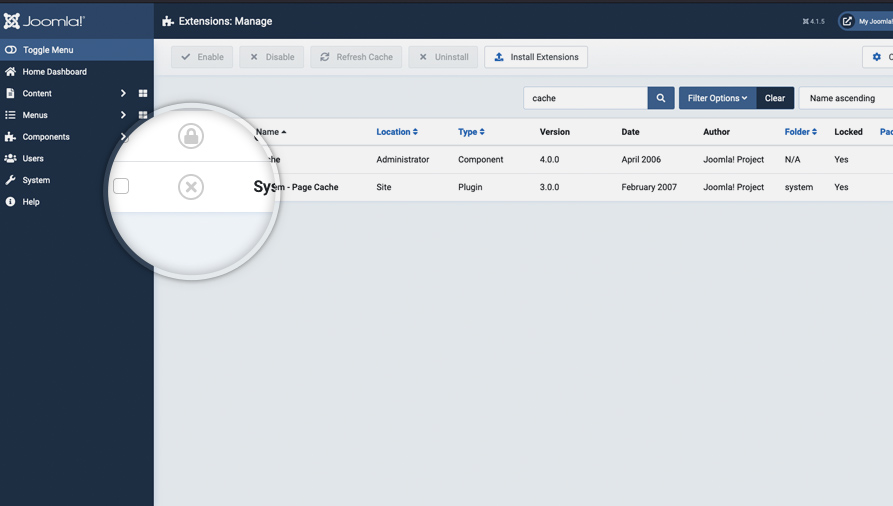
Finally, the status button next to the caching plugin will turn green and you’ll see a message, indicating that the plugin has been enabled successfully.
That’s it! Your Joomla! 4 caching system is now enabled and functional!
Joomla! 3
If the cache is not enabled, every time your visitors load one of your pages, Joomla! 3.x has to do a few things – fetch the content from its database, load all the plugins, components and modules you have installed, load your template file and combine all that into a single page. Needless to say, this process takes time. This is where the internal Joomla! 3.x caching system comes to help. When you enable the cache, the first time someone loads your page, the result from the above-mentioned actions is stored. Then, all the next visitors will directly get the stored version of that page as if it was a simple, plain HTML file which is much, much lighter and loads faster. This is why caching is one of the most important things to enable in order to have a fast Joomla! 3.x site. To enable the Joomla! 3.x caching, go to System > Global Configuration.
Next, click on the System tab to get to the caching settings.
On the right part of this page, you will find the Cache Settings. Find the Cache label and click on the drop-down next to it. From the list, you should select the ON – Conservative caching option. The other available option – Progressive Caching works a bit different – it stores a cached version of your site per each one of your visitors. It is useful in some particular cases and we don’t recommend you to use it unless you’re absolutely sure you need such caching enabled.
Once you set the caching to Conservative Caching, click on Save at top of the page.
There is one final step that you need to make before the Joomla! 3.x caching system actually starts working – to enable the System – Page Cache core Joomla! 3 plugin. To do this go to Extensions > Plugins.
Here you will see a big list of all the plugins, currently installed in your Joomla! 3.x application. The easiest way to locate the caching plugin is to use the search field. Just type in cache and press the magnifying glass button next to the search field.

Once you do that, you will see the System – Page Cache plugin and a red cross button next to it indicating that the plugin is disabled. To change its status to enabled press on the red button.
Finally, the status button next to the caching plugin will turn green and you’ll see a message, indicating that the plugin has been enabled successfully.
That’s it! Your Joomla! 3.x caching system is now enabled and functional!
Enable Joomla! Compression
Another thing that will greatly improve the performance of your Joomla! website is compression. If you enable the internal Joomla! compression system, the page that your visitors will download will be compressed before it is transferred to them. When your webpage size is reduced through compression, it will load much faster.
Joomla! 4
To enable the Joomla! 4 compression, access your admin area and go to System > Global Configuration.
On this page, you will see numerous settings. Click on the Server tab to view the server-related options you can change.
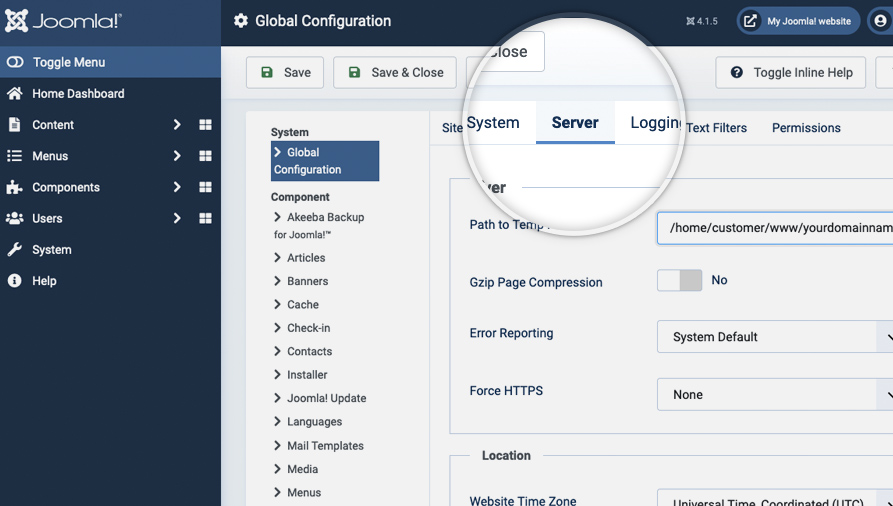
Here, locate the Gzip Page Compression label and press Yes next to it to enable the Gzip compression for Joomla! 4.
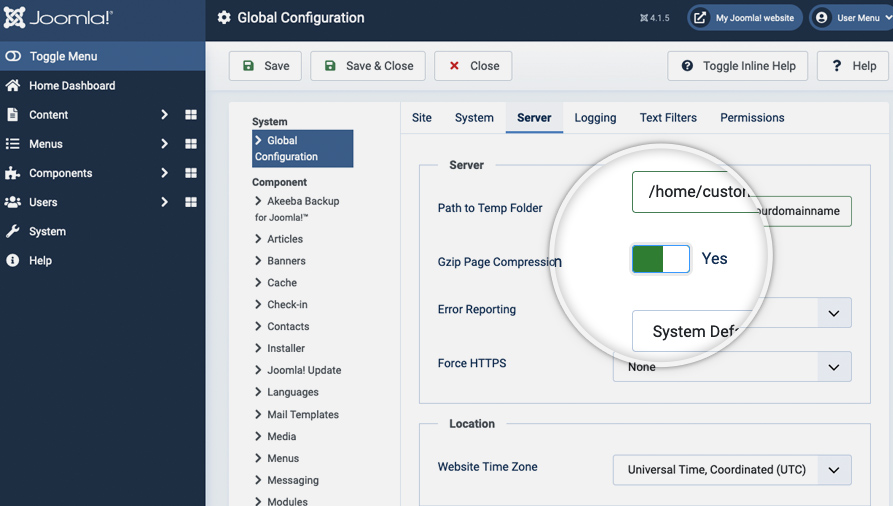
You will notice that the indicator will turn green showing that the compression is enabled. Finally, press the Save in the top left part of the page to commit your changes.
Joomla! 3
To enable the Joomla! 3.x compression, access your admin area and go to System > Global Configuration.
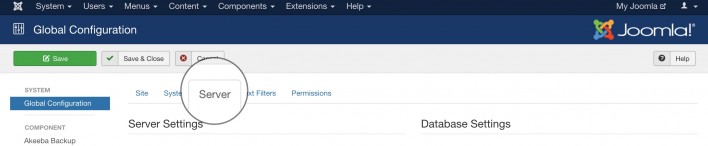
On this page, you will see numerous settings. Click on the Server tab to view the server-related options you can change.
Here, locate the Gzip Page Compression label and press Yes next to it to enable the Gzip compression for Joomla! 3.x.
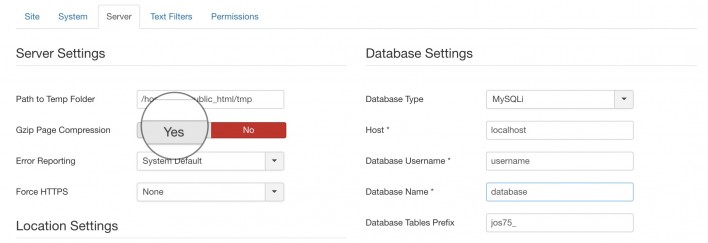
You will notice that the indicator will turn green showing that the compression is enabled. Finally, press the Save in the top left part of the page to commit your changes.
That’s it, the compression of your Joomla! 3 site is enabled.
Add .htaccess Optimization Rules
Htaccess files handle the way your webservers processes your site. There are few rules you can add at the end of the .htaccess file that will improve the performance of your Joomla! site:
- ETag – tells browsers when one image has already been downloaded and can be fetched from the local browser cache instead of the server;
- Expires headers – similar to ETag but allows you to set different expiration times for different file types;
- AddOutputFilterByType DEFLATE – minifies the source code of your compiled HTML files by removing empty lines, breaks, and spaces
########## Begin - ETag Optimization
## This rule will create an ETag for files based only on the modification
## timestamp and their size.
## Note: It may cause problems on your server and you may need to remove it
FileETag MTime Size
# AddOutputFilterByType is now deprecated by Apache. Use mod_filter in the future.
AddOutputFilterByType DEFLATE text/plain text/html text/xml text/css application/xml application/xhtml+xml application/rss+xml application/javascript application/x-javascript
# Enable expiration control
ExpiresActive On
# Default expiration: 1 hour after request
ExpiresDefault "now plus 1 hour"
# CSS and JS expiration: 1 week after request
ExpiresByType text/css "now plus 1 week"
ExpiresByType application/javascript "now plus 1 week"
ExpiresByType application/x-javascript "now plus 1 week"
# Image files expiration: 1 month after request
ExpiresByType image/bmp "now plus 1 month"
ExpiresByType image/gif "now plus 1 month"
ExpiresByType image/jpeg "now plus 1 month"
ExpiresByType image/jp2 "now plus 1 month"
ExpiresByType image/pipeg "now plus 1 month"
ExpiresByType image/png "now plus 1 month"
ExpiresByType image/svg+xml "now plus 1 month"
ExpiresByType image/tiff "now plus 1 month"
ExpiresByType image/vnd.microsoft.icon "now plus 1 month"
ExpiresByType image/x-icon "now plus 1 month"
ExpiresByType image/ico "now plus 1 month"
ExpiresByType image/icon "now plus 1 month"
ExpiresByType text/ico "now plus 1 month"
ExpiresByType application/ico "now plus 1 month"
ExpiresByType image/vnd.wap.wbmp "now plus 1 month"
ExpiresByType application/vnd.wap.wbxml "now plus 1 month"
ExpiresByType application/smil "now plus 1 month"
# Audio files expiration: 1 month after request
ExpiresByType audio/basic "now plus 1 month"
ExpiresByType audio/mid "now plus 1 month"
ExpiresByType audio/midi "now plus 1 month"
ExpiresByType audio/mpeg "now plus 1 month"
ExpiresByType audio/x-aiff "now plus 1 month"
ExpiresByType audio/x-mpegurl "now plus 1 month"
ExpiresByType audio/x-pn-realaudio "now plus 1 month"
ExpiresByType audio/x-wav "now plus 1 month"
# Movie files expiration: 1 month after request
ExpiresByType application/x-shockwave-flash "now plus 1 month"
ExpiresByType x-world/x-vrml "now plus 1 month"
ExpiresByType video/x-msvideo "now plus 1 month"
ExpiresByType video/mpeg "now plus 1 month"
ExpiresByType video/mp4 "now plus 1 month"
ExpiresByType video/quicktime "now plus 1 month"
ExpiresByType video/x-la-asf "now plus 1 month"
ExpiresByType video/x-ms-asf "now plus 1 month"
Reduce Your Images Size
Images are a big part of your website. In most of the cases, images can be optimized. There are several tips that you should follow when you use images in your pages:
- Never use large photos and then scale them using HTML – it takes the browser time to scale the images and they look worse than the original;
- Always optimize your images. Applications like Adobe Photoshop and online services like Smush It, for example, offer easy to use tools that will reduce the size of your images without lowering their quality greatly;
- Don’t add too many images to a single page. If you have an article with many photos, for example, try splitting it into pages.
Remove unused and unoptimized extensions
Each Joomla! extension you add to your website requires system resources, database and disk space to operate. Having many extensions will increase the overall size of your website and make it slower. This is why it is important to make sure that you have only extensions that you’re actually using installed on your Joomla! site. People often test different plugins, component, and modules and forget to remove them once they finish working with them. It’s a great idea to do a clean-up of such extensions once in a while just to make sure there isn’t any unnecessary content added to your site. Last but not least, when you choose the best extensions for the functionality you want to add to your Joomla! site, always check for user reviews regarding the load it creates. Some components are poorly written and can affect the performance of your entire site.
Use Optimization Extensions
There are many extensions that try to improve the performance of your Joomla! website. During the years of experience, we’ve gathered while working with Joomla! sites, there are few that we can recommend:
- JCH Optimize – Combines JavaScript & CSS, combines images into sprites, minifies and compresses JavaScript;
- Cache Cleaner – easily clean the cache from the Joomla! admin panel.