How to transfer emails to SiteGround over IMAP with Thunderbird?
To transfer your messages from another server to your new account with SiteGround by using Thunderbird, follow these steps:
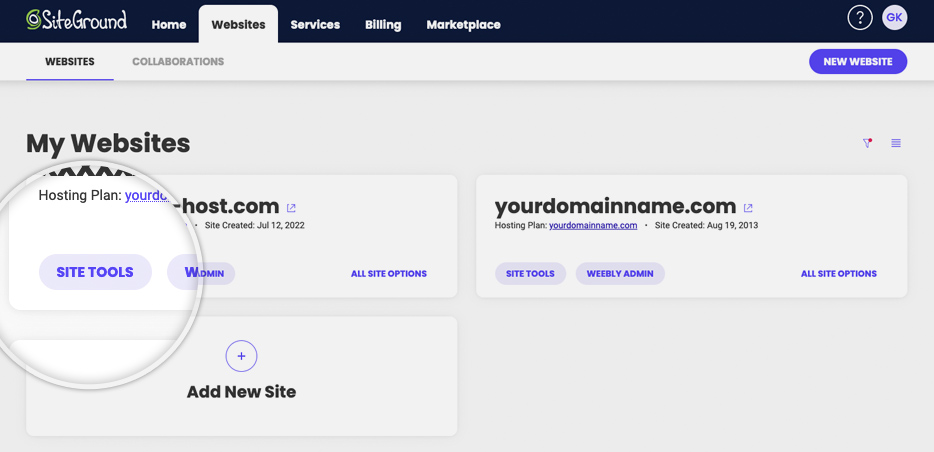
Step 1: Login to the SiteGround account that you want to transfer the messages to from here.
Step 2: Go to Websites -> Site Tools for the desired website.
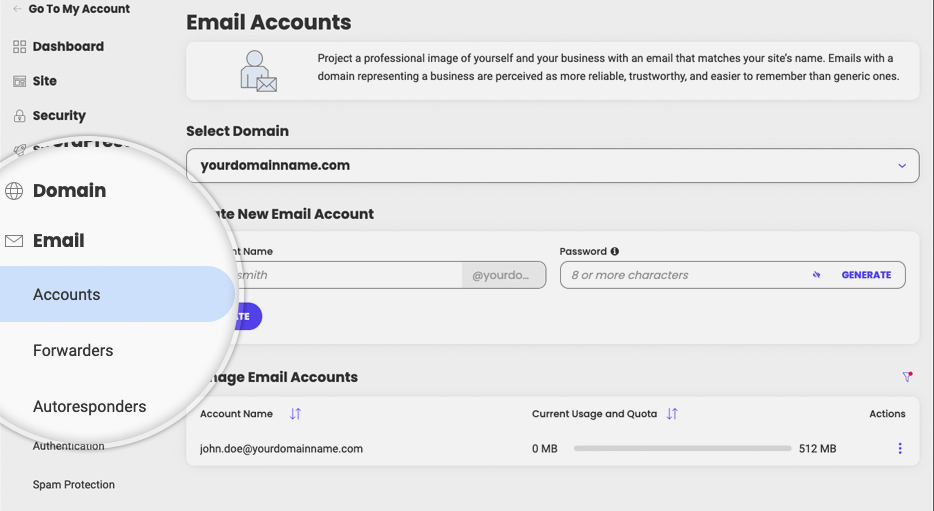
Step 3: Go to Email -> Accounts. Create the email account to which you will be transferring the messages. It can have the same name as the email account you are transferring the messages from.
Step 4: Once the email account is created, obtain its mail client configuration settings from the kebab menu -> Mail Configuration.

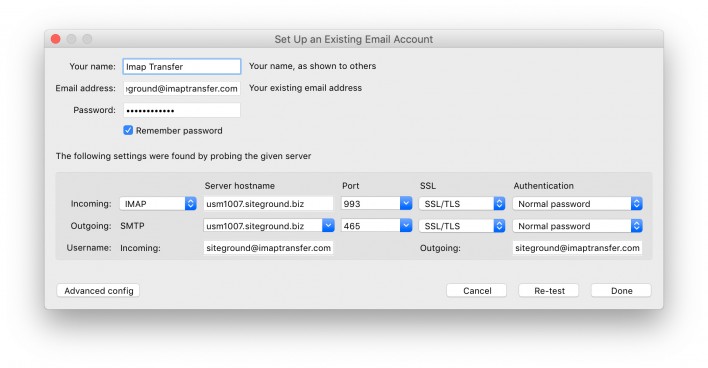
Step 5: Click the Manual Settings tab and write down the settings there. You will need them to set up the email accounts in your Mozilla Thunderbird mail client.
![]()
Step 6: Open Mozilla Thunderbird and add the new email account from New -> Add -> Existing Mail Account. Use the settings from the previous step when prompted and complete the email account setup.
Step 7: If you have not setup the email account from which you are transferring the messages in Thunderbird you should add it by following the steps from the previous steps. This time, the settings for the email account should be obtained from the previous host, from which you are transferring the messages. If you already have the email account set up, you can skip this step.
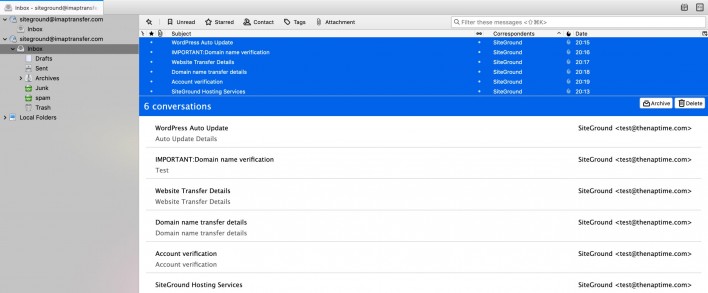
Step 8: Once the two accounts are set up, they should both appear in your Mozilla Thunderbird.
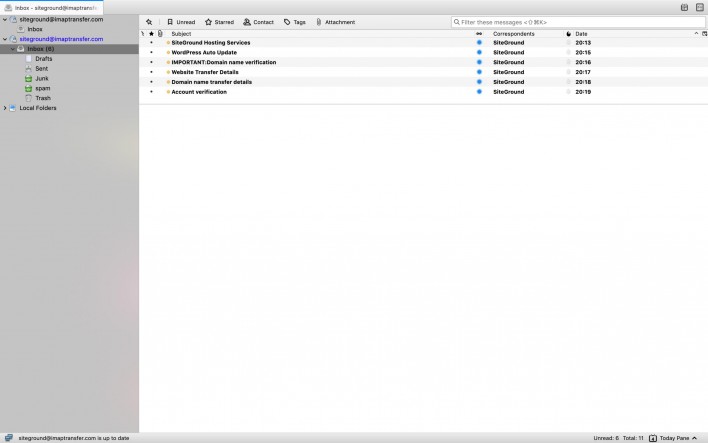
Step 9: Click on the inbox of the remote account and select one of the messages, then press Ctrl + A (Cmd + A on macOS) on the keyboard, which will mark all mails in the inbox.
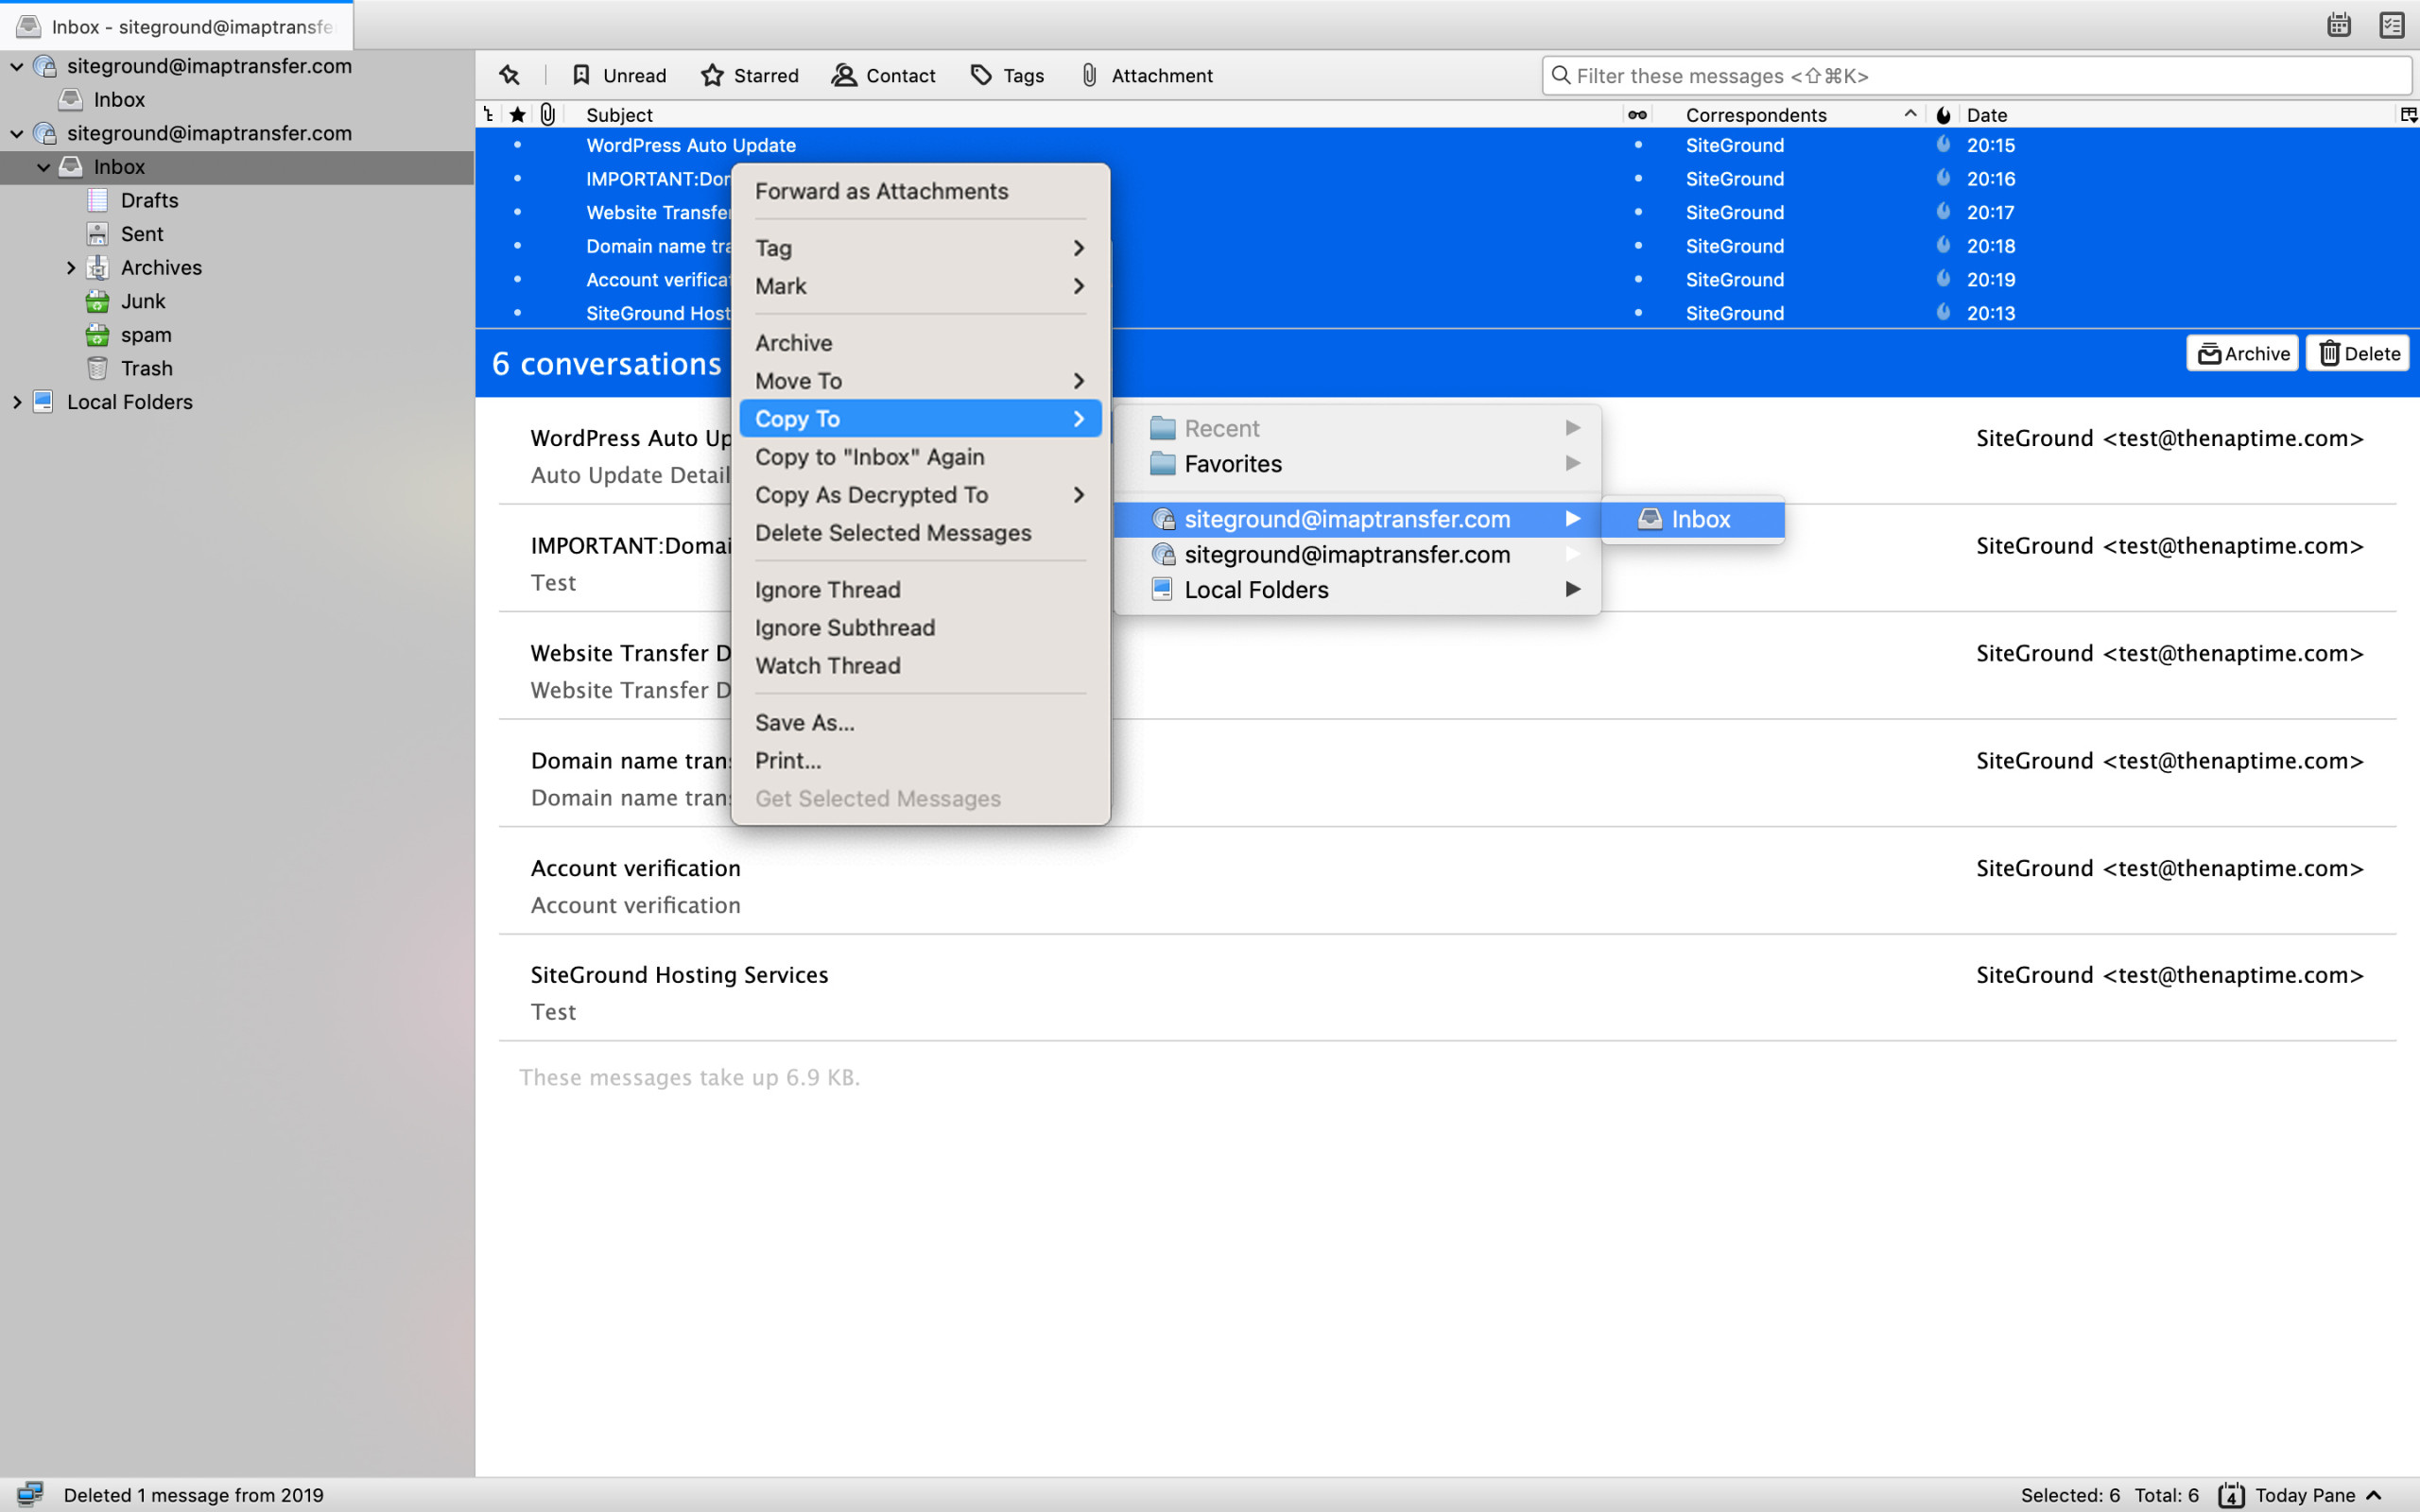
Step 10: Once marked, drag the messages with the left mouse button to the new email account’s Inbox folder. Alternatively right click on them -> Copy To -> select the SiteGround account here -> Inbox. Both actions will achieve the same result – all messages will be copied and available in the inboxes of both email accounts.
You should do the above for all folders in the old email account.
Step 11: The new email account with SiteGround now has all old messages. The last step is to point the domain’s email service to our server. That will ensure that SiteGround is the new email host – all new messages will be received and sent through our server, while all old messages will remain in the inbox/respective folders – nothing will be lost.